• How React Chatbots are Revolutionizing Customer Service ?- A Detailed Guide

    How React Chatbots are Revolutionizing Customer Service ?- A Detailed Guide

    A quick response saves time, eliminates waiting time, and most importantly, engages the clients on your website. This is not possible with the support of people as it needs lots of investment and manual efforts, which increases the budget. How can this issue be solved? No wonder you must build Chatbot, a one-time investment that can entertain ample consumers on time, respond to queries, and make long-term relationships with your clients. In this blog, you will know that React for Chatbots would be a great solution for your business.

    Introduction

    In the tech-driven world, businesses have begun implementing Chatbots into their websites or apps. Many well-known countries like the United States, Germany, Australia, and the United Kingdom have begun to develop their apps or websites with this valuable functionality.

    However, just integrating the Chatbot into the website is insufficient; other important considerations include which frontend technology should be utilized, how the Chatbot should be developed, and how the user experience should be improved.

    Use React to create compelling Chatbot user interfaces that encourage user interaction. Get an understanding of user psychology with the help of BOSC Tech Labs experts, and get a Chatbot with an intuitive design.

    Let’s explore React’s other possible applications for Chatbots.

    Why is React a better choice for developing Chatbots?

    As React is an open-source JS library for web UI development. Also, it would be a great choice for your Chatbot integration. Considering React for Chatbot integration into your site or app is crucial.

    1. Natural Language Processing (NLP)

    By integrating NLP libraries like Wit.ai or Dialogflow, React has the capability to create Chatbots that comprehend user queries and produce responses that closely resemble human-like conversation. Through the use of NLP, Chatbots are equipped with the ability to identify user intent and relevant entities within their queries. With this information in mind, Chatbots are able to deliver responses that emulate natural human communication.

    The other advantage of NLP is that it brings sentiment analysis, via which Chatbots will understand positive, negative, and natural sentiments. Based on this, it will give accurate responses. Hence, Chatbot develops a contextual understanding via which previous interactions and communications are done with bots.
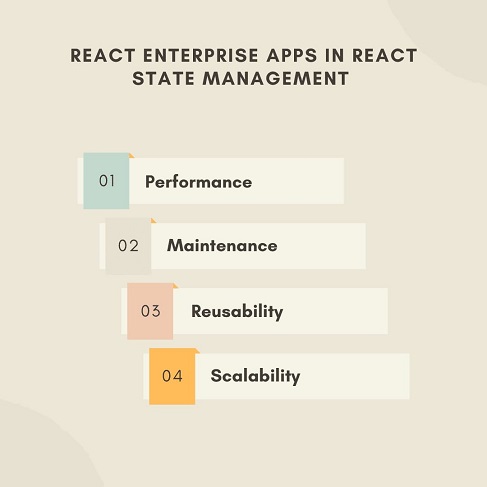
    2. State Management

    By leveraging advanced state management solutions such as Redux Toolkit or the React Context API, developers can efficiently manage the conversational flow in Chatbots. Redux Toolkit simplifies complex state management tasks, while React Context API provides a lightweight solution for less complex scenarios. State management stores user inputs, allowing the Chatbot to maintain context and provide coherent responses in subsequent interactions.

    3. Contextual Information

    Users may require the answers dependent on location, device type, and browsing history. Delivering contextual data will enhance the user experience by giving them recommendations or advice, depending on its recent locations. For example, a Chatbot will track locations and suggest nearby restaurants, shopping malls, or cinema halls.

    4. API Integrations

    React development team will aid you in integrating external sources via API, that is, either weather or news API. These APIs ensure accurate responses to a user’s queries if you wish to integrate the Chatbot with third-party services like social media platforms. Therefore, it helps to give personalized responses from a user.

    5. Multi-lingual Support

    With the help of multi-lingual support, users can talk in their native language and resolve queries on time. Another advantage of having multi-lingual support is that you can cater to international clients.

    Moreover, you can also leverage localization, enabling region and location-based images and texts. Enabling multi-language support will create brand awareness.

    6. User Interface Design

    React’s component architecture helps to make consistent UI for your Chatbot. Also, reusable components become helpful when customized according to customers’ needs.

    To enhance customer experience, you can also integrate real-time updates for an engaging experience. Also, React designs responsive Chatbots that fit all screen sizes. Finally, React helps to build Chatbot that is dynamic and intuitive.

    7. Accessibility

    ARIA attributes and keyboard navigation of React will enable easy navigation for disabled users. ARIA helps people to understand “how to use a Chatbot.” However, keyboard navigation is another great feature that helps users who cannot touch or operate the keyboard or mouse.

    Also, the JS library provides an alternative text for images and other non-textual elements. For those users who are visually impaired, it will enable the color contrast in React so that the visually impaired users can access it.

    8. Testing and Debugging

    Chatbots must function efficiently, for which rigorous testing is done. React community leverages a testing framework to perform testing and debugging to keep codes operational and performing.

    Know 4 Chatbot Design Principles

    The design represents your brand; hence the design concepts are crucial. The possibility of customer involvement increases with design simplicity. But what specifically has to be considered? Let’s examine this in greater detail.

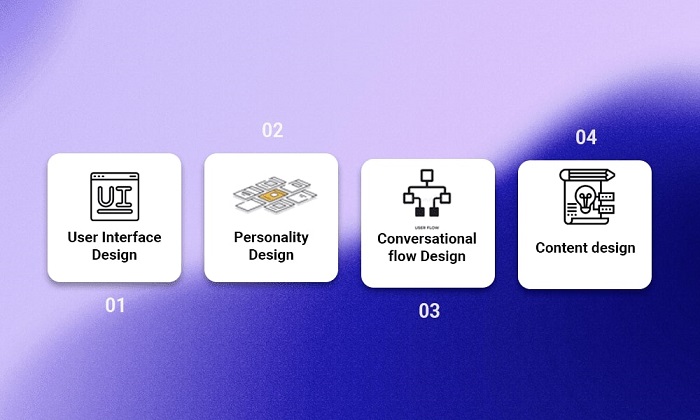
    1. User Interface Design

    When developing Chatbots, user interface design is paramount because it increases the possibility of client interaction. A UI design has a Chatbot layout, color schema, and typography. A UI design can be developed so that a disabled user can access your website or app without any hassle.

    2. Personality Design

    Chatbots represent your brand. And for that reason, it needs to be built in that way. Your brand’s personality and voice must be reflected in the Chatbot. The customers won’t be able to converse productively till then.

    3. Conversational Flow Design

    Conversational flow means an interaction between the Chatbot and the consumer. By considering the objective of the business, a Chatbot is trained in such a manner that drives users to take some revenue-generating actions. Also, conversational flow design should be such that it remains engaging while serving the business purpose.

    Moreover, the design should be such that it anticipates user queries and answers them proactively. Hence, answering what users expect or offering a solution to a user’s challenges is the key to converting clients.

    4. Content Design

    The major objective of Chatbot integration into a website or app is that it gives precise answers to client queries. If answers are appropriate, then the chances of customer engagement will increase, and it will get more clients.

    4 Chatbot Development Principles

    These development principles determine the functionality of the Chatbots. If the rules mentioned above are not followed, developing Chatbots may not be successful. So let’s take them one at once.

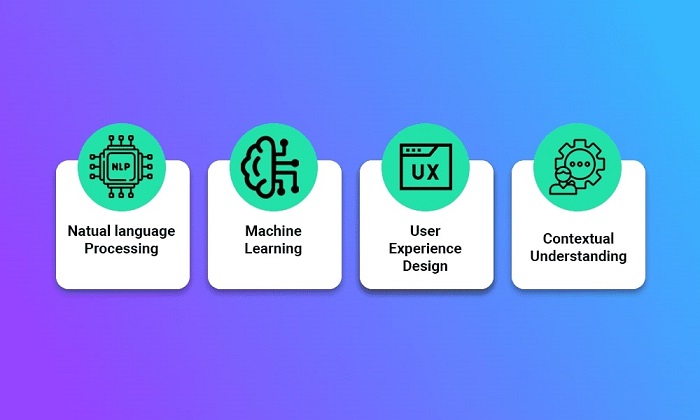
    1. Natural language Processing (NLP)

    Customers want precise and real-time answers to their queries. Any delay or miscommunication will affect user experience and the brand image also. So, NLP integration Chatbots stay the top priority. NLP guides the Chatbot algorithms to understand consumers’ inputs and will respond accordingly.

    2. Machine Learning (ML)

    Another development principle trains Chatbots to evaluate past consumer interactions and will do current and future queries accordingly. Hence, evaluating older conversions will benefit in giving prompt responses and enhancing your brand’s consumer experience.

    3. User Experience Design

    While developing a Chatbot, user experience design is the utmost priority as it seems time-consuming and uninteractive. In this stage of development, it is discussed how buttons are placed, the conversational flow, and the colour combination, as all these minor changes will boost your business.

    4. Contextual Understanding

    Contextual understanding is a willingness to properly understand the context of the user’s communication and appropriately reply. Chatbots must be instructed to comprehend the audience’s worries, questions, and inquiries because they are computers. The embedded Chatbot on your website or app can only respond to them afterwards.

    Schedule an interview with React developers

    React best practices for developing chatbots

    You must follow Chatbot development best practices whenever you are developing a Chatbot for your website.

    1. Choose the Right Chatbot Framework

    While opting for a Chatbot framework, there are these several options for you, like Rasa, Botpress, and Dialogflow. Select the best that suits your project needs and your business.

    2. Use Natural Language Processing

    Chatbots are an incomplete investment without Natural Language Processing (NLP) integration because they may not be as effective at responding to client inquiries. NLP can also be successful and customer hooking if it is properly integrated with Chatbots. To create a Chatbot or plan to add a Chatbot to a website or application, NLP must be applied.

    3. Execute Contextual Understanding

    Like NLP, contextual understanding is equally significant to implement into Chatbots as the bot can respond like humans with its personalized responses. Hence, contextual understanding, a bot will know an earlier interaction with the client and answer accordingly to make a client feel like a real-time response with humans.

    4. Mobile Device Optimization

    Since mobile intelligence is rising, the n optimizing Chatbots for mobile gadgets is the best. However, users prefer to utilize mobile devices for making conversations with Chatbots and having a mobile-device-optimized version for Chatbots which means that it will help you to stay ahead of the competition.

    5. Feedback

    A Chatbot needs to be well-trained to give users the right feedback. In addition to increasing engagement, doing so will boost trust. The users will also learn what to expect, and no false promises will be made.

    6. Test and Refine

    The Chatbot requires regular inspection, updating, and maintenance as a machine. By doing this, you’ll keep the Chatbot prepared with appropriate responses to questions.

    Conclusion

    Chatbots have evolved significantly, with modern advancements in NLP, state management, and UI design making them more efficient and user-friendly. Leveraging the latest React features and best practices ensures your Chatbot remains at the forefront of customer service technology.

    React Chatbots will effectively solve the all-time challenge of managing the various versions and falling short of entertaining all at once. Hire React experts from us and take benefit of the unexplored areas of frontend technology.

    Frequently Asked Questions (FAQs)

    1. What information regarding Chatbots is necessary?

    Chatbot is a program that makes use of artificial intelligence (AI), machine learning (ML), and natural language processing (NLP) to generate automated responses to client questions. But it does not mean that the customers are talking with robots.

    2. How can React Chatbots be successful?

    A great Chatbot has specific natural language processing (NLP) ability to understand the context of a discussion in various dialects in dialogue.

    3. How to build a chat app in ReactJS?

    To create a chat app in ReactJS, you can use a combination of ReactJS and Firebase, which offers real-time database and hosting features. The process involves:

    • Setting up a Firebase project.
    • Implementing authentication.
    • Utilizing the Firebase Real-time Database to store and retrieve messages.

    Book your appointment now

  • Mastering React Internationalization: Your Comprehensive Guide to Multilingual Web Development

    Mastering React Internationalization: Your Comprehensive Guide to Multilingual Web Development

    App internalization is the procedure of creating the content of your app that is available in several languages to reach more clients worldwide, which will genuinely globalize the potential of your web application development. Many enterprises avoid internalization, thinking it’s too complex and have to put too much effort into integrating it. However, ideal internalization and localization have proven their stats, highlighting their impact and importance in internationalizing your app. Hence, adding internationalization and localization phases to your app will help you achieve this scope.

    What is internationalization?

    Internationalization, or i18n, is designing and developing a product, application, or document’s content to enable simple localization for target audiences with various cultures, geographies, or languages. As a result, React i18n’s primary goal is to adapt React apps to different regions.

    Eliminating obstacles to localizing or deploying an application abroad is the goal of internationalization. With regard to application design, using Unicode, older character encodings, string concatenation, and other elements can assist in achieving successful internationalisation.

    What is localization?

    The process of changing a product, application, or document’s content to match a particular target market’s linguistic, cultural, and other needs is known as localization (a locale). Many need clarification on localization, also known as l10n, by merely translating an application’s content to fit a location. Localization goes beyond translation. With localization, you may alter the preferred language, keyboard layout, sorting and collection, text direction, colors, and even designs for numbers, dates, and currencies.

    Prerequisite

    This tutorial assumes you have the most recent versions of npm and Node.js versions installed on your computer or device. Before understanding React i18n, you should be comfortable with HTML, JavaScript, and the fundamentals of npm or yarn.

    Popular libraries for React i18n

    Learn more about some of the popular React i18n libraries by exploring them. It might be more complex than it seems to pick the proper package or React library. Some of the most popular libraries for React i18n are React-intl and react-i18next.

    Getting started with React-intl

    Installation

    By running the following command in your terminal or command line, you can install the React-intl library:

    	
    npm i -S react-intl
    

    React-intl

    The internationalization libraries for FormatJS include the react-intl library. More than 150 languages are supported globally. The characteristics included in this product, which Yahoo sells, are the main reasons it is so well-liked. Handling common locale settings, such as date and time, currency, and numbers, is made simple with React-intl. Also, it features detailed documentation that follows advanced standards, leveraging the built-in browser translations whenever possible. Polyfill options can be used with browsers that do not implement the JavaScript API for i18n.

    React-intl delivers enhanced APIs and components while building on JavaScript’s React i18n API. React-intl leverages higher-order components that provide translations and the React context when language modules must be dynamically loaded.

    Here is a link to the React-intl documentation.

    Schedule an interview with React developers

    Application WorkFlow

    Our application will be created following the folder structure below:

    English, French, and Arabic will all be used in the demo application.

    A critical issue while creating our application to allow internationalization is figuring out how to identify the user’s preferred language. Usually, users have set their browsers to use their preferred language. By identifying their language and offering material in that language, we can provide them with the best user experience possible.

    The navigator.language object, present in all current browsers, can be used to access the user’s language preferences.

    Now, here is how our Wrapper.js file will initially appear:

    	
    import React, { useState } from "react";
    import { IntlProvider } from "react-intl";
    import French from "../lang/fr.json";
    import Arabic from "../lang/ar.json";
    import English from "../lang/en.json";
    
    
    export const Context = React.createContext();
    
    
    const local = navigator.language;
    
    
    let lang;
    if (local === "en") {
      lang = English;
    } else {
      if (local === "fr") {
        lang = French;
      } else {
        lang = Arabic;
      }
    }
    
    
    const Wrapper = (props) => {
      const [locale, setLocale] = useState(local);
    
    
      const [messages, setMessages] = useState(lang);
    
    
      function selectLanguage(e) {
        const newLocale = e.target.value;
        setLocale(newLocale);
        if (newLocale === "en") {
          setMessages(English);
        } else {
          if (newLocale === "fr") {
            setMessages(French);
          } else {
            setMessages(Arabic);
          }
        }
      }
    
    
      return (
        <Context.Provider value={{ locale, selectLanguage }}>
          <IntlProvider messages={messages} locale={locale}>
            {props.children}
          </IntlProvider>
        </Context.Provider>
      );
    };
    
    
    export default Wrapper;
    

    Now, here is how our index.js file will initially appear:

    	
    import React from "react";
    import ReactDOM from "react-dom";
    import "./index.css";
    import App from "./App";
    import * as serviceWorker from "./serviceWorker";
    import Wrapper from "./components/Wrapper";
    
    
    ReactDOM.render(
      <Wrapper>
        <App date={Date.now()} />
      </Wrapper>,
      document.getElementById("root")
    );
    serviceWorker.unregister();
    

    As you can see, we imported four files: IntlProvider, three language files (en.json, fr.json, and ar.json), and IntlProvider.

    The React-intl library uses the provider pattern to define a lifecycle of React component tree as the scope of the internationalization context. This will wrap up the root component of the program, and the entire application will be set up under the internationalization context. We’ll then declare a constant variable to use with navigator.language to navigate the language.

    Adding Translations

    The language files must be updated with the pertinent translated messages. If you haven’t already, add three files with en.json, fr.json, and ar.json to the ‘lang’ subdirectory in the src folder. Then, add the subsequent information to the files appropriately. Keep in mind that you may always change and add new text.

    lang/en.json file

    	
    {
      "app.header": "Edit<code>{fileName}</code> js and save to reload",
      "app.content": "Learn React",
      "app.channel.plug": "Tutorial brought to you by {blogName}",
      "app.plural": "{amount, plural, =0 {no languages} one {# one language} few {# several languages} many {# lots of languages} other {# wrong fromat}}"
    }
    

    lang/fr.json file

    	
    {
      "app.header": "Modifiez <code>{fileName}</code> et enregistrez-les pour recharger",
      "app.content": "Apprendre React",
      "app.channel.plug": "Tutoriel présenté par Yash Dalal",
      "app.plural": "{amount, plural, =0 {no languages} one {# one language} few {# several languages} many {# lots of languages} other {# wrong fromat}}"
    }
    

    lang/ar.json file

    	
    {
      "app.header": "قم بتحرير الملفات وحفظها لإعادة<code>{fileName}</code> التحميل",
      "app.content": "تعلم React",
      "app.channel.plug": "يقدم لك البرنامج التعليمي {blogName}",
      "app.plural": "{amount, plural, =0 {no languages} one {# one language} few {# several languages} many {# lots of languages} other {# wrong fromat}}"
    }
    

    Reflecting the changes

    We’ll update the App.js file to reflect the modifications once we have the aforementioned code. Here, we’ve used the second approach to execute the message declaration.

    serviceWorker.js

    	
    const isLocalhost = Boolean(
      window.location.hostname === "localhost" ||
        // [::1] is the IPv6 localhost address.
        window.location.hostname === "[::1]" ||
        // 127.0.0.0/8 are considered localhost for IPv4.
        window.location.hostname.match(
          /^127(?:.(?:25[0-5]|2[0-4][0-9]|[01]?[0-9][0-9]?)){3}$/
        )
    );
    
    
    export function register(config) {
      if (process.env.NODE_ENV === "production" && "serviceWorker" in navigator) {
        // The URL constructor is available in all browsers that support SW.
        const publicUrl = new URL(process.env.PUBLIC_URL, window.location.href);
        if (publicUrl.origin !== window.location.origin) {
          // Our service worker won't work if PUBLIC_URL is on a different origin
          // from what our page is served on. This might happen if a CDN is used to
          // serve assets; see https://github.com/facebook/create-react-app/issues/2374
          return;
        }
    
    
        window.addEventListener("load", () => {
          const swUrl = `${process.env.PUBLIC_URL}/service-worker.js`;
    
    
          if (isLocalhost) {
            // This is running on localhost. Let's check if a service worker still exists or not.
            checkValidServiceWorker(swUrl, config);
    
    
            // Add some additional logging to localhost, pointing developers to the
            // service worker/PWA documentation.
            navigator.serviceWorker.ready.then(() => {
              console.log(
                "This web app is being served cache-first by a service " +
                  "worker. To learn more, visit https://bit.ly/CRA-PWA"
              );
            });
          } else {
            // Is not localhost. Just register service worker
            registerValidSW(swUrl, config);
          }
        });
      }
    }
    
    
    function registerValidSW(swUrl, config) {
      navigator.serviceWorker
        .register(swUrl)
        .then((registration) => {
          registration.onupdatefound = () => {
            const installingWorker = registration.installing;
            if (installingWorker == null) {
              return;
            }
            installingWorker.onstatechange = () => {
              if (installingWorker.state === "installed") {
                if (navigator.serviceWorker.controller) {
                  // At this point, the updated precached content has been fetched,
                  // but the previous service worker will still serve the older
                  // content until all client tabs are closed.
                  console.log(
                    "New content is available and will be used when all " +
                      "tabs for this page are closed. See https://bit.ly/CRA-PWA."
                  );
    
    
                  // Execute callback
                  if (config && config.onUpdate) {
                    config.onUpdate(registration);
                  }
                } else {
                  // At this point, everything has been precached.
                  // It's the perfect time to display a
                  // "Content is cached for offline use." message.
                  console.log("Content is cached for offline use.");
    
    
                  // Execute callback
                  if (config && config.onSuccess) {
                    config.onSuccess(registration);
                  }
                }
              }
            };
          };
        })
        .catch((error) => {
          console.error("Error during service worker registration:", error);
        });
    }
    
    
    function checkValidServiceWorker(swUrl, config) {
      // Check if the service worker can be found. If it can't reload the page.
      fetch(swUrl, {
        headers: { "Service-Worker": "script" },
      })
        .then((response) => {
          // Ensure service worker exists, and that we really are getting a JS file.
          const contentType = response.headers.get("content-type");
          if (
            response.status === 404 ||
            (contentType != null && contentType.indexOf("javascript") === -1)
          ) {
            // No service worker found. Probably a different app. Reload the page.
            navigator.serviceWorker.ready.then((registration) => {
              registration.unregister().then(() => {
                window.location.reload();
              });
            });
          } else {
            // Service worker found. Proceed as normal.
            registerValidSW(swUrl, config);
          }
        })
        .catch(() => {
          console.log(
            "No internet connection found. App is running in offline mode."
          );
        });
    }
    export function unregister() {
      if ("serviceWorker" in navigator) {
        navigator.serviceWorker.ready
          .then((registration) => {
            registration.unregister();
          })
          .catch((error) => {
            console.error(error.message);
          });
      }
    }
    

    App.js

    	
    import React, { useContext } from "react";
    import logo from "./logo.svg";
    import "./App.css";
    import {
      FormattedMessage,
      FormattedDate,
      FormattedNumber,
      FormattedPlural,
      FormattedTime,
    } from "react-intl";
    import { Context } from "./components/Wrapper";
    
    
    function App(props) {
      const context = useContext(Context);
    
    
      return (
        <div className="App">
          <header className="App-header">
            <img src={logo} className="App-logo" alt="logo" />
            <select value={context.locale} onChange={context.selectLanguage}>
              <option value="en">English</option>
              <option value="fr">French</option>
              <option value="ar">Arabic</option>
            </select>
            <p>
              <FormattedMessage
                id="app.header"
                defaultMessage="Edit the files and save to reload"
                values={{
                  fileName: "src/App.js",
                  code: (word) => <strong>{word}</strong>,
                }}
              />
            </p>
            <a
              className="App-link"
              href="https://reactjs.org"
              target="_blank"
              rel="noopener noreferrer"
            >
              <FormattedMessage id="app.content" defaultMessage="Learn React" />
            </a>
            <FormattedMessage
              id="app.channel.plug"
              defaultMessage="Tutorial brought to you by Yash Dalal"
              values={{ blogName: "Yash Dalal" }}
            />
            <br />
            <FormattedPlural
              id="app.plural"
              defaultMessage="{amount, plural, =0 {no languages} one {# one language} few {# several languages} many {# lots of languages} other {# wrong fromat}}"
              values={{ amount: 90 }}
            />
            <br />
            <FormattedDate
              value={props.date}
              year="numeric"
              month="long"
              day="numeric"
              weekday="long"
            />
            <br />
            <FormattedNumber
              value={20.42}
              style="currency"
              currencyDisplay="symbol"
              currency="USD"
            />
            <br />
            <FormattedNumber value={10000} />
            <br />
            <FormattedTime
              value={new Date()}
              hour="numeric"
              minute="numeric"
              second="numeric"
              timeZoneName="long"
            />
          </header>
        </div>
      );
    }
    
    
    export default App;
    

    To get the messages, we imported FormattedMessage here. The declared IDs must be used when naming the translated strings because we have now defined the translated texts in a JSON file. For instance, the ID for the Learn React message is app.content.

    The FormatJS community encourages using defaultMessage and employing it for the following reasons:

    When messages are collocated with anything else, especially when their usages are, they start to manage themselves, and if the uses are modified or removed, so are the messages.

    Developers construct highly contextual messages by adopting a specific language style.

    The message determines how the text is styled. For instance, the messages are affected by capitalization, truncation, etc.

    Given that many toolchains cannot verify or confirm cross-file references in validating syntax, this facilitates better integration when used with toolchains.

    Run npm start after finishing the modifications, then open http://localhost:3000/ in your browser. These changes will happen automatically if you have already issued the command and the server is running.

    These modifications will result in the following user interface:

    Conclusion

    You finally got the internalization React app, which can be localized according to various languages and regions, making the app more accessible to people around the globe, increasing your targeted audience, giving you better revenue streams, and making your business reach globally.

    Suppose you want to React internalization in your app. In that case, you can hire React development team from a leading mobile app development company that will help you in every manner and make your project fit within your budget.

    Frequently Asked Questions (FAQs)

    1. What is internalization in app development?

    Internalization is the state that enables software applications to function equally well in their supported locales; and to be localized. Localization is the process of modifying an app’s elements to meet a particular locale’s requirements.

    2. What is the difference between internalization and localization?

    Internalization (i18) is designing and creating software or products that adopt various cultures and languages. At the same time, localization (i10n) is the phase of adopting the item or content for a particular market or locale.

    3. What is the impact of internationalization?

    Usually, internalization leads to the highest levels of innovation, showing that exporting entails more R&D, high sales from product innovation, and an increase in the number of international patents; FDI outflows raise R&D and international patents; international outsourcing entails higher.

    Book your appointment now

  • Everything to Know About React Re-Rendering: A Comprehensive Guide

    Everything to Know About React Re-Rendering: A Comprehensive Guide

    React JS is an open-source JavaScript library that can be used for easily creating the user interface. These are specifically designed for single-page applications. These are also known for providing a quick user experience by updating certain features in the UI.

    Rendering components involves the React Component Lifecycle, so these are also called various app stages due to the result of the user interacting with the app or external data. It could be processed based on an asynchronous request or subscription model. Non-interactive apps do not enable asynchronous data updates, which do not re-render.

    React force rerender can be extensively caused by the three reasons listed as follows:

    • Update in prop
    • Re-rendering of the parent component
    • Update in State

    What Is A Necessary And Unnecessary Re-Render?

    1. Necessary Re-Renders

    In React, the render() method is involved with class components. These are also responsible for extensively describing views on rendering with browser windows.

    These can be enabled in a clever way, as React operates on the virtual DOM concept. For example, if the user types a word in the input, this message will be updated on every key press in the input field, i.e., re-rendered.

    2. Unnecessary Re-Renders

    The app cultivates the re-rendering of a component via the various re-render mechanisms, which are either a mistake or inappropriate for the app’s architecture. Unnecessary re-rendered by themselves are simple, as it makes React fast and able to deal with them without noticing anything about the users.

    Re-rendering React components will slow down the app unnecessarily. These could be making the UI feel entirely unresponsive. Normally, this process could affect the performance level of the app, which will cause a loss or even side effects.

    When Does the React Component Re-Render?

    1. Context Changes:

    The value of Provider can change with the components, so it is used with Context on re-rendering. These can be easily accessed even with the data directly.

    Re-renders are also not prevented directly by memorization. It also involves fewer workarounds, which could be stimulating. So it also prevents re-renders, which are enabled by the context.

    2. Parent Re-Renders:

    The component is re-rendering itself only when the parent re-renders in the system. These can be easily enabled in opposite directions. The component could be re-rendered with the children.

    The process can also be enabled with the tree so the re-rendering in the child does not trigger with the re-rendering of the parent. It also involves the edge case and caveats, enabling the mystery of the React element with the parent and children and re-renders.

    3. Hooks Changes:

    Hooks changes are one of the common reasons for Re-renders, so these can be extensively happening with the hook, such as “belongs.” It can be extensively added to the components with an added feature. The same rules are involved with context changes as well as state changes.

    Typically, the state changes with the hook enabled with the trigger are wholly unpreventable and re-rendered with a “host” component. These also involve triggering the unpreventable re-rendering in the “host” component. It can be enabled by using context and having the context’s value change on a different level.

    Hooks are also chained to different levels. A single hook in the chain still involves “host” components. Below is the reason for creating the simple Counter React Project to understand the concept of re-rendering components.

    4. State Changes:

    When the React component’s state changes, it will re-render itself. Usually, it operates either in the callback or in the useEffect hook. Also, State changes are the “root” source of all re-renders.

    5. Props Changes :

    For props to be modified, they must be updated by a parent component, which means that a parent component must be re-rendered to have the trigger re-rendered of a child component regardless of its props; however, when the memoization techniques are used with React.memo or useMemo, then the props upgrade becomes necessary.

    Steps of React Re-rendering Component

    Step 1: Create React project called a counter-app by running the below command

    	
    npx create-react-app counter-app
    

    Step 2: Open the project folder

    cd counter-app    
    

    Step 3: Install the required module by running the below command to create React JS application

    npm install react-desktop
    

    Step 4: Open VS Code

    • Go to the explorer in VS Code
    • Go to the src folder
    • New file
    • Name it Child.js

    Step 5: Edit code in the App.js

    • The app.js file has the following code.
    • The state declared change and caused the re-rendering of App.js.
    import { useState } from 'react';
    import './Style.css';                      // CSS file for style
    import Child from './Child'; // Child Component
    function App() {
    const [Count,setCount]=useState(0);
    console.log("Parent rendered");
    return (
               <div className="wrap">
               <button onClick={()=>setCount(Count+1)}>
                           Increase
               </button>
    <p>Count:{Count}</p>
               <Child name={"ABCD"}/>
               </div>
    );
    }
    export default App;
    

    Step 6: Make a Child component

    New File and name Child, js
    

    Step 7: Child.js will have the components

    These give messages each time components render a function. Every time the count button is clicked, the state change is triggered.

    All the state changes in the parent component trigger re-rendering for subsequent child components.

    Reasons for React force Re-Render: Parent Re-Renders

    Usually, the React component can easily re-render itself under various circumstances. React schedules with the rendering of the time state with changes. These also involve scheduling renders, which is quite time-saving to some extent.

    These are extensively done by updating the reach and triggering it using the useState function. This allows us to easily enable the state variable in the functional components in ReactJS.

    Re-renders could occur solely on the newer page that is requested. It ensures the result is server-generated with the new HTML document. These can be extensively sent to the browser to achieve excellence.

    Re-rendering is quite similar to that of a snapshot taken with a camera. The camera is helpful for checking the difference between an older snapshot and newer snapshots generated with the state change. The following components will be re-rendered:

    1. The Receiver Component:

    It involves re-rendered as the consuming Context that receives updated context value from the provider

    2. Receiver Component’s Children:

    State change with parent component resulting in re-rendering of its children

    Conclusion

    Context provider component updates with the React state management. These will be enabled with the updates to the context value. This also causes all components consuming the context to re-render.

    Therefore, knowing when and why React re-renders components is vital for optimizing the performance of your application. By using the React in-built tools and integrating modernization techniques, you can significantly reduce the number of necessary re-renders and improve the overall performance of your React application.

    If you want more information about the React Re-render component, consult with experienced React app developers who will give you complete knowledge about React components in detail, which will help you make the application better with an appropriate budget. So, let’s get started.

    Frequently Asked Questions (FAQs)

    1. What is re-rendering in ReactJS?

    Re-rendering occurs when React updates its app with new information. Usually, this exists due to user interaction with an app, a few external data points coming through an asynchronous request, or some other subscription model.

    2. How do you prevent re-renders on React functional components?

    Re-rendering can be done simply by exporting components using React.memo. React. memo tells React to compare component props with its older props and only re-render if they are different.

    3. How do I check component re-rendering in React?

    A checkbox hidden in ReactDevTools settings allows you to highlight the components that were re-rendered visually. Hence, to enable it, go to “Profiler” >> click the “Cog Wheel” on the right side of the bar >> “General” tab >> Check the “Highlight updates when components render” checkbox.

    Book your appointment now

  • React JS Cheat Sheet for Beginners in 2026

    React JS Cheat Sheet for Beginners in 2026

    While learning about React JS Cheat Sheet you need to learn about React framework and it could be overwhelming for beginners. In the modern day, a large change has been made ever since the first React framework was released. React Native is an open-source framework allowing developers to create native mobile apps and many others using React.

    React JS cheat sheet especially covers all the components, navigation, and styling. You can easily hire React developers to learn and implement powerful React JS cheat sheets for web apps.

    What is React JS?

    ReactJS is one of the powerful JavaScript libraries suitable for easily building the User Interface. These involve primary tasks of providing better displaying of web pages. Facebook developed React, which was released in the year 2013. It has been powerfully designed from scratch and enabled with an emphasis on performance level.

    Normally, React has been powering Facebook, Instagram, Airbnb, as well as other websites. In the modern day, React is the industry leader in providing you the complete front-end attributes. These are especially the JavaScript library designed for creating unique single-page applications.

    • 100% open-source JavaScript library
    • Allows reusing of ReactJS code
    • Component-based structure
    • Simplicity with testing apps
    • Components can be reuse to create mobile apps
    • Plenty of resources to learn skills
    • Ready-made libraries

    Also Read: Benefits of using ReactJs for Web Development

    How does React JS work?

    Normally, React will store the DOM information. The DOM nodes with the browser render them and check the changes even between the past and present Virtual DOM.

    These can be extensively updated with the virtual DOM, so they can also be rendered with the browser. If there are DOM manipulations, then it takes more time to load. The React use DOM nodes which can be easily changed accordingly.

    Also Read: How to Solve Changes Not Reflecting When useState Set Method Applied?

    React JS Cheat sheet

    The ReactJS Cheat Sheet covers all the basics of React. These are suitable for easily handling the components, props, lifecycle, and other methods. ReactJS Cheat Sheet is one of the amazing resources for those who are looking for React as a beginner. This will be great reference guide for the beginners.

    React Components

    The React components library is most important to easily build the blocks in the React app. These are the most important React functions that could easily return with the HTML element. Large HTML blocks involve the codes, which are also enabled with certain functions in the app. It will provide a better range of panels and a navigation bar.

    Below are some of the most important react components, such as

    1. Class Components

    The Class Components involve the class written in the context of React. Writing components will provide you with a better range of components with capital letters. These could be extensively denoted as House Class Component.

    	
    Import react and react-dom
    Call the ReactDOM.render()
    import React from 'react.'
    import ReactDOM from 'react-dom.'
    class House extends React.Component {
      render() {
        return (     
    <div>       
    <h2>This is a house</h2>     
    </div>
        )
      }
    }
    ReactDOM.render(<House />, document.getElementById('root'));
    

    2. Functional Components

    React is a super fast, powerful tool especially preferred by many numbers of developers. The main reason is that React JS lets the user easily create the application faster. React simplifies the process of creating the site. These will be quite a convenient option for making components highly responsive, and they are easier to update.

    import React from "react";
    import ReactDOM from "react-dom/client";
    import "./index.css";
    import App from "./App";
    
    const root = ReactDOM.createRoot(document.getElementById("root"));
    
    root.render(
      <React.StrictMode>
          <App />
      </React.StrictMode>
    );


    React Hooks Cheatsheet

    React Hooks are one of the amazing additions of React. These could be extensively used for adding the state along with many other features. These will be related to functional components. React Hooks Cheat Sheet especially covers everything with the hooks. These include the:

    • state
    • useEffect
    • useContext

    React Performance Optimization Cheatsheet

    React Performance Optimization Cheat Sheet covers every important level of performance with optimizing techniques. These are quite important for React, so there are some additional benefits like

    • Avoiding unnecessary renders
    • Optimizing event handlers
    • Using memorization

    React Router Cheatsheet

    The React Router Cheatsheet is the best option for enabling a long-form article covering the important attributes of React Router. Some of the most important attributes are the hooks, configuration, and components. These can be easily enabled with the FreeCodeCam to ensure maximum benefits.

    React TypeScript Cheat sheets

    TypeScript is one of the basics for the React developer, so these will provide you with maximum results. The React JS cheat sheet helps you to save time easily. It is helpful for you to learn everything about the process of TypeScript in code.

    Also Read: Develop Secure and Scalable IoT Apps for React.js

    React Testing Library Cheatsheet

    The React Testing Library Cheat sheet especially covers essential methods or features in the React Testing Library. This short guide gives you a better idea about exported functions across the React Testing Library.

    	
    const {/* */} = render(Component) returns:
    import {render, fireEvent, screen} from '@testing-library/react'
    test('loads items eventually', async () => { 
    render(<Page />)
      // Click the button 
    fireEvent.click(screen.getByText('Load'))
      // Wait for the page to update with query text
      const items = await screen.findAllByText(/Item #[0-9]: /)
      expect(items).toHaveLength(10)
    })
    

    React States

    The React states management involve objects along the variables in the stored manner. React States variables could be extensively accesse within the Component. There are some states involved with decorating the House Class component.

    	
    Class House extends React.Component { 
    constructor(props) {      
    super(props);      
    this.state = {           
    color: "white,"           
    rooms: 4       };
      }
      render() {
        return (     
    <div>       
    <h2>This is a {this.state.color} house with {this.state.rooms} rooms.</h2>
         </div>
        )
      }
    }
    

    Schedule an interview with React developers

    Conclusion

    The React JS cheat sheet for beginners is a great resource for those just starting with React. It delivers an overview of React components, syntax, and concepts and offers a detailed guide for working with React. The cheat sheet also provides helpful examples and tips for making the most of React. With this cheat sheet, React experts can learn the basics of React and use it confidently and efficiently. Hence, React JS is the ideal tool for large-scale and complex dynamic applications and provides a proven solution for thousands of projects.

    If you plan to develop a React application, connect with an experienced and best React app development company that ensures that beginners will learn easily with their tutorials and resources. It also ensures that a client will get a high-featured mobile app for the business, boosting their growth and developing a customer-centric application.

    Frequently Asked Questions (FAQs)

    1. What are the prerequisites for ReactJS development?

    HTML and CSS, Git and CLI, Basics of JavaScript and ES6, and NPM (Node Package Manager).

    2. Is React more difficult than JS?

    ReactJS is easier and simple to grasp in comparison to JS. ReactJS is simple to understand due to its component-based design and use of plain JavaScript.

    3. Why to use NextJS over React?

    It’s easy to code in comparison with React and the other frameworks working with React. NextJS needs very less coding. Programmers just need to make the page and link to its component in the header, which means less code, better readability, and will improvise project management.

    Book your appointment now

  • Differentiation between NPX and NPM

    Differentiation between NPX and NPM

    NPX and NPM – Before executing the React program, we need to learn about npx and npm. Of course, it stay entirely for JavaScript and was develope for nodes. It is related to npm to manage the packages and modules for node.js and consists of the command line client npm. You can hire React engineers who consist of modules that suit the requirements by installing npm.

    However, the package should contain files that need to take proper JS libraries. The node project includes it as per the requirements for the projects. The installation of node.js takes the required packages and modules. So, in this blog, you can check the main difference between npx and npm.

    How to execute package with npm?

    It should include the local path and write down the path by including the best packages. It should written by focusing on running and running the packages with the back command.

    They stand the best thing by focusing on the npm package and runners by focusing on executing, which comes with npm. They can run the package using the command file by choosing the package name.

    Also Read: How to show or hide elements in React?

    npm run your-package-name

    Of course, the main difference is to take the node package by executing and comes with the npm version. They consist of npx to install based on the packages and suit the runner.

    They approach them with the npm registry for install packages. Thus, you should be capable enough to look over the npx in the system. You can check npx and run using some commands.

    What is npx?

    It has to take a good solution and be able to check based on the requirements. In addition to this, they will set out a new thing by focusing on command lines and options. The npx can explored by focusing on command lines and focusing on nodes and commands.

    Directly runnable: The node allows you to execute by focusing on the package, and to do so, run the following command with a package name and notice the changes. The package should be adaptive in changing well on the npx and npm differentiation.

    Also Read: React State vs Props: Introduction & Differences

    What are differences between npm and npx?

    • If you wish to run packages via npm, you must verify based on the packages by installing with npm package runner. They consider the practical goal and include an executable solution for running through packages forever. It creates a good solution by focusing on npm without installing the packages.
    • On the other hand, the npx creates React app my app and includes React life cycle changes in the packages. They take a complete pledge solution and notice changes in the npx by focusing on executing the packages. You don’t have to worry about long-term packages being install.
    • The packages used by npm are install globally. Likewise, npx is not install globally. It will set out a new solution and be able to capture package managers by executing JS packages as well. Npm is a tool use to install packages, and npx is use to execute packages forever. They are used as a package manager and thus capable of holding sure things for JS packages.

    What is NPM- default and package manager?

    NPM is the node package manager, focusing on default and package manager for node projects. Of course, it will install the machine and focus on what comes with the command line interface.

    They used the online database for NPM that suits the NPM, which would interact with the online database. They consider practical goals, and the database can be identified with hosts’ public and private packages. They can add updated packages and use NPM CLI by interacting with the database.

    What is NPX- Default and package manager?

    Of course, NPX is the best node package that executes by focusing on the NPM package. It allows developers to execute by focusing on NPM version 5.2.0 and above.

    To check whether or not following the command on the terminal is usually the primary use case of NPX. It needs to use a package by focusing on the redundant task and following on a particular package for just one.

    On the other hand, NPX focuses on node packages by focusing on the NPM package runner. They take the best class solution and allow experts to use cases for first installing it and executing the redundant task. It considers NPX a powerful tool.

    Also Read: Parse CSV File by Using React JS

    Define Redundant task

    Of course, it takes a complete solution, and NPX is when you need to use a particular package just once. In addition, they consider the practical goal and can identify executing the redundant tasks. The powerful tool should be handled and able to identify the results for your desires.

    How to Execute via NPX and NPM?

    Based on the section, Javascript packages use both NPM and NPX. Of course, it should be flexible for focusing on sections by executing the various Javascript framework for focusing without any hassles.

    Using NPM:

    They consider effective solutions and use the NPM by focusing on installing and executing by installing a package. They carry out the package and run the following command by working on the package name. It considers the local path by package by focusing on npx and npm.

    Using NPX:

    They use the NPX as a better option for executing packages and need to install the package manually for scripts. They need to take a complete pledge solution and follow the command by focusing on npx your package’s name to focus on better options.

    Creating a React app using NPM would be first for first to install it globally. They consider running it thus redundant, which suits the command application of NPX. They create a React app command to focus on the need to use it once. They initialize the project and do not install it.

    Schedule an interview with React developers

    Conclusion

    Now, you should know familiarity with a tool for NPM and NPX. Of course, it considers the package and manager used to install and update with removed packages. They depend on the project required to focus on NPX and NPM packages to execute an NPM registry directly without installing it. Hence, these tools are necessary while working with React as they make it easy to find, install and manage vital packages.

    If you have any questions or queries related to this, then you can connect with the best React app development company and get clear your queries. Their trained and experienced professionals will give you the desired solution to your problems. They will help you develop the app quickly and efficiently with high-quality features and functionalities.

    Frequently Asked Questions(FAQs)

    1. How will NPX installation work?

    npm, install downloads a package and its dependencies. NPM install can run with or without arguments. However, when it is run without arguments, npm installs download dependencies described in the package. json file, and it will make a node_modules folder with installed modules.

    2. What is the benefit of using NPX?

    NPX allows you to run and utilize packages without requiring you to install them locally or globally. If the package is installe while running NPM executables with NPX, then the NPX will look for package binaries and run the package.

    3. Does NPM need the node?

    To publish and install packages to and from the public npm registry or private npm registry, you must install Node.js and npm command line interface utilizing either the node version manager or Node Installer.

    Book your appointment now

  • How to Redirect URL in ReactJS?

    How to Redirect URL in ReactJS?

    Do you want to know how to redirect URL in ReactJS? Well! This section explains in-depth about a redirect URL in ReactJS. It helps you learn the working of the redirect feature in ReactJS properly. If you still need help with this task, you can hire ReactJS developer.

    Introduction to redirect in ReactJS

    ReactJS is an open-source and free frontend library. It is widely accessed for developing single-page applications. Redirecting is one of the vital features in the frontend application like React app. It lets you programmatically redirect from one URL to another without accessing the React-router component or anchor link.

    Currently, many components, methods, and hooks in React are available. You can use them to redirect using React and JavaScript. The following section covers both external and internal URL redirecting.

    Must know things about redirecting in ReactJS

    Before getting into the details of how to redirect in ReactJS, here is a quick cheat sheet to redirect URL in ReactJS. It helps you to perform redirects efficiently in ReactJS.

    1. Redirect

    window.location.replace (https://Google.com/);

    2. User event navigation

    window.location.href = “https://Google.com/”;

    In React, plenty of libraries are available that you can utilize to handle client-side navigation and routing. Redirection is also a part of those libraries, but the redirect principle is similar for all the React component libraries.

    The client-side redirect’s principle is to push or replace the new URL to the window history to change the page. You can use any of the above methods to redirect in JavaScript according to the scenario.

    For instance, use window.location.replace to perform the redirect that replaces a specific item in history to avoid loops. On the other hand, use window.location.href to add to the history according to the user action.

    Also Read: How to Conditionally Add Attributes to React Components?

    A guide to redirect to the external URL

    You can redirect to the external URL in plain JavaScript by calling the method “window.location.replace”. Here is how to use this method in React.

    Example

    	
    function RedirectExample() 
    {
     useEffect(() => {
    const timeout = setTimeout(() => {
    // redirects to an external URL  
    window.location.replace('https://Google.com');
    }, 5000);
    return () => clearTimeout(timeout);
    }, []); 
    return <>Will redirect in 5 seconds...</>;
    }


    Keep in mind that accessing the page through the browser’s back button is not possible after redirecting with the replace() method.

    Also Read: How To Navigate Programmatically Using React Router

    Navigate to the external page to Redirect URL in Reactjs

    In many cases, people assume that redirects mean navigating. If you want to navigate to another page, you can do it easily with the help of window.location.href method. For that, you have to set this property with the URL like below-mentioned.

    	
    // directly change the active URL to navigate
    window.location.href = 'https://google.com';
    

    When you navigate like this, you can add a new entry in the navigation history rather than replacing the current one. As a result, the user will go back. If this navigation happens when the user clicks an element, it is enough to use the anchor tag (<a>). Here is how to use this navigation!

    	
    //  A simple link to an external website
    <a href="https://google.com" target="_blank" rel="noopener noreferrer">
      Go to google.com
    </a> 
    

    The “=”_blank” attribute is accessed to open the link in the new tab. In addition, the rel=”noopener noreferrer” attribute is used for security reasons.

    Redirect with the help of React-router

    Commonly, React-router is used together with React. As it is responsible for client-side navigation, you cannot handle the redirect to external URLs. You have to use the above method to do that.

    But, to redirect between the pages in the React app, which uses React-router v6, utilize the useNavigate hook or navigate component. You have to set the replace property like “true: navigate(‘/about’, { replace: true });”

    Here is how it looks in React:

    	
    import { useEffect } from 'React';
    import { Route, Routes, useNavigate } from 'React-router-dom';
    function RedirectReactRouterExample() {
    return (
    <Routes>
    <Route path="/" element={<Index />} />
    <Route path="about" element={<About />} />
    </Routes>
    );
    }
    function About() {
    return <div>About</div>;
    }
    function Index() {
    const navigate = useNavigate();
    useEffect(() => {
    setTimeout(() => {
    // Redirects to the about page, note the `replace: true
    navigate('/about', { replace: true });
    }, 5000);
    }, []);
    return <div>Redirecting...</div>;
    }
    export default RedirectReactRouterExample;
    

    Redirect to the URL using the useHistory hook

    The following code will help you to redirect to the new path with the help of the useHistory hook property.

    	
    import { useHistory } from "React-router-dom";
    import "./App.css";
    function App() {
    const history = useHistory();
    const handleGoHome = () => {
    history.push("/home"); // New line
    };
    return (
    <> 
    <button onClick={handleGoHome}>Go Back</button>
    </>
     
    );
    }
    export default App;
    

    In React Router v6, the useHistory property is deprecated and replaced with the useNavigate hooks. It is a function letting the user navigate to the path programmatically within the function. It serves a similar purpose as the useHistory hook and utilizes the same prop as the <navigate/> component.

    Also Read: React State Management: Everything you need to know

    Difference between internal and external URLs for redirecting

    The difference between external and internal URLs for redirecting in React is extremely simple. The internal URLs will navigate within the current site, while external URLs will navigate to different sites. Understanding this difference is highly important because handling different types of URLs is quite challenging.

    While navigating to the external route from your page, you do not worry about running it via your library. It is because the application will go down after you navigate away from the specific page. It is especially true using the React-based library or vanilla JS implementation.

    On the other hand, even though internal URL is easier to handle and manage, you must use redirection or libraries implementation. The use of libraries will help track, render React components, and manage every page while maintaining the browsing history.

    Schedule an interview with React developers

    Conclusion

    Usually, the server performs the redirect, not the client. However, in certain cases, redirection requires the client to perform the tasks. In such a case, it is mandatory to use window.location.redirect () call. Use window.location.href with the target URL to navigate to another page upon clicking a button. Thus, focus on the coding to get a better understanding.

    To redirect a URL in ReactJS, use the useNavigate hook from react-router-dom. Call navigate(‘/new-path’) to redirect users. For advanced solutions, consult a generative AI services company.

    However, the Redirect component from the react-router-dom library is a helpful and useful tool for redirecting to URLs in ReactJS. It also redirects from one URL to another URL easily and efficiently. If you want to integrate this functionality in ReactJS, consult a React apps development company like BOSC Tech Labs, which has the expertise and will help you with their skills and knowledge.

    Frequently Asked Questions (FAQs)

    1. Define redirect in ReactJS

    A JavaScript redirect is the only JavaScript code used to automatically transmit a visitor from the landing page to various target pages.

    2. What is the way to redirect to the login page in React JS?

    import {Naviagte} from “react-router-dom”; is sued to redirect the unauthenticated users. Navigate component is the declarative API. It relies on the user event, which is the authentication, to cause the state change and will consequently cause the component, which is re-render.

    3. How does URL Redirect work?

    In HTTP, redirection is triggered by the server sending a particular direct response to the request. However, redirect responses have status codes that begin with a 3, and the location holder has the URL to redirect. Hence, when the browsers receive the redirect, they immediately load a new URL provided in the location header.

    Book your appointment now

  • Develop Secure and Scalable IoT Apps for React.js

    Develop Secure and Scalable IoT Apps for React.js

    In the 21st century, IoT Apps for React.js and IoT technology is entering every industry. A robust framework is needed to make featured-rich and efficient apps. JavaScript is a programming language that has been used for web application development. However, JavaScript frameworks are available to make enterprise-grade and future-ready apps. However, ReactJS has been gaining much attention among all these frameworks in the developer community. A framework has multiple advantages that influence engineers to implement ReactJS into IoT apps. Brands like PayPal, Netflix, and many others use ReactJS. An app developed with ReactJS leverages some benefits that are listed below.

    Enterprise IoT Market 2019-2027

    Image source :iot-analytics.com

    • The enterprise IoT spending will grow 21.5% in 2022 to $201 billion. IoT Analytics is lowered, and the growth outlook for 2023 to 18.5%.
    • However, macro trends are huge dominating and growth expectancy for the otherwise robust digital transformation phase for the enterprises.
    • It has lower-than-expected economic growth and general insecurity in 2022 and 2023, which leads to cautious spending on digital transformation and IoT development.

    What are the advantages of Utilizing IoT Apps for React.js?

    1. Increase Efficiency in the Development Process

    ReactJS has a compositional structure that plays an important role in the coding and development process, which is more efficient. And due to this reason, brands like Walmart use IoT Apps for React.js. A code and component are used at various locations throughout a development. It gives a more systematic structure throughout your code.

    Project management becomes easier when you can handle and control the challenging project, as programmers can handle large coding structures. Moreover, the individual unit components showcase independence, which supports the React component’s reusability. Hence, it reduces development time and enhances the developer’s productivity.

    2. Code Stability

    React.js follows the descending stream of the data flow. It happened from the parent component to the child component. Thus, any changes made in the child component don’t reflect the parent components. Due to the downward data flow, when any changes are required in the app, the experts must only alter its state and make modifications. Only a few of the specific components of an app are refreshed. It aids with codebase stability and advantages such as enhancing code strength, improving app execution, and ensuring smooth app performance.

    Also Read: Top 10 Techniques For React Performance Optimization in 2022

    3. Facilities Quick Rendering

    While creating the high-efficient IoT Apps for React.js, identifying and showing code structure will affect the IoT app execution, which is essential for development. Document Object Model (DOM) is the tree-structured model that reflects an app’s performance, as every minor change in the app’s per layer will negatively impact the app interface.

    However, Facebook has launched Virtual DOM in React.js to resolve this issue. It is also an important virtual portrayal of DOM. Changes are initially applied to Virtual DOM, which calculates and evaluates the interrelated risk to each modification. Then the changes are then applied to the DOM as needed without wasting time. It will make the server-side rendering more rapid and enhance app performance, as not each component gets disturbed.

    4. HTML Code More Resistant

    React.js is based on the HTML for loading, as it is necessary to ascertain that your app’s HTML code is secure and safe. HTML element with the “disabled” tag is non-mutable. The programmers can not submit that element while using the form. It will apply a certain validation and activate the segment if bound to certain criteria.

    React.js reduces the risk associated with any malicious materials which might have serious consequences. If you hire ReactJS developers, they will use JavaScript XML in ReactJS for writing the HTML code and making it more durable. It leverages the auto-escaping feature to secure and protect the app.

    Also Read: React State Management: Everything you need to know

    5. Assists in Writing

    It comes with a feature known as JSX, a JavaScript grammar extension that aids in making the segments easy. It will identify HTML citations and also simplifies the representation of subcomponents. React.js uses JSX to simplify a segment composition procedure for coders. Thus, following the principles while composing on IoT Apps for React.js is necessary to make clean and feature-rich apps. JSX helps create custom apps that prevent errors and fix the bugs that have taken place during the writing process of the code.

    6. Separation of Concerns

    While creating IoT apps, there are classes, components, objects, and many other layers. Each object or element may be distinct and have multiple coding needs. For instance, an AC can have many components, and it is essential to automate every component for proper functioning.

    Separation of concerns helps to ensure a proper differentiation of the components. It is ascertained that data passing occurs through an object that compromises information related to these components. However, you can separate the parent and child components from one another. For example, for a component-based IoT app, you can use React.js as its framework.

    7. Easy to maintain

    App maintenance is an issue that programmers face, particularly working with software devices and solutions. However, with React.js, you do not have to worry about maintenance. The JavaScript framework will make app maintenance easy, flexible, and scalable. The design framework, coding structure, and other features of ReactJS will ease the app development process. Hence, you can easily add a new code, modify an existing code, or even update your application.

    8. Lifecycle method in React

    The React JS library is component dependent and ensures all the components are executed into the virtual DOM besides its execution. A lifecycle method is prevalent in the ReactJS library, which assures and develops the components that will handle the constant modifications. Hence, these changes are required for smooth interactions of a web or mobile application for the users in real life. Hence, these three methods are mainly used to ensure a lifecycle method is followed: initialization for mounting, updation for giving updates, and destruction for unmounting.

    Also Read: What is the component lifecycle in React?

    Future of IoT Apps for React.js

    ReactJS will help in covering the way to the bright future for an IoT mobile application development space. As it is not exclusively created for an IoT solution, features like fast rendering and compositional structure give many relatable advantages. An independent codebase has better readability, making ReactJS an amazing choice for IoT apps. Thus, IoT Apps for React.js is the favorable choice for the IoT applications development phase, and it will remain an essential part of IoT in the future.

    Schedule an interview with React developers

    Conclusion

    Integrating ReactJS in IoT apps with several advantages helps to take your business to new heights. It gives better performance and UX in complicated app development. Hence, if ReactJS merges with IoT, it will bring several technical enhancements to your software solution.

    Mobile app development companies have expertise in React which helps your enterprises to reach new heights and gives the best solution for your app’s needs. Therefore, partnering with a dedicated web and mobile app development company will help you to develop reliable, flexible, and high-featured apps which help you in improving your overall experience.

    Frequently Asked Questions (FAQs)

    1. Why select IoT Apps for React.js against other technologies?

    With React, developers can save time, give the product faster, and help businesses yield the print without delay. This benefit is rooted in React’s ability to work with JavaScript, JSX, and TypeScript.

    2. What is the most innovative feature of React development?

    Easy creation of dynamic apps makes React easier to build dynamic web apps as it needs less coding and gives more functionality, which is opposed to JS, where the coding often gets difficult very rapidly. React also uses a virtual DOM to improve performance and will develop web apps faster.

    3. What is the render function of the React framework?

    Render is the technique that redirects the page with render support (). The render function defines an HTML code within the HTML element. It is to view certain views in the UI using the particular logic defined in the render function, which returns an output.

    Book your appointment now

  • Use of React Bad Setstate() Call

    Use of React Bad Setstate() Call

    React is a highly demanding library for the front-end application. It is a suitable asset for startups, companies, and big corporations.  Developers use it for mobile and web application development. However, the application works well rather than other concepts. Library initiates several concepts to prevent obstacles in front end framework. Find here all details on various uses of React Bad Setstate() Call

    The most important concept is React state management, comprising data for the component. The component comes back with data present within the output state. The main role of an in-built react object is to hold information or data about the component. A state may also modify over time.

    When it changes, the component will re-render. Before updating the state value, building the initial state setup is mandatory. Developers use the setstate() method to modify state objects. It is easy to update components and call component rendering.

    Why get an error on the component – React Bad Setstate() Call

    When developing an app, programmers must carefully write code and prevent mistakes. Experts experience an error on a component due to a bad setstate() call. They focus on the best source to get accurate solutions for the problem. When bad setstate() calls in code, components cannot update when rendering different components.

    It often occurs due to useEffect pass after the rendered component. Hire React developers who will understand the root cause and solve them. Outlet components render first before coding in useEffect.

    	
    import React, {useEffect, useState} from 'react';
    import {Pressable, Text, View} from 'react-native';
    import {useNavigation} from '@react-navigation/native';
    function HomeScreen() {
    const [isSubmitted, setIsSubmitted] = useState(false);
    const navigation = useNavigation();
    const toggleIsSubmitted = () => {
    setIsSubmitted(value => !value);
    };
    useEffect(() => {
    if (isSubmitted === true) {
    navigation.navigate('ProfileScreen');
    }
    }, [isSubmitted]);
    return (
    <View>
    <Pressable
    onPress={() => {
    toggleIsSubmitted();
    }}>
    <Text>Submit</Text>
    </Pressable>
    </View>
    );
    }
    export default HomeScreen;
    

    UseEffect () is the best way to prevent errors and update components easily. Expertise checks every step of code before executing.

    What to avoid while using React Bad Setstate() Call

    A state can change depending on network change and user action. React re-renders components to browsers when the state object is modified. The state object is responsible for keeping different properties. Setstate() function serves as a merge between the previous and new state.

    React engineers consider some essential matters to prevent mistakes. When updating React states, you may encounter scenarios. Beginner developers must focus on the scenario and prevent application development mistakes.

    Also Read: How can you force react components to rerender without calling the set state?

    Reading state after setstate()

    When you try to verify the state after setstate function in React, you cannot update the state. If you don’t have this mistake, you can go further. The count state will increase with the button.

    	
    export default class App extends Component {
    state = {
    count: 0
    }
    handleClick = () => {
    this.setState({
    count: this.state.count+1
    })
    console.log(this.state.count)
    }
    render() {
    return (
    <div className="App">
    <h1>{this.state.count}</h1>
    <button onClick={this.handleClick}>+</button>
    </div>
    );
    }
    }
    

    Calls to setstate are asynchronous; that is the main reason. When calling setstate(), you can request to update the state and go to the next line. In that manner, the state can log in to the console before completing the update request.

    Also Read: How to work with State and manipulate it in React ?

    How to solve

    • Whether you need to acquire state after setstate, you may use a React lifecycle method inside, like useffect() or componentdDidUpdate(), for the functional component.
    • Developers can attain this by employing the callback function within the setstate function.
    • The method does not perform for the useState hook setter function.

    Fill array or object in the wrong manner

    Programmers try to keep objects and arrays in code properly. Code takes input and updates the state with the perspective function. It is something odd. When entering the first name, the last name is undefined. It occurs because of something known as a shallow merge.

    When renewing the state by passing an object within setstate(), the state may update by shallow merging. Shallow merging is also an important perception in javascript in which two objects merge. Properties in the same keys can be overwritten with the same key value.

    	
    addFirstName = e => {
    this.setState({
    name: {
    ...this.state.name,
    firstName: e.target.value
    }
    });
    };
    addLastName = e => {
    this.setState({
    name: {
    ...this.state.name,
    lastName: e.target.value
    }
    });
    };
    

    How to solve

    Use spread operator (…) to build state copy and update state. Such a case is also applicable for array states. So, you can update the array and objects clearly in the body and attain a good result.

    Also Read: How to call loading function with React useEffect only once

    Update state different times repeatedly

    If you wish to update the state at different times in a row, you can try it properly. Developers may increase the count by ten. Only incrementing by one is better compared to incrementing by 10. In that manner, different update calls batch together. The last call function overrides existing calls and increments by one.

    	
    handleClick = () => {
    for(let i = 0;i<10;i++) {
    this.setState((prevState) => {
    return {
    count: prevState.count + 1
    }
    })
    }
    };
    

    How to solve

    Employing the updater function in setstate is the best way to allow one of the arguments to recognize setstate.

    • The updater function greatly reduces the update state at different times.
    • All updates can chain, and updation takes place simultaneously rather than call overriding each other.
    • If a new state value can fix based on the present state value, utilizing the updater function is great for the current state update.

    All these scenarios are identical for the useState() hook. Setstate() is only the setter function of the useState hook in React. Setstate calls batched information within the event handler. In the upcoming version, it will be the default element.

    Developers check the setstate function closely in the class component. An event handler allows the setstate function to call, update, and re-render components. So you can understand the mistake and look at possible solutions to overcome specific issues.

    Schedule an interview with React developers

    Conclusion

    In conclusion, a bad setState() call will cause several issues developing the React application. But, by following best practices, it will make great use of setState(), and these problems can be ignored, making the app run smoothly and flexibly. However, it will provide the function argument that will return a new state that ignores the mutating state, and it will account for the asynchronous nature of the function.

    The above guidelines are very useful for individuals who work with react the first time. If you have doubts about react concept, you can take the help of the leading app development company and acquire the perfect solution. Their expert development team, who is certified and skilled, will help you fix the error and create an application quickly.


    Frequently Asked Questions (FAQs)


    1. What is setState() in React?

    The setState() method will place update methods into the component state, instructing React to re-render a component and its children with an updated state.

    2. How does React handle state changes?

    To make a state change, React provides us with the setState function, which allows you to update the value of the state. However, calling the setState automatically re-renders all components and child components. Hence, we do not need to manually re-render using a rendercontent function.

    3. State difference between the setState() and replaceState() methods

    With a SetState, a current and the previous states are combined. But with a replaceState, it throws out a current state and replaces it with a new one you have given. But, the setState is usually utilized when you must remove only the keys for some reason, but setting them to false or null is the easiest method.

    Book your appointment now

  • How to Upload Files With React

    How to Upload Files With React

    Here you may learn how to upload files using the React framework. This tutorial will show you how to implement file uploads in your React project from the ground up. To receive your API key, you’ll need to sign up for a free Filestack account, but after that, our React Filepicker Component is a plug-and-play solution.

    We have a brand new React app development. However, we’ve already stripped out all of the sample data.

    Example

    	
    import './App.css';
    
    function App() {
      return (
        <div className="App">
    
        </div>
      );
    }
    
    export default App;
    

    Starting, we’ll make a basic upload form for the user to fill out and submit.

    	
    import './App.css';
    function App() {
      return (
        <div className="App">
            <form>
              <h1>React File Upload</h1>
              <input type="file" />
              <button type="submit">Upload</button>
            </form>
        </div>
      );
    }
    
    export default App;
    

    Next, hire React experts, we’ll use a state variable, an onChange event handler for the input element, and a handle change method to remember the user’s file selection throughout the upload process.

    	
    import './App.css';
    import React, {useState} from React;
    
    function App() {
    
      const [file, setFile] = useState()
    
      function handleChange(event) {
        setFile(event.target.files[0])
      }
    
      return (
        <div className="App">
            <form>
              <h1>React File Upload</h1>
              <input type="file" onChange={handleChange}/>
              <button type="submit">Upload</button>
            </form>
        </div>
      );
    }
    
    export default App;
    

    Also Read: React State Management: Everything you need to know

    Now that we know the file the user selected, we can add Axios for initiating HTTP queries, an onSubmit event handler to the form, and a handleSubmit method to upload the file through an HTTP POST request.

    	
    import './App.css';
    import React, {useState} from 'React';
    import axios from 'axios';
    
    function App() {
    
      const [file, setFile] = useState()
    
      function handleChange(event) {
        setFile(event.target.files[0])
      }
      
      function handleSubmit(event) {
        event.preventDefault()
        const url = 'http://localhost:3000/uploadFile';
        const formData = new FormData();
        formData.append('file', file);
        formData.append('fileName', file.name);
        const config = {
          headers: {
            'content-type': 'multipart/form-data',
          },
        };
        axios.post(url, formData, config).then((response) => {
          console.log(response.data);
        });
    
      }
    
      return (
        <div className="App">
            <form onSubmit={handleSubmit}>
              <h1>React File Upload</h1>
              <input type="file" onChange={handleChange}/>
              <button type="submit">Upload</button>
            </form>
        </div>
      );
    }
    
    export default App;


    Output

    This is a crucial need for implementing file uploads in React. We have created a config object to add a ‘content-type’ header to our HTTP request. The ‘content-type’ header must be set to multipart/form-data for file uploads to be successful.

    To use as the body of our POST request, we first need to build a new, empty formData object using the new FormData(). Assuming an API endpoint at http://localhost:3000/uploadFile exists on our backend server, we make a POST request there.

    If you don’t want to set up a server, you can add the file-uploading capability to your app with only two lines of code by signing up for a free account on Filestack and utilizing our file-upload SDKs & APIs.

    Also Read: How to Send Form Data Using Axios Post Request In React

    Conclusion

    A library or package like React-dropzone or React-upload specializing in file uploading is necessary to upload files using React. To implement a file upload or drag-and-drop area in your React project, you may use the component provided by these React component libraries. You are responsible for managing the server-side logic that saves the submitted data to your server or a cloud storage provider.

    Mobile app development companies specializing in React can help you navigate the multiple options and opt for the best solution for your app’s needs. They can also provide expertise in other areas of React development, such as state management, component design, and performance optimization.

    Hence, partnering with a reputable mobile app development company can help ensure your React app has a seamless and reliable file upload process, improving the overall user experience.

    Schedule an interview with React developers

    Frequently Asked Questions (FAQs)

    1. What is the Upload command?

    It is used to identify a log file formatted and uploaded to the server. If the multitool is specified, upload the files to the Lenovo multitool web server. If Lenovo is specified, then upload the files to the Lenovo server.

    2.What are hooks in React development?

    Hooks are the functions that let you “hook into” React state and the lifecycle features from the function components. Hence, hooks in React do not work internally with the classes and let you use React without classes.

    3. How to use JSX in React?

    JSX expressions in React are written inside curly brackets, allowing only things that will evaluate some value, such as string, number, array, and so on. In React, we use className instead of the class to add the classes to the HTML element. Hence, all attribute names in React are written in camelCase.

    Book your appointment now

  • React State Management: Everything you need to know

    React State Management: Everything you need to know

    React State Management enables entrepreneurs to create enterprise apps that are scalable, performant, and maintainable. However, various ways to effectively apply state management in ReacJS apps include component state, context API, React hooks, high-order components, and React state management libraries.

    Although, the state management libraries in React have pre-built code bundles added to React front so that state management of components becomes easy. Thus, there are various states of React components, like global, fetch, UI state, etc., and each has its importance. In this blog, we have in-depth information about React State Management.

    State management in React Enterprise Apps is necessary

    The most important and challenging choice of the business owner is to make their enterprise apps in such a manner that is easy to maintain, reusable, delivers high performance, and, most important, is that an app must have a good scope of scalability.

    React State Management is a well-known topic in the web development domain, and when you have a ReactJS enterprise app, getting in-depth knowledge is necessary. Let’s see how the state management React libraries enable your enterprise mobile app development to match your business goals.


    React Enterprise Apps in React State Management
    React Enterprise Apps in React State Management


    1. Performance

    ReactJS apps might have complexity loading during a frontend due to its re-renders. With React State Management, you can optimize your state updates, which gives better in-app performance and efficiency.

    2. Maintenance

    State Management in React applications that enable you to modularize and that will encapsulate the updates of states. Therefore, you can maintain and debug your codebase. Hence, this maintainability ensures that React app development team will rapidly adapt and understand an application’s state.

    3. Reusability

    Reusing the state across distinct components of React application isn’t easy. Still, using React state management libraries like Redux and MobX, you can share the states across all components f your application.

    4. Scalability

    The poor state management strategy leads to performance bugs and degradation, making it difficult to manage states as applications scale in size and complexity. React provides a well-designed state management strategy to sure that it will scale your ReactJS apps smoothly.

    Also Read: What is Redux architecture in React?

    What are the different approaches in React to State Management?

    ReactJS apps offer speed, flexibility, rich UI, and many more features. Find multiple ways to attain React state management to leverage a state of components in your application.

    1. Component State

    Each React component has its internal state that is used to store and manage data that is specific to that component. The state is controlled using a setState method that updates a component’s state and triggers a re-render.

    2. Context API

    The context API in React is an in-built way to share a state between the components in React without passing the data down the component tree via the props. Hence, it is a useful alternative to use a component state when you must share the state between components not directly connected in the component tree.

    3. React hooks

    It is how to include the state, and other React features in the functional components. The useState and useReducer hooks manage the local component state, while the useContext hook is utilized to access a shared state from Context API.

    4. Custom Hooks

    It is how to extract the state and logic into the reusable functions that multiple components use. Hence, it is a good option for sharing state and logic between the components not deeply nested in the component tree.

    5. High-Order Components (HOCs)

    HOCs are a way to share a state between the components by wrapping a component with another that provides the state. Hence, it is best to share the state between the components not profoundly nested in the component tree.

    6. Render Props

    Render props are the pattern transferred between components by passing the function as a prop that renders a component that requires a state. Hence, it is best for the components not deeply nested in the component tree.

    Also Read: React State vs Props: Introduction & Differences

    Well-known React State Management Libraries

    Some leading libraries are pre-built for state management in ReactJS apps.

    1. Redux

    It is a popular management library for web applications with Angular, React, and other frameworks. It gives a centralized store for managing the state of an application and has a set of rules for predictably modifying that state.

    2. MobX

    A state management library uses observables to track state changes, and it will automatically re-render components when those observables are modified. It is intuitive to use, has minimal boilerplate, has great performance, and is strongly compatible with React.

    3. Recoil

    Facebook developed Recxopi for React applications. It delivers the centralized storage to manage a state of an application and has a set of React hooks for accessing and updating the state. It is simple, flexible, and gives outstanding performance.

    4. Jotai

    Jotai uses atoms and setters to manage an application’s state, focusing on simplicity and performance. It works well with React and also has a small learning curve.

    5. Zustand

    Guillaume Salva developed the Zustand state management library for the React technology, and it uses the simplified Redux-like approaches to manage the state of an application. It has minimal boilerplate code, drives performance, and has a small bundle size. Hence, it is not suggested for complex state management handling.

    6. Rematch

    It is the Redux-based state management library for the React apps. It gives the simplified API for making Redux stores and reducers and hence reduces dependency on boilerplate and will improve developer productivity. It uses less boilerplate code than the traditional Redux and performs amazingly.

    7. Hookstate

    Hookstate is the new state management library for React apps that Rafael Wieland created. Hookstate uses the simplified approach to manage an application’s state and will emphasize performance.

    Also Read: How to Use Push Method In React Hooks?

    8. Valtio

    Valtio state management library utilizes a minimalistic and reactive approach for managing the state of an application. It concentrates on performance and gives productivity to React developers’ apps.

    9. XState

    XState library uses the finite state machine to manage the state of an application, focusing on predictability, testability, and modularity as it needs more time to learn and, due to this, is not perfect for simple state management scenarios.

    10. Unstated

    This state management library is a lightweight state management library that makes use of React context API to transfer the state between components. It is a simple alternative to ReduX and MobX, used for small or easy apps. It could be better for large-scale projects and has potential performance issues as it depends on Context API in React, which sometimes slows down in certain matters.

    11. React-router

    Ryan Florence and Michael Jackson develop this library for routing in React. React Router gives a declarative way to handle the routing in React apps and will focus on flexibility, scalability, and performance. However, it is complex to set up and configure and sometimes leads to performance issues.

    12. React-stately

    Adobe, created by the React-stately state management library, is its core and provides the set of hooks and components used to manage the complicated UI states, and it is found in form inputs, menus, and dropdowns. It is designed specifically to build an accessible UI with a unique performance and has a composable API.

    13. React-power hooks

    Fabien Juif builds this library for reusable hooks for React framework. Hire React Experts that provide the set of hooks and will manage UI states like loading, error handling, and form validation with React power hooks.

    14. React-use-state-updater

    Jed Watson creates this library which gives a hook to manage the state of React component; with this, it provides good performance and developer productivity. Hence, it is less intuitive to use than the in-built state hook.

    What are the different ReactJS States?

    Here are the multiple ReactJS states defined below:

    1. Local State

    The state is certain to only one component and is managed using a setState method. It is usually used to store component-particular data only within that component.

    2. Global State

    It is shared between the various components and manages a whole application’s global data. It is saved in a centralized system, like the Redux store, and accessed by components via a store’s state.

    3. Fetch State

    It manages data fetched from a remote server or API. The fetch state is normally used to store data about a state of the fetch operation like the data has loaded, if there is an error, or if data is being loaded.

    Also Read: React: How To Utilize Context API With Class And Functional Components

    4. UI State

    It manages data that affects how UI is displayed-data related to the user interface. The example of UI state makes the form visible, or the modal is open, currently selected tab or scroll position.

    5. Server-side Caching State

    It stores the state on the server and is used to cache data for React performance optimization. The server-side caching state is utilized to save the data that is not frequently modified, such as data about products or user profiles, to deduce the number of round trips to the server.

    6. Mutable State

    refers to data that can change over time and is typically stored in a component state using the useState hook or in the class component’s state. The mutable state is simple, like the string or number, or complicated, like the array or object. When the state updates, React will re-render the component and any child component which depends on that state.

    Also Read: What is Flux architecture in React?

    7. Complex State

    refers to the data derived from the other data and is usually not directly mutable. Rather than being stored in a state, a complicated state is calculated utilizing a component’s props and other state variables. Examples include calculation results, filtered or sorted versions of an array, or the current state of an animation. As the complicated state is not directly mutable, it does not trigger re-renders of the components when it modifies.

    Conclusion

    React state management is essential for entrepreneurs to make scalable, performant, and robust React applications. It keeps the application in sync with the user interface, as the in-built and third-party options handle and manage the state of React application. Hence, the wide range of solutions, your choice depends on the project requirements and your development team’s size.

    We at BOSC Tech Labs use the best components for React State Management library, which is helpful and valuable in your project. Our React expertise will make the React apps that will enhance a business presence and improve your app’s performance in the market. Let’s connect with the leading mobile application development company for the next project!

    Schedule an interview with React developersFrequently Asked Questions (FAQs)

    1. Do you need state management in React apps?

    React applications are created using the components and manage their state internally, and it works well for applications with some components. When the application grows larger, managing states shared across components becomes difficult.

    2. What is state management pattern?

    State management is the design pattern that aims to perfectly share the state data across React components and separate domain representation from state management. Hence, its pattern is applied by well-known web frameworks like Redux, Flux, or Vuex.

    3. What is the need for state management techniques?

    State management is the technique used to maintain the user and page information over the various requests while browsing the web. HTTP is a stateless protocol. Hence, it does not store any information about the user on a web page; the general need is for data to be maintained while navigating the website.

    Book your appointment now