• What is the purpose of using the super constructor with props argument in React?

    What is the purpose of using the super constructor with props argument in React?

    React is a free, open-source JavaScript library for UI design. It showcases components written in JSX in React, introducing the concept of props. Props are mainly used to pass data from the parent-to-child components.

    The parent component can only update these props. It is read-only for child components. With this keyword, we may need props inside the child component constructor.

    The Super () function invokes the constructor of the parent class. Using the Super constructor with the props argument allows access to this.props in the constructor function. You can hire React experts to use the super constructor with props argument.

    What is a constructor?

    In a class, a constructor is a method automatically invoked when an object of that class is created.

    	
      Constructor(props){ super(props); 
    }
    

    A constructor is not required for every React component. It needs to call super () inside the constructor to set properties or use ‘this’ within the constructor to call super ().

    We must remember that React’s setState () method cannot be used directly in the constructor (). Use ‘this.state’ to set the initial state in the constructor. The constructor uses this.state to set the initial state, and other methods should use set.state ().

    Define Props

    In React, props are properties passed to components from parent components. It can be used to pass values and functions to components which can then be used to render the component. When creating a component in React development that makes an app faster, extending an existing component and passing additional components is common. This is where the advanced constructor with the props argument comes in.

    Super Constructor behavior with Props argument in React

    Subclass constructors cannot use this reference until the super () method is called, as with ES6 subclasses. The main reason to pass a props parameter to the super () call is to access this.props in your child builder.

    Using an advanced constructor with the props argument, the component can inherit its parent’s properties and access the new props passed in it. This allows a component to take advantage of the properties of both its parent component.

    New props in the render method are particularly useful in situations where components need to access values or functions from the parent component to render content.

    Also Read: React State vs Props: Introduction & Differences

    Main purpose of using the super constructor with props argument in React

    The purpose of using a super constructor with the props argument is to allow the component to inherit properties of the parent component and pass additional properties as arguments to the component.

    This is especially useful in React when building components that need access to the parent component’s values or functions to render content. Components can access both the parent component’s properties and the new props using an advanced constructor with the props argument. This makes components more flexible and dynamic.

    • There is nothing complicated about using super (props). We need to call super (props) in the constructor method of our child class component.
    • This method, called subclass constructor, cannot be created using this reference until super ().
    • The same applies to ES6 subclasses as well.
    • The main reason for passing the props parameter to the super () call is to access this.props in your child constructor.
    • Super () is a requirement while using a function. Constructor () inside a React component.
    • For example, super (props) calls a reaction.
    • Component constructor passing props as arguments.

    Also Read: How to Use Push Method In React Hooks?

    What is Super in React?

    The same concepts we saw above apply when you create React components. You are extending a React component. When you extend a Component, you are inheriting this.props, this.context, and other prototype functions like setState.

    So if you don’t call super (props) in the constructor, this.props will not be defined in the constructor function. When implementing a constructor for a subclass React.Component you should call super (props) before any other statement. Otherwise, this.props will not be defined in the constructor, which may lead to bugs.

    Introduction to Super in React

    • The super keyword is a reference variable used to refer to a parent class object.
    • Super can be used to call parent class variables and methods.
    • Variables and methods to be called via super keywords can be done anytime.
    • Nothing will happen if a superclass variable or method is not explicitly called using the super keyword.

    What is Super () in React?

    • Super () is a reference variable that references the parent class constructor.
    • Super () can only be used to call the parent class’s constructor.
    • The super () call must be the first statement in the class constructor. Derived(Student)
    • If the constructor does not explicitly invoke the superclass constructor using super (), the compiler automatically injects a call to the constructor that takes no superclass arguments.

    Also Read: Why does React need a key prop?

    Is the constructor still relevant?

    React is an extremely powerful JavaScript framework. Understanding how a React component lifecycle works will unlock the potential and power of the React JavaScript Framework.

    As we have seen in this blog, when you create a React component, the constructor is one of the unsupported properties in functions.

    Constructors allow you to define variables and initialize variables for convenience. We don’t need to define a constructor for the component in JavaScript. We won’t fetch data from the constructor and don’t need an aggregate method to set the default state.

    It is important to know the rules in order to know which ones can be broken. It’s a good way to learn when you might want to create multiple instances of classes with different values. If you are confused about how to use the super constructor with props, then you can consult the leading mobile app development company in USA, which will guide you in a proper way.

    Schedule an interview with React developers

    Summary

    The Super () function calls the constructor of the parent class. It is used when we want to access some variables in the parent class. It helps to return an object that represents the parent class. This is the correct way to use when the child and parent classes come from the same field. The super keyword is used to call the parent class’s constructor to access the properties and methods of the parent.

    In this article, you have learned the objective of utilizing the super constructor with props argument in React framework. Consult the best React app development team for scalable, flexible, and reliable mobile app development. BOSC Tech Labs has an expert team of app developers who are dedicated to you, and it helps props argument in React with the correct strategies, approaches, and practices.


    Frequently Asked Questions (FAQs)


    1. What is the purpose of super props?

    In a constructor function, there is a method called props. However, what the super() function does is, calls the constructor of the parent class. As there is nothing complex in utilizing the super props, we have to call in the constructor method of the child class component, such as so: class Checkbox Extends React.

    2. Do I need constructor props in React development?

    If you do not initialize the state and you do not bind methods and do not need to integrate the constructor for your React component. The constructor of React component is known before it is mounted. At the same time, you are implementing the constructor for React. Component subclass, you call the super (props) before any other statement.

    3. What is the purpose of Prop types?

    PropTyes is the mechanism that ensures a passed value is of the correct datatype if we do not receive any error at the end of our app by the console, which defines that it is very complicated to deal with an application.

    Book your appointment now

  • Lazy Loading with Suspense in React JS

    Lazy Loading with Suspense in React JS

    While developing the React applications, we usually use images and videos. We also install third-party packages/libraries, make API calls, and can do various things. It automatically increases the time to load our mobile app development. And it results in a poor user experience. That’s where the lazy loading comes into place. Hence, it lets us lay content before displaying it in the application.

    We also avoid the pre-content while it is still out of view, and it will concentrate on whole resources on content in the view. In this guide, we will see how to implement lazy loading and code splitting functionality, which allows us to control code splitting without requiring additional libraries.

    What is lazy loading in React?

    It typically bundles the entire application at once, loading everything for us, including the entire web app pages, images, content, and much more, which may cause a slow load time and generally poor performance, depending on the size of the content and the available internet bandwidth at the time.

    Thanks to lazy loading, specific components can only be loaded when required. Usually, we divide the code into logical parts that can be lazy loaded with the material.

    The technique of utilizing carefully monitored experiments to improve a web application’s performance is known as web optimization. Let’s look at a straightforward analogy to grasp better how lazy loading React components contribute to website optimization.

    As a result, only a piece of a web page renders when a user accesses it rather than the complete page. The remaining webpage won’t load until the user scrolls to that area, thanks to React lazy loading. If you want to use lazy loading in React development, you can hire React developers who have complete knowledge and will enhance your business app.

    Benefits of lazy loading React component

    Performance is the main advantage of lazy loading in React making app development faster. Our application will run faster and require less DOM load time if we load less JavaScript code into the browser. Users can access a web page even if the content has not yet been loaded.

    1. A quicker start-up time:

    To enable a quicker initial page load time, React lazy loading helps lower the page weight.

    2. An improved user experience:

    An application’s user experience is enhanced by React lazy loading. Effective user experience (UX) aids customer retention and revenue growth.

    3. Consuming less bandwidth:

    Images that load slowly on demand can save data and bandwidth. Users who don’t have access to fast internet or large data plans will find this to be especially helpful.

    4. Less effort required of the browser:

    When React lazy loads images, browsers do not need to process the images until users scroll to that page area and request them.

    Dynamic imports in React

    This can make utilizing your programme extremely difficult and painfully slow. The bundle can be divided into smaller parts via code splitting, and the most crucial chunk can be loaded first, followed by a lazy loading of the other secondary portions.

    Using dynamic imports, which use the import() syntax, is one method for dividing code. A module is loaded by calling import(), which relies on JavaScript Promises. Therefore, it returns a promise that is either accepted if the module can be loaded or denied if it cannot.

    	
    import ('moment’)
    .then(({default:moment}})=>{
    const tomorrow=moment().startOf('day').add(1,'day);
    return tomorrow.format('LLL');
    })
    

    Also Read: Top 8 React Boilerplates in 2023

    What is React lazy?

    With the help of code splitting and the new React lazy function, you may load React components in a lazy fashion without the aid of any additional third-party libraries. A third-party library was formerly required to accomplish this.

    The “React lazy()” function is now a part of the core React component library. We can lazy load React components with ease as a result of this.

    Rendering React components that are loaded using the dynamic import() technique is simple with “React lazy().” The bundle containing the component only loads when the component is loaded since the components are rendered as ordinary components.

    A function that must invoke a dynamic import is sent to React lazy() (). A Promise that resolves to a module with a default export that includes a React component must be returned by this dynamic import.

    	
    import OtherComponent from './OtherComponent';
    

    What is the Difference Between Dynamic Import and Regular Import?

    What distinguishes a dynamic import() from a standard import()? Between these two imports, the dynamic import is the primary distinction ()
    let OtherComponent = undefined;

    	
    if (false) {
      OtherComponent = React.lazy(() => import('./OtherComponent.js'));
    }
    

    When calling the component on regular import(), you import the component:

    	
    import AB from './AB.js';
     
    function App() {
      return <AB/>
    }


    import A from './A.jsx';
    import B from './B.jsx';
    
    function AB() {
      return <A/>; 
    }
    

    Also Read: Understanding React Native New Architecture in 2023

    What is React Suspense?

    A React component called React Suspense allows components to “wait” for something before rendering. React Suspense only supports dynamically loading components using React Lazy, which is one use case (). It will later support other use cases like data fetching.

    Only when a component constructed with React lazy() is rendered is it loaded, as a result, while the lazy component is loading, you must provide some placeholder content. For example, a loading indication would let users know something is loading while waiting.

    While we wait for the lazy component to load, we can display a loading indication using the React Suspense component.

    	
    import React, { Suspense } from 'React';
     
    const OtherComponent = React.lazy(() => import('./OtherComponent'));
     
    function MyComponent() {
      return (
        <div>
          <Suspense fallback={<div>Loading...</div>}>
            <OtherComponent />
          </Suspense>
        </div>
      );
    }


    What may be used to wrap component imports so that they can be loaded slowly?

    Even more, than one lazy component can be wrapped in a single React Suspense component.

    import React, { Suspense } from 'react';
    
    const OtherComponent = React.lazy(() => import('./OtherComponent'));
    
    function MyComponent() {
      return (
        <div>
          <Suspense fallback={<div>Loading...</div>}>
            <OtherComponent />
          </Suspense>
        </div>
      );
    }


    Also Read: How to Scroll to a List Item in React?

    Avoiding Fallback in React Suspense

    We’ve seen how React Suspense can enhance user interaction while lazy loading a component in React with the component supplied to the fallback props. What happens, though, if the component used as a fallback is degrading the user’s experience?

    Let’s look at a code example to see what happens when we utilize the React Suspense component without giving a fallback prop. This already defeats one of the purposes of lazily loading a React component by producing a poor user experience.

    	
    import React, { Suspense } from 'React';
     
    const OtherComponent = React.lazy(() => import('./OtherComponent'));
     
    function MyComponent() {
      return (
        <div>
          <Suspense>
            <OtherComponent />
          </Suspense>
        </div>
      );
    }
    

    Why do we keep getting errors? If not by deleting the fallback prop from the Suspense component, how else are we supposed to prevent the component from being sent to the fallback prop?

    Using Suspense

    Loader.js

    	
    const style = {
      height: "100vh",
      display: "flex",
      justifyContent: "center",
      alignItems: "center",
    }
     
    const Loader = () => {
      return (
        <div style={style}>
            <h1>Loading...</h1>
        </div>
      )
    }
     
    export default Loader;
    

    MyComponent.js

    import React, { Suspense } from 'react';
    import Tabs from './Tabs';
    import Loader from './Loader';
    
    const Comments = React.lazy(() => import('./Comments'));
    const Photos = React.lazy(() => import('./Photos'));
     
    function MyComponent() {
      const [tab, setTab] = React.useState('photos');
       
      function handleTabSelect(tab) {
        setTab(tab);
      };
     
      return (
        <div>
          <Tabs onTabSelect={handleTabSelect} />
          <Suspense fallback={<Loader />}>
            {tab === 'photos' ? <Photos /> : <Comments />}
          </Suspense>
        </div>
      );
    }


    Comments will be suspended when users move the tab from “pictures” to “comments” in the code example above. Until Comments have fully loaded, the user will then see a loader. Given that the Comments component isn’t yet prepared to render anything, this makes reasonable. React is forced to display the Loader above in order to maintain consistency in the user experience.

    	
    function handleTabSelect(tab) {
      startTransition(() => {
        setTab(tab);
      });
    }
    

    You are informing React that changing the tab to “comments” is a transition that might take some time rather than an urgent upgrade.

    Also Read: Integrating Google maps with React Applications

    Error Handling for React Lazy

    As was already explained, while using React lazy, the import() function produces a promise (). Several factors, including network failure, file not found issues, file path errors, and others, can cause this promise to be refused.

    	
    import React, { Suspense } from "React";
     
    const LazyComponent1 = React.lazy(() => import("./OtherComponent1"));
    const LazyComponent2 = React.lazy(() => import("./OtherComponent2"));
    const LazyComponent3 = React.lazy(() => import("./OtherComponent3"));
    import ErrorBoundary from "./error.boundary.js";
     
    const MyComponent = () => (
        <div>
            <ErrorBoundary>
                <Suspense fallback={<div>Loading...</div>}>
                    <LazyComponent1 />
                    <LazyComponent2 />
                    <LazyComponent3 />
                </Suspense>
            </ErrorBoundary>
        </div>
    );


    Error Boundaries can manage recovery, handle errors, and present a pleasant user experience. As demonstrated in the code example above, Error Boundaries can be used anywhere above a lazy component to display an error state when there is a network error, a file not found, a defect, or a file path issue.

    Route-based lazy loading in React

    You may accomplish route-based code-splitting without relying on an external package using React. lazy() and React.Suspense. Your app’s route components can easily be changed to lazy components, and then you may wrap each route with a suspense component.

    	
    import React, { Suspense } from 'React';
    import { Router } from '@reach/router';
    import Loading from './Loading';
    
    const Home = React.lazy(() => import('./Home'));
    const Dashboard = React.lazy(() => import('./Dashboard'));
    const Overview = React.lazy(() => import('./Overview'));
    const History = React.lazy(() => import('./History'));
    const NotFound = React.lazy(() => import('./NotFound'));
    
    function App() {
      return (
        <div>
          <Suspense fallback={<Loading />}>
            <Router>
              <Home path="/" />
              <Dashboard path="dashboard">
                <Overview path="/" />
                <History path="/history" />
              </Dashboard>
              <NotFound default />
            </Router>
          </Suspense>
        </div>
      )
    }
    

    Schedule an interview with React developers

    Conclusion

    Using lazy loading is a wonderful technique to improve page performance and keep visitors on your site. It might assist you in developing effective and user-friendly solutions if used properly.

    Code splitting and lazy loading React components have never been easier, thanks to React. lazy() and React.Suspense. With these features, boosting your React app’s performance and enhancing the user experience is simpler than ever.

    Hence, with lazy loading and suspense, React developers can quickly create and deliver a high-quality mobile app that retains the users’ attention. However, if you face any issues while integrating this function, you can take the help of a mobile app development company with an expert team who will happily aid you. The team will also try their best to give the desired outcomes to their valuable clients. Get in touch with us for more details!


    Frequently Asked Questions (FAQs)


    1. What is suspense in lazy loading?

    Suspense is a component required by a lazy function that is usually used to wrap the lazy components. The multiple lazy components are wrapped with a suspense component. Hence, it takes the fallback property, which accepts a React element you want to render as lazy components are being loaded.

    2. Does React lazy enhance performance?

    React. Lazy () is a vital tool for optimizing the performance of React apps. It allows the engineers to import the components dynamically, reducing the initial bundle’s size and improving the app’s performance.

    3. What is the difference between React suspense and lazy loading?

    The React. lazy function allows you to import the dependencies dynamically and renders the dependency s component in only one line of code. However, the lazy components are rendered inside the suspense component, which aids you in reflecting the fallback content while the lazy component loads.

    Book your appointment now

  • React Hooks Best Practices in 2026

    React Hooks Best Practices in 2026

    Before React, class-based items had access to the services and lifecycle methods. Function-based components are therefore referred to as “thin, or solely presentational,” as they cannot access state and lifecycle activities. However, function-based components have advanced to the status of first-class React citizens since the introduction of React Hooks. Additionally, several businesses provide solutions in React development.

    Mostly, React consists of two parts. The first is components containing the HTML code, and the second is an HTML document where all your components can be rendered. In this blog, we will discuss some React Best practices of hooks that you should use in your mobile application development to make your app high-quality and feature-rich.

    Best Practices for React Hooks in 2024

    One of the most frequently used front-end JavaScript frameworks is React. It is relatively non-opinionated, in contrast to other frameworks like Angular. As a result, it is entirely up to you how you would like to create or organize your React code. The strategies discussed in this article can help your React application run more efficiently.

    Step 1: Swapping Out Classes For Functional Parts And Hooks

    You may utilize category or functional components along with hooks in React. However, you should utilize essential features and hooks more frequently since they provide code that is shorter and easier to comprehend than classes.

    The class component will show data from NASA API.

    However, the same task is performed as the class component, it is simpler, more straightforward, and easier to comprehend, all of which improve the developer experience.

    Step 2:Prevent Using “State” (If Possible)

    React state maintains a record of the data, and when it changes, it causes the React element to render again. Therefore, avoid utilizing information as much as possible while developing React applications because the more state you utilize, the more information you have to manage across your project.

    It reveals state only when essential is one method of reducing its usage. For example, if you are retrieving user information from an API, keep the entire user model in the state rather than just the individual fields.

    Also Read: Integrating Google maps with React Applications

    Step 3:Group Documents About The Same Element Into A Single Folder

    Choose a component-centric project structure when making your decision. This entails putting all the documents about one component in a single folder.

    Create a folder named navbar that contains the Navbar component itself, the style sheet, and any additional JavaSript and asset files required by the component, whether you were making one.

    It is simple to reuse, distribute, and debug an element when all its files are in a single folder. However, you need to access one folder to examine how a component functions. Hire Rect experts who will integrate this functionality into your application.

    Step 4:Try Not to Use Indexes as Crucial Props

    To identify a specific item in an aggregate, React employs keys. For example, React can identify which element in the array has been modified, added, or deleted using keys.

    When displaying arrays, you may frequently utilize the number as the key.

    To guarantee that the identification of the dropdown list is retained, the approach uses a particular feature as the index.

    Step 5:When possible, choose fragments over divs

    The code returned by React components libraries must be contained in a single element, most frequently a div or a React fragment. When feasible, choose snippets instead of whole sentences.

    Using <div> expands the DOM, especially in large projects, because the more elements or DOM nodes your webpage has, the more storage it requires and the more energy a browser must expend to load it. This causes a slower website load time and a worse user experience.

    Not utilizing <div> tags when delivering a single element is one example of doing away with extra <div> tags.

    Step 6:Adhere to Naming Customs

    To distinguish constituents from other JSX files in React that are not components, you must always name components in PascalCase. TextField, NavMenu, and SuccessButton are a few examples.

    For functions specified inside React components, such as handle input () or show element, use camelCase ().

    Step 7:Eliminate repetitive code

    If you find yourself writing duplicate code, make the changes necessary to make it into reusable components.

    Instead of continuously putting the code in every element that needs a menu, it makes sense, for instance, to construct a component for the main navigation.

    The benefit of a component-based design is that. You may divide your project into manageable pieces that you can utilize throughout your application.

    Also Read: Understanding React Native New Architecture in 2023

    Step 8:Make Props Object Destructible

    To supply the prop name, utilize object destructuring rather than providing the props object. Doing this means you no longer need to remember where you put the component object each moment you need it.

    Step 9:Using Map, Render Arrays Dynamically

    To dynamically generate repeated HTML blocks, use map (). For instance, you may present a list of objects in tags using a map () function in React.

    Step 10:Test each React component by writing tests

    Create tests for the elements you make to lessen the likelihood of mistakes. Testing ensures that the components function as you would expect. Jest, one of the most popular testing frameworks for React, offers a setting in which you may run your tests.

    Hooks should not be used inside loops, situations, or nested functions; instead, they should only be invoked from the highest management of a function component. Furthermore, the behavior of your element must be consistent. Therefore, this ensures that Hooks are performed in the same sequence each time the element is shown.

    This post has provided insight into how simple and practical it is to apply these hooks in your modern functional parts. Be aware that React would not construct these hooks to render our lives as programmers harder and more complex; instead, they did it so that we could benefit from them and use them to simplify our developers’ lives and create apps that perform better.

    Schedule an interview with React developers

    Conclusion

    This excellent improvement to the React foundation makes it easy to mix, reuse, and distribute React code in ways that were not previously feasible. Since Hooks change how expertise builds React components, absolute favorite practices for designing React Hooks are necessary to allow development and collaboration across many teams.

    Choosing React Hook’s Best Practices is a vital development process. Hence, engineers have spent little time dealing with complex code that uses hooks practices. At BOSC Tech Labs, we use the best methods of React hooks in 2024, which will be helpful and valuable in your project. Our development team will develop the React apps that enhance the business presence and improve your application’s performance in the market. Let’s talk about creating the React applications for your next project.

    Frequently Asked Questions (FAQs)

    1. Is it better to use React Hooks?

    Hooks make React much better as you have simple, easy code that implants similar functionalities faster and more effectively. Implement the React state and lifecycle methods without writing the classes.

    2. Why use hooks rather than classes?

    Hooks allow you to utilize the local state and other React features without writing the class. Hooks are the particular functions that let you “hook onto” React state, and the lifecycle of React has the functionality inside the components. Hence, Ract does not track hooks that run out of order.

    3. What is the primary used React Hook?

    The useState hook is the primary and useful React hook. It has in-built hooks, which must be imported from React to be used in our application. Hence, to initialize this state, we must declare both state and its updater function, which will pass an initial value.

    Book your appointment now

  • How to create a Responsive Carousel in React JS

    How to create a Responsive Carousel in React JS

    You must be familiar with creating a responsive Carousel when using React JS. The options are always unique and establish a new thing for a series of images to work. It includes custom markup, text, and a series of images. It carries out supportive options and works with previous/next controls and indicators. Of course, you can hire React developers who are well-known for creating carousels in React JS.

    Here, you can find lists of steps to explore and create a responsive carousel in React JS that benefits web development.

    • Understand the structure
    • Implement a simple carousel in React
    • Add some styling
    • Add the Carousel to the App
    • Configure the active item
    • Implement the indicators
    • Carousel/Slider with auto cycle
    • Pause/Resume the Carousel/Slider on mouse hover/mouse leave

    Step 1: Recognize the structure

    As you can see, Div. The inner will translate to display element #1. We can easily use the translateX property for the Div. Inner to adjust accordingly. If you want to show element number 1, Div. Inner will have transform: translateX(0%)

    If element #2 is visible, the Div. Inner will have a transform: translateX(-100%)

    And if Item #3 is visible, then Div.Inner will convert: translateX(-200%)

    Step 2: Implement a simple carousel in React

    I assume you understand React app development and how to set up a React app.

    Let’s start by creating a Carousel.js with the following code:

    	
    import React from "react";
    import "./Carousel.css";
    export const CarouselItem = ({ children, width }) => {
    return (
    <div className="carousel-item" style={{ width: width }}>
    {children}
    </div>
    );
    };
    
    const Carousel = ({ children }) => {
    return (
    <div className="carousel">
    <div className="inner" style={{ transform: "translateX(-0%)" }}> 
    {React.Children.map(children, (child, index) => {
    return React.clone Element (child, { width: "100%" });
    })}
    </div>
    </div>
    );
    };
    export default Carousel;


    We need to create two components: Carousel & CarouselItem

    The Carousel component will be the main controller to control the items

    The CarouselItem component will display the item itself. Now we need to pass the width property to this element.

    It will create Carousel.css in the next step

    Iterate over all child elements. This will be the CarouselItem component and adjust the width property. Now we will set the width to 100%. This means we will only have one element visible. This solution will allow us to control the lifecycle of React components of the Carousel component later. You can read more about React. Children. Map and React.cloneElement to understand.

    Also Read: Parse CSV File by Using React JS

    Step 3: Add Style

    • We need to hide overflow content inside, only showing active element
    • This line is extremely important so that our article is on 1 line; otherwise, it will default to a new line.
    • Added transition for Div. Inner, so it animates when the active element changes. The element’s type. You can do whatever you want here, but
    • make sure the screen is inline-flex or inline-block to keep them on 1 line.
    	
    .carousel{
        overflow: hidden;
    }
    .inner{
        white-space: nowrap;
        transition: transform 0.3s;
    }
    .carousel-item{
        display: inline-flex;
        align-items: center;
        justify-content: center;
        height: 200px;
        background-color: green;
        color: #fff;
    }
    

    Step 4: Add Carousel to App.js

    Now we can see the first version of the component by adding it to App.js

    	
    import Carousel, { CarouselItem } from "./components/Carousel";
    
    
    function App() {
    
    
      return (
        <div className="App">
          <Carousel>
            <CarouselItem>Item 1</CarouselItem>
            <CarouselItem>Item 2</CarouselItem>
            <CarouselItem>Item 3</CarouselItem>
          </Carousel>
        </div>
      );
    }
    
    
    export default App;
    

    Step 5: Configure Active Item

    Let’s see how we control the active item in the Carousel component. As I mentioned earlier, we will use translateX to move the Div. Inner to show the active element. Let’s see how translateX works in Carousel.js, and then we may have a solution. You can see that the active element is updated when the translated value is changed, so we need to implement logic to change this value. Let’s update our Carousel.js like this.

    	
    import React,{useState} from "react";
    
    
    import "./Carousel.css";
    
    
    export const CarouselItem = ({ children, width }) => {
    
    
        return (
            <div className="carousel-item" style={{ width: width }}>
                {children}
            </div>
        );
    
    
    };
    
    
    const Carousel = ({ children }) => {
        const [activeIndex,setActiveIndex]= useState(0)
        return (
            <div className="carousel">
                <div className="inner" style={{ transform: `translateX(-${activeIndex*100})` }}>
                    {React.Children.map(children, (child, index) => {
                        return React.cloneElement(child, { width: "100%" });
                    })}
                </div>
            </div>)
    }
    
    
    export default Carousel;
    

    We need to manage the active state; we use the useState hook here. The key is the line 20 translateX(-${activeIndex * 100}%). Why do we use 100? Because we have 100% width for each item. For example, if we have two active elements (50% width for each) and we need to drag each element, the number should be 50 => 50%. Let’s find out the relationship between them:

    • 1 active element, width 100% => translateX(-${activeIndex * 100}%)
    • Two active elements, width 50% and slide one by one => translateX(-${activeIndex * 50}%)
    • 2 active elements, 50% width and sliding both => translateX(-${activeIndex * 100}%)

    Step 6: Implement the Indicators

    In the previous step, we finished the element logic working, but it still doesn’t work because we need control to trigger the update. We will have a method to update the new active index called update-index ().

    	
    import React,{useState} from "react";
    
    
    import "./Carousel.css";
    
    
    export const CarouselItem = ({ children, width }) => {
    
    
        return (
            <div className="carousel-item" style={{ width: width }}>
                {children}
            </div>
        );
    
    
    };
    
    
    const Carousel = ({ children }) => {
        const [activeIndex,setActiveIndex]= useState(0)
    
    
        const updateIndex =(newIndex)=>{
            if(newIndex < 0 ) {
                newIndex = 0
            }else if(newIndex >=React.Children.count(children)){
                newIndex =React.Children.count(children)-1
            }
            setActiveIndex(newIndex)
        }


        return (
            <div className="carousel">
                <div className="inner" style={{ transform: `translateX(-${activeIndex*100}%)` }}>
                    {React.Children.map(children, (child, index) => {
                        return React.cloneElement(child, { width: "100%" });
                    })}
                </div>
    
    
                <div className="indicators">
                    <button
                      onClick={()=>{
                        updateIndex(activeIndex - 1)
                      }}
                    >
                       Prev
                    </button>
                    <button
                      onClick={()=>{
                        updateIndex(activeIndex + 1)
                      }}
                    >
                     Next
                    </button>
    
    
                </div>


            </div>)
    }
    
    
    export default Carousel;
    

    Step 7: Carousel/Slider with auto cycle

    If the active element is the first, we will jump to the last element when the user clicks on the previous button. Our approach will use setInterval(). You can check how it works here. Since the conveyor belt is in an automatic cycle, it becomes an infinite carousel.

    If the active element is the last, we will return to the first element when the user clicks the next button. Please review the update-index () method. We have a carousel that automatically rotates after a certain amount of time.

    Also Read: How to Use Push Method In React Hooks?

    Step 8: Pause/resume carousel/cursor when hovering over/leaving

    Usually, the carousel will allow users to hover to stop scrolling, so they have more time to read the content. We can have it after this step. How to pause setInterval()? The API doesn’t help us do that.

    My solution is to keep the interval running, but we can have a state to check if the user hovers over the carousel; we don’t need to trigger the update-index () method.

    Step 9: Mobile swipeable carousel

    Swiping is a must-have feature on a carousel, especially on a responsive web app. It can be done easily by this step. We can do it manually using onTouchStart and untouched, but I will use a library to reduce the complexity. This will provide us with easy-to-use event handlers. Let’s see how I apply it to our Carousel.js. So, it would be best if you noticed the swipeable carousel changes in the React JS value and set out a new thing forever.

    	
     const [paused,setpaused]=useState(false)
    
    
        const updateIndex =(newIndex)=>{
            if(newIndex < 0 ) {
                newIndex = 0
            }else if(newIndex >=React.Children.count(children)){
                newIndex =React.Children.count(children)-1
            }
            setActiveIndex(newIndex)
        }
    useEffect(()=>{
        const interval= setInterval(()=>{
            if(!paused){
                updateIndex(activeIndex +1)
            }
        },1000)
    
    
        return ()=>{
            if(interval){
                clearInterval(interval)
            }
        }
    })
    
    
        return (
            <div
            className="carousel"
            onMouseEnter={()=>setpaused(true)}
            onMouseLeave={()=>setpaused(false)}
            >
    

    Schedule an interview with React developers

    Conclusion

    Indeed, one can develop a responsive carousel in ReactJS development with the perfect steps. Here, we have learned all the right steps for a carousel component in React. While building the carousel component, React component libraries play a crucial role. As a leading mobile app development company, we deliver the best content, making your procedure smooth, fast, and flexible. You can share your queries, doubts, and suggestion in the comment section.

    Feel free to get in touch with us!

    Frequently Asked Questions (FAQs)

    1. What is React responsive carousel?

    React-Responsive-Carousel is the Javascript or React package used for frontend applications to view image or video galleries, sell products, and view related blogs. Hence, the carousel component develops the slideshow for the images or text slides in a presentable manner in a cyclic way.

    2. What is the format of the carousel?

    The carousel format will help you to view two or more images or videos in a single ad; each has its headline, description, call to action, and link. To scroll via the carousel, people swipe on their mobile devices or click the arrows on their computer screen.

    3. How do you make the carousel accessible?

    The major carousel accessibility consideration for sighted users is not to make it auto-play. If you must create the carousel auto-play, you must give the pause or stop button. If you use the pause o stop button, place the previous carousel, and provide the descriptive link just like the text, “Pause animated content”.

    Book your appointment now

  • Use the Map () Function to Export JavaScript in React

    Use the Map () Function to Export JavaScript in React

    The most popular data structure inside the programming community is an array. An array would be a group of objects used to store data linearly. Each element of an array is kept in its index, which is used to access and manage the array.

    Arrays play a significant role in contemporary front-end programming. Typically, arrays are used to hold the processed data from the front end. Working with arrays may occasionally be challenging. Enterprises is now looking hire ReactJS expert from the leading app development company.

    Consequently, JavaScript has included several built-in array functions. Each array technique was developed with a specific purpose in mind. The primary objective is to make the developer’s job easier.

    The most frequent array technique in JavaScript is the map () function. It now plays a significant role in modernization. This tutorial will talk about JavaScript’s map function and how to utilize it with React.js.

    Overview of the Map () Function

    You will engage with arrays in use cases while developing React applications, which also benefits web development. These scenarios may entail presenting a set of data objects in your element, answers from your back-end services, or information from an external API.

    By iterating over and gaining access to certain items, the map() method allows you to alter the elements of an array. You will discover how to use and export the map() function in this manual. Use the map() method to cycle through an array and modify or update the data elements. The map() method in React is most frequently utilized to present a list of information to the DOM.

    Attach the map() method to the array you wish to iterate to use it. The callback provided as a parameter to the map() method is executed for every element in the array. You can access the array, the current component, and the current index via callback arguments.

    The map() function also accepts a second parameter, which you can supply to use within the function. The returned data is next appended to a new array each moment the function is executed.

    	
    let new_array = arr.map(function callback( currentValue[, index[, array]]) {
    	// return element for new_array
    }[, thisArg])
    

    Take a look at the example below.

    	
    const num = [3, 8, 11, 7, 5];
    const num2x = num.map((n) => n * 2);
    console.log(num2x); // [6, 16, 22, 14, 10]
    

    Each React component library of the num array is increased by two, in this case, before being put inside a new array. It should be noted that the map() method generates a new array only with updated items from the old array rather than altering it.

    Also Read: Scroll To An Element On Click In React

    Usage in React

    Think of a collection of items that includes the user id and username. You must use the map() method and have the automated process return JSX in React to show it to the DOM. React’s map() method is used most frequently in this situation.

    const Users = () => {
    
      const data = [
    
    { id: 1, name: "John Doe" },
    
    { id: 2, name: "Victor Wayne" },
    
    { id: 3, name: "Jane Doe" },
    
      ];
    
      return (
    
    <div className="users">
    
       {data.map((user)=> <div key={index}>{user.name}</div>)}
    
    </div>
    
      );
    
    };


    The utility function, which may be supplied from another file, can also use the map() method in addition to rendering.

    Consider having a variety of distinct picture sizes.

    	
    const imageSizes = [
    
      { name: "horizontal", width: 600, height: 380 },
    
      { name: "vertical", width: 400, height: 650 },
    
      { name: "thumbnail", width: 300, height: 300 },
    
    ];


    You need to normalize the object to a string with the following format: “Horizontal image – 600 x 380”.

    	
    imageSizes.map((a) => {
    
      const capitalizedName = a.name[0].toUpperCase() + a.name.slice(1);
    
      return `${capitalizedName} image - ${a.width} x ${a.height}`;
    
    });
    
    js
    

    Next, make this a reusable utility function and name the function stringifyImageSizes.

    	
    const stringifyImageSizes = (imageSizes) => {
    
      return imageSizes.map((a) => {
    
    	const capitalizedName = a.name[0].toUpperCase() + a.name.slice(1);
    
    	return `${capitalizedName} image - ${a.width} x ${a.height}`;
    
      });
    
    };


    Add the export keyword before the function declaration to access it in any other .js or .jsx files.

    	
    export const stringifyImageSizes = (imageSizes) => {
    
      // ...
    
    };
    

    Now, import the function using the import keyword in the component file. Also, the React component’s lifecycle will help you better understand the project.

    import React, { useMemo } from 'react';
    
    import { stringifyImageSizes } from "./utils";
    
    const Images = () => {
    
        const imageSizes = [
    
            { name: "horizontal", width: 600, height: 380 },
    
            { name: "vertical", width: 400, height: 650 },
    
            { name: "thumbnail", width: 300, height: 300 },
    
        ];
    
        const normalizedImageStrings = useMemo(() => stringifyImageSizes(imageSizes), [imageSizes]);
    
        return (
    
            <div className="images">
    
                {normalizedImageStrings.map((s, index) => (
    
                    <React.Fragment key={index}>
    
                        <div className="image-type">{s}</div>
    
                    </React.Fragment>
    
                ))}
    
            </div>
    
        );
    
    };


    Map Method in ReactJS: Usage

    1. Browse an Elements List

    Here is an illustration of how the map method may be used to iterate across a list of items.

    Example:

    import React from 'react'; 
    import ReactDOM from 'react-dom/client';
    const foodLists = ["Pizza", "Burger", "Pasta", "Noodles", "Brownie"]; 
    
    function FoodListComponent() {
    
        const foodItems = foodLists.map((foodItem, index) => <li key={index}>{foodItem}</li>);
    
        return (
    
            <div>
    
                <div>Food Items</div>
    
                <ul>
    
                    {foodItems}
    
                </ul>
    
            </div>
    
        );
    
    }
    
    const root = ReactDOM.createRoot(document.getElementById('root')); // Correct usage
    
    root.render(<FoodListComponent />);


    Also Read: Understanding React Native New Architecture in 2023

    2. Use Keys to Navigate a List of Elements

    Let us now walk through an instance to demonstrate how we can use keys to navigate a list of components.

    Example:

    import React from 'react'; 
    
    import ReactDOM from 'react-dom/client';
    const numbers = [1, 2, 3, 4, 5]; 
    function ListItem(props) {
    
        const { numbers } = props; 
        return (
            <div>
                <div>Example of using React Map with keys</div>
                <ul>
                    {numbers.map(num => <li key={num}>{num}</li>)} {/* Ensure key prop is unique */}
                </ul>
            </div>
        );
    }
    const root = ReactDOM.createRoot(document.getElementById('root'));
    root.render(<ListItem numbers={numbers} />);


    The string value of each number was used as the basis of each specific number in the aforementioned example’s use of such a map function with keys on an array of integers.

    At our computer vision development company, utilizing the map() function to export JavaScript in React simplifies handling arrays and transforming data efficiently. This approach ensures our applications remain robust and dynamic, enhancing user experience seamlessly.

    The map() function in ReactJS is most frequently used to render a list of information to the DOM. It is incredibly well-liked since it is simple to use. As we saw in this post, iterating across an array of objects greatly benefits from the map function. This technique also allows us to change the data in the array.

    Schedule an interview with React developers

    Conclusion

    It was all about ReactJS’s map () method. Along with data structures and algorithms, your skill sets are now equally important for building a name for yourself in the computer business. Without changing the original array, you can perform any transformation with the map () method. The non-mutation component is crucial since it prevents adverse reactions by default and facilitates code debugging. Use the forEach() method or any other form of loop to modify the initial array instead of the more common for.

    Consequently, a tech expert should continually stay up with the most recent hardware and software developments in the web development industry. Get in touch with BOSC Tech Labs, a team of imaginative and driven developers. They tackle problems using cutting-edge approaches and execute optimum solutions.

    Frequently Asked Questions (FAQs)

    1. How to use the map function in ReactJS?

    In ReactJS, maps are used to traverse or view a list of the same component objects. The map method is the standard JavaScript function and not the only ReactJS feature which could be called on the array only. The new array is created using a map() method, and a function is called on each array element.

    2. Is it possible to export the function from the functional component?

    Exporting a function from the functional component is possible only with the parent component. All you have to do is make use of the refs.

    3. How will the map() function works in your project?

    Map () loops over items of the input iterable and will return the iterator, resulting from applying a transformation function to every item in the original input iterable. Hence, the map() will apply the function to each item in the iterable loop, and it will return the new iterator that yields the transmitted items on the demand of the project owners.

    4. Why use import and export in React JS?

    In ReactJS, importing and exporting will aid in writing the modular code, which means splitting the codes into different files. Importing allows the use of contents from another file, whereas exporting will make the file content eligible for import. Hence, with these, the class and function can be used in the app development phase.

    Book your appointment now

  • Future of ReactJS and How it fits into the JavaScript Ecosystem

    Future of ReactJS and How it fits into the JavaScript Ecosystem

    In 2023, React will be the best JavaScript framework for front-end web app development. In addition, Reactjs framework functionalities and features have multiple tools that will make an app the best. However, due to the rapid pace of change in the world of javascript, it is necessary to know about the future of ReactJS and how it fits into the vast context of front-end development.

    What is JavaScript?

    Javascript is the scripting language utilized to build and control the dynamic of web app content. It consists of interactive forms, photo slide shows, and animated graphics. Also, React framework works with web app animation parts where you can view the things to move, refresh or modify on your screen without manually reloading a page.

    Therefore, it is a simple and easy coding language that includes a web application’s animated and interactive features on top of the primary, static structures developed by programming languages like HTML and CSS.

    What is a JavaScript library?

    Javascript plays a crucial role in web application development. Hence, you need JavaScript to perform repetitive functions such as stock animation effects and the autocomplete search bar features. Thus, recoding these functionalities is massive; therefore, Javascript libraries come in to prevent this annoying situation.

    Javascript libraries are the collection of pre-written JavaScript, which is utilized for simple and easy Javascript tasks. It also permits you to manually eliminate the coding time written by a programmer.

    Now, let’s see the multiple Javascript libraries and add them ReactJS is one of them.

    Also Read: React JS vs Vue.js! Which is better for Javascript Framework?

    What is ReactJS?

    ReactJS is the open-source, component-based JavaScript library broadly used to develop reusable user interface components for web and mobile application development.

    React is gaining popularity and is mainly used in the JavaScript framework. Moreover, it has excellent unique features, including React hooks’ great features and functionalities and allows you to write the functional components. Several resources are built around React and allow React engineers to work efficiently.

    Moreover, a JavaScript ecosystem is proven to be highly dynamic. The latest software packages and tools are arising daily and give developers several options. Hence, libraries are no exception!

    ReacJS is well-known when it comes to Javascript libraries. So, the business is looking to hire ReactJS developers who will engage and give the best with the trending technology in the industry.

    However, the front end plays a vital role in the success of any modern business application. React’s robust library steadily gaining attraction amongst developers and enterprise owners. Therefore, ReactJS has become a great web app development tool due to its benefits.

    Furthermore, React delivers efficiency and has high code reusability. Create a scalable structure for the ReactJS applications, which is faster than other frameworks or libraries.

    Most used frameworks by developers worldwide as of 2022

    Node.js will overtake React.js to become the most used framework among software developers worldwide as of 2022. As per the research, 47.12 % of the respondents use Node.js, while 42.62% utilize React.js.

    Image source : statista.comA web framework, sometimes known as a web application framework, supports the overall software development of web applications. These web frameworks are utilized to automate menial activities typically performed within web development. In other words, it simplifies the web development process and makes creating a website easy.

    Why use ReactJS?

    ReactJS is a technologically advanced, responsive, and risk-free way to make interactive and intuitive front-end interfaces. It is proven safe and secure technology to make your subsequent enterprise applications. Therefore, if you decide to approach with best ReactJS development company, then you are on the right track for your project.

    ReactJS has a rich ecosystem with the most tools like Redux or flux and Node.js on the back-end development.

    React’s primary component and abstraction take in the data and will illustrate the DOM without any disadvantages. Furthermore, the scalable ReactJS architecture pattern makes it easy for engineers to build the states in the DOM, making React components easier to test.

    ReactJS provides the data regarding a snippet of the code and needs the section to make the particular bit of the user interface. Hence, making an app development procedure accessible and eliminating the bugs. Hence, ReactJS is one step ahead in open-source JavaScript solutions.

    1. ReactJS for front-end development

    This section describes the significant advantages of ReactJS for front-end development. Most companies in front-end development have used reactJS features and advanced functionalities.

    2. React uses plain JavaScript

    React has the JavaScript exports the class r function. If you have npm installed, you have to just run the ‘npx create-react-app app-name with this function. Hence, you can easily add the React component by developing the new JavaScript file, which exports a function or class inside the ‘src’ folder.

    	
    export default function Component() {
    return(<h1>Hello World</> )
    }
    

    The above code shows how easy it is, to begin with, ReactJS; you have only to export the function that returns JSX.

    JSX in React is the extension to JavaScript, allowing developers to write HTML in JavaScript files. The utilization of jSX aids in keeping the logic of components and UI in only one file without bloating it. JSX also helps interpret JavaScript expressions and statements by wrapping them in curly braces; it complies first and more rapidly than the actual JavaScript written outside the JSX.

    3. Simple learning curve

    Each new and latest technology needs less time and effort to learn the language. Hence, allocating a similar time to learning the other framework is a time-consuming task. Therefore, React has an easy-to-learn user interface. Hence, working on React is relatively easy, and if you have a fantastic knowledge of the JavaScript library, then it is good.

    Hence, if you have the JavaScript development team to work on the project, you can switch to embedding React within your organization’s tech stack, and it will kick off the phases.

    4. Exceptional Reusability

    Developing and including the components in your application is a great way to begin. Hence, everyone wants to view the customization and keep their work unique to stand out. However, as project length and time goes beyond reach, rewriting all the small components is nothing but overhead.

    Hence, it grants ReactJS developers the reuse of existing components throughout the application. You can also utilize them, encapsulate or wrap a method and find them reliable and suitable for the projects.

    5. Declarativeness

    ReactJS is developer friendly as whenever the view or component requires to build, then the library will only ask what has to be deployed. Hence, it increases the speed of application development and makes the debugging and deployment process easy. It also provides the flexibility and ease experienced by coders when working on React technology.

    6. Slices Abstraction

    Every front-end development framework or library provides the facility of abstraction in its development phase. The specific architecture makes it complicated for a developer to keep up with the development task. Hence, React gives you your choice of app architecture and designs the app in such a manner as per your project requirement.

    7. Rich Ecosystem of tools and developers

    ReactJS has a feature-rich ecosystem for domain expertise. The library has built-in tools that will simplify the procedure of developing, designing, and building the application. However, with the help of ready-made charts, modules, graphics, and documentation tools, the experts can finish an entire development procedure in no time with the support of existing components. Moreover, these tools are technically rich and have all the features, so one must incorporate them within the application.

    8. Supports functional or class-based components

    ReactJS gives more than one approach to composing your UI. A class component is a class that will just extend the React component libraries. It comes with the render method and is called to develop and return your UI.


    import { Component } from "react";
    class App extends Component {
    render() {
    }
    let message
    return (
    );
    =
    'Hello World!';
    <h1>{ message }</h1>
    }
    export default App;
    

    You can declare and export the function that returns your UI in the functional components. Hence, it gives the flexibility to select the style in which you are convenient and comfortable.

    Also Read: Benefits of using ReactJs for Web Development

    Well-known React combinations that are looking for a while to hire React development company

    A popular combination of back-end technologies is described below and has proven the record of supporting multiple domains and industries with ultra-modern tech solutions. So, see some of the combinations while hiring the best react app development company for your project.

    1. React with Node

    JavaScript gives the scope as a full-stack development package. So, whenever you are using ReactJS for front-end development and Node.js in the back-end for your enterprise mobile app development, you will be surprised to view the excellent functionalities of your business app. Hence, it ensures scalability and authentication in your application with the whole Javascript tech stack.

    2. React with PHP

    As PHP is the widely used language that supports various websites, merging this back-end language with React gives many advantages. PHP is easy to learn and can be used in React app development. This language has a rich set of libraries and frameworks to accomplish many back-end tasks. So, while using PHP and React, programmers get the benefit of enormous community support.

    3. React with Laravel

    A combination of ReactJS and Laravel will give the best results, proven to be a great combination for developing the SaaS product. React also permits you to make an SEO-friendly application. In contrast, Laravel can support it with its built-in libraries and data migration to create the feature-rich enterprise ReactJS architecture.

    Why ReactJS for front-end web app development?

    React has a massive colony of applications. If you are stuck in the problem of ReactJS and its applications, here are some of the use cases to understand why it is used in web app development.

    1. Single-Page Applications

    ReactJS has eliminated the requirement to wait for a website to reload each time when any task is performed. In this way, it gives better performance with less bandwidth.

    2. Large-scale objects

    React will follow a component-based approach to design the same for apps with several workflows and a complicated server side.

    3. Fantastic UI and intuitive apps

    For apps facing significant complexities over a performant UI, rEcat will simplify a process through its functionalities and features.

    4. E-commerce applications

    E-commerce apps use the ReactJS navigation tools and design components. It will help you to improve the performance of eCommerce apps.

    5. IoT applications

    An app designed with the React library’s core features and performance in mind, server-rendering, and the virtual DOM permits you to create large-scale and high-performing IoT apps faster.

    Schedule an interview with React developers

    Conclusion

    I hope this information relayed to ReactJS development is clear from this blog. Hence, if you are planning to use ReactJS in your project, you will need the help of React developers who can note the specific requirements and ensure the delivery of a project with the desired result. BOSC Tech Labs is the best web and mobile app development company that has always strived hard to get clients results beyond their exceptions.

    Besides this, hundreds of organizational benefits and improved efficiency have proven to be the reasons big business brands adopt and integrate ReactJS in its product and services. The cost and resources are worth upgrading the existing service with ReactJS app development. It has the interactive and intuitive front-end interfaces of ReactJS development services and is known for providing an unmatchable user experience for web and mobile app development.


    Frequently Asked Questions


    1. Why is React the most used framework in 2023?

    Compared to the other front-end frameworks, React code is easy to maintain and flexible because of its modular structure. Due to its flexibility and reliability, it saves a considerable amount of time and cost for businesses.

    2. What makes React unique?

    React will build interactive UIs. With the help of designing simple views for each state in your application, it will efficiently update and render the just right components when the data is being modified. Hence, the declarative ways make the code more predictable and easier to debug.

    3. Why do developers make use of React hooks in their development?

    With the help of hooks, you can extract the stateful logic from the components to be tested independently and reused. Hooks also allow you to reuse the stateful logic without changing the component hierarchy. Hence, sharing the hooks among components or with the community is easy.

    Book your appointment now

  • Scroll To An Element On Click In React

    Scroll To An Element On Click In React

    Scrolling involves the elements in React that are done even in JavaScript. Normally, scrolling is a sliding effect or movement in the text, image, and graphics. It is quite different from that of the frameworks. It is efficient to enable scrolling while developing the WebPages. These can be either clicked, or they can be automatically enabled in React.

    The scrolling process can be enabled on both the horizontal and vertical positions in the display. It is also quite convenient to hire React engineer to add the scrolling element in React. You can also easily select the DOM element for updating the scrollable element, such as the body.

    Scrollintoview Function

    The scrollTo method or scrollTop position manually can also be used in the process. These automatically match the DOM elements on the screen and assure to improve stability. These are quite an easier way to improve the stability to the maximum level.
    scrollIntoView function is one of the simple ways to scroll the element in React to make development faster. This element requires the DOM for the useRef, or you can also select the DOM directly. There are also many methods that can be useful for enabling the scroll section with the button.

    scrollIntoView method also accepts the optional parameters for controlling scroll animation. These also involve focusing on various elements to the extent. Default scrolling is also enabled for the webpage or part of the site areas where it is required.

    Scroll An Element On Click In React#

    Scrolling the element on click with React is quite a simple process. It is quite convenient for setting the ref pop-on element that you require to scroll. You can easily set the onClick prop across the element to the maximum. Call the scrollIntoView() method when the element is clicked on the ref object.

    App.js
    import {useRef} from 'react';
    export default function App() {
      const ref = useRef(null);
      const handleClick = () => {
    ref.current?.scrollIntoView({behavior: 'smooth'});
      };
      return (
    <div>
    <button onClick={handleClick}>Scroll to element</button>
    <div style={{height: '155rem'}} />
    <div ref={ref}>Some content here</div>
    <div style={{height: '155rem'}} />
    </div>
      );
    }
    

    useRef() hook will be involved with passing the initial value for the argument. Normally, hook returns will be mutable ref objects, and these are enabled with the .current property initialized for passing the arguments. It is convenient for accessing the current property in the ref object for getting access to div elements. These are suitable options for setting ref prop even without any hassle.

    React sets the .current property for the ref object when it is passed on the ref prop in elements. For example,

    corresponds with the DOM node. It will be quite a convenient option for learning the methods for scrolling the elements in React.

    Scrolling the elements in React is quite an efficient option compared to that of other frameworks. These also involve various elements and scroll added by clicking the button or automatically.

    Also Read: How to Scroll to a List Item in React?

    Element.Scrollintoview() Method

    The Element.scrollIntoView() method is available in the HTML element interface, as well as React refs or references. These can be easily created either using the useRef() hook or even using the createRef() method. You have the better option to easily take the help of React Experts to develop progressive web applications based on your requirements. Scroll to an Element using the Element.scrollIntoView() Method in React can be easily listed below

    the element.scrollIntoView(align)
    

    The element.scrollIntoView() accepts the boolean value or object

    element.scrollIntoView(alignToTop);
    

    These involve alignToTop as a Boolean value.

    element.scrollIntoView(options);
    

    Normally, this method will easily accept single arguments. scrollIntoView() method scrolls with elements that can be visible in all areas of the browser.

    Types Of Properties Scroll To A New Element In React

    Normally, the DOM element is useful to scroll the view, so it is convenient to run any problem. DOM elements can be easily created in response to state changes with React. There are 3 important properties available such as

    1. block:

    The block is defined as the vertical alignments. These accept the 4 values called as the

    • start
    • end
    • center
    • nearest

    2. behavior:

    The behavior property is called the transition animations. These accept the 2 values called as the

    • auto
    • smooth

    3.inline:

    The inline property involves horizontal alignment in the process. These accept 4 important values like

    • start
    • end
    • center
    • nearest

    Example

    var element = document.getElementById("box");
    element.scrollIntoView();
    element.scrollIntoView(false);
    element.scrollIntoView({block: "end"});
    element.scrollIntoView({behavior: "smooth", block: "end", inline: "nearest"});
    

    Setting the onClick prop can also be added with the button element, and it can be easily analyzed with the function called handleClick. scrollIntoView method can be easily used in the handleClick function for scrolling the div elements. These can be easily added with ref prop during its functions.

    Behavior property also denotes that scrolling is enabled to animate it smoothly. The default value enabled with behavior property will be the Auto feature. scrollIntoView() method invokes the elements when the button is clicked. Normally, this element can be visible to the user.

    Also Read: Understanding React Native New Architecture in 2023

    How To Scroll To The New Element In React?

    DOM elements can be easily created in response to changes in React. It gives a better referent as the DOM element for scrolling the view. For example, the problem can be easily listed, and it gives scrolling as the last element. The list is rendered based on the numerous array of states.

    A new DOM element will not be rendered if the scroll down of the last element is processed at the bottom. For example, the flushSync method is quite an effective way of enabling the react-dom to update DOM immediately extensively. It involves the component’s state is updated automatically.

    import { flushSync } from 'react-dom';
    

    Schedule an interview with React developers

    Conclusion

    JavaScript API provides a better way for scrolling the elements through the scrollIntoView method. These don’t provide fine-grained control, but these are independent on several OS. You can easily install a terminal inside the ReactJS project and install react-scroll. However, it is now possible to scroll an element on the click in React by utilizing a react-scroll package. This package allows the React lifecycle components to scroll the particular part or position within the page. It has the feature of scroll-to-top whenever the user taps on the button. Hence, the react-scroll package delivers a simple and effective way to scroll the element in React app development.

    From the above-explained example, you got an idea of how to scroll the element on click in React development. Sow, what are you waiting for? Connect with the best web and mobile app development companies like BOSC Tech Labs to execute this procedure. These well-known experts will help you to complete this task at the correct time and approach.


    Frequently Asked Questions(FAQs)


    1. How to scroll to the top on the button click in React?

    addEventListener property and set the state visible to true. However, the state is utilized to view and Scroll to the top icon to the user. Thus, when the user clicks on this specific icon, a function scrollToTop gets triggered as an onClick() event that helps to scroll on pages smoothly to the top.

    2. What is the use of scrollable control?

    The scrollableControl class will behave as a base class for controls that need the ability to scroll. However, to enable the control to appear on the scroll bars as needed, set the AutoScroll property to actual and set the AutoScrollMinSize property to desired size.

    3. What is a scrollable ResultSet?

    Scrollable means that once a ResultSet object has been built and traversed via the fetched records in any of the directions, that is, backward and forward. Hence, it allows the ability to read the last, following, and previous records.

    4. How do I set the scroll view in React?

    To put the various views in the scroll view, one must build a group as the direct child and then define the many views internally. Hence, the scroll view supports vertical scrolling only to build the horizontally scalable view, and HorizontalScrollView is used.

    Book your appointment now

  • Flutter Vs. React Native: Which is Best For your Project in 2026?

    Flutter Vs. React Native: Which is Best For your Project in 2026?

    Mobile application development is growing at a very fast pace of time. The new lifestyles and the latest methods of communication have raised the demand for mobile apps. But it is creating the app for iOS and Android, meaning you need two different teams with various skill sets. However, with the help of the cross-platform mobile app development framework, it is easy to develop an app for both platforms with a unified codebase.

    Cross-platform mobile apps platforms such as Google’s Flutter and Facebook’s React Native are two of the latest topics to debate when selecting hybrid app development platforms. But deploying the app on Apple Store or Google Play Store is the need of every business. However, shipping in the app market and selecting the correct technology stack is the most important step to take wisely. However, when we discuss the two most renowned platforms, React Native and Flutter, it is very difficult to find the most suitable for your project. But before going on any discussion, let’s discuss both these frameworks in detail.

    What is Flutter?

    Flutter is an open-source, cross-platform mobile application development framework that uses Dart language. As Google introduces Dart and Flutter, the business industry uses this framework to create robust and big-size enterprise apps easily. However, due to its huge capability of cross-platform app development, Flutter has gained much popularity in a very short time. Hence, it has given birth to many mobile apps which are getting appreciated by people.

    What are the benefits of Flutter App Development?

    1. Hot Reloading

    The hot reloading feature perfectly matches Flutter’s nature, which is the major advantage of utilizing Flutter for streamlining cross-platform development. However, with the help of this feature, the programmers can make the changes quickly, make instant tweaks, and then merge the updated elements. Hence, this approach has necessarily streamlined the development process and will make bug fixing easier.

    2. Embedded Application Builder

    The built-in app builder is another benefit of Flutter app development. Hence, this tool has many pre-developed UI elements that the developers must merge and customize. An app builder is flexible and allows creative and non-patterned ideas.

    3. Codebase Sharing

    Flutter-build applications can share the code between iOS, Android, and various other platforms by eliminating the requirement to rewrite it from scratch. Hence, this feature makes Flutter a great choice for MVP development. With this, the developers can deliver the app with a close-to-native look, test it with the targeted audience, and decide on the necessity of making a native application.

    4. High Productivity

    As Flutter is cross-platform, you can use a similar codebase for the iOS and Android apps. Hence, it will save time and resources.

    5. Great Performance

    Dart compiles into the native code, and there is no requirement to access the OEM widgets, as Flutter has its own. There is less mediated communication between the app and the platform, as Flutter is the SDK that gives reactive views without needing a JavaScript bridge. Hence, it contributes to the fast application startup times and the very few performance issues.

    6. Compatibility

    As the Flutter widgets are part of the app rather than the platform, you will get less experience or no compatibility issues on the various OS versions. Hence, in turn, less time is spent on testing.

    What is React Native?

    React Facebook launched Native. It is the most preferable and well-known cross-platform mobile app development framework. Hence, React Native uses JavaScript and simplifies Android and iOS app development with a single codebase.

    What are the major benefits of React Native App Development?

    1. Code Reusability

    The major benefit of React Native is that programmers are not required to make different codes for multiple platforms. However, approximately 95% of the code can be reused between two platforms, which helps to increase development speed and efficiency considerably. Thus, you will get a faster time-to-market with fewer maintenance efforts.

    2. Native look and feel

    React Native Components merges the blocks from a native user interface with their JavaScript and gives an app a native-like appearance. Moreover, by creating the blocks for the same iOS and Android, the look and feel of the app will be the same across the two platforms.

    3. Live Reload

    The live reload feature of React native permits you to view and work with the changes in real-time. You can fix the code while an app is loading and it reflects in the application with the automatic reload feature. Hence, reload the particular change area to save time on a compilation.

    4. UI Focused

    React Native makes use of the React JavaScript library to create app interfaces that are fast and responsive. It has great rendering abilities and utilizes the component-based approach, making it easy to make simple and complicated UI designs.

    Also Read: Top 10 Most Used React Component Libraries in 2022

    5. Cost-Efficiency

    As code is reusable in React Native, it helps you save up to 40% of development costs. Hence, you do not have to hire the two various Android and iOS developers to make the application. Therefore, the pre-built components in React Native will fasten the development process.

    6. Third-Party Plugins

    Developing the app from scratch is expensive; React Native gives several third-party plugin options, including JavaScript-based and native modules. Therefore, the third-party plugins alienate a requirement for the particular web view functions, and it helps to enhance an app’s functionality and performance.

    React Native Vs. Flutter: Which is the Best Cross Platform Mobile App Development Framework In 2023?

    Both React Native and Flutter is the renowned platform for cross-platform mobile app development. Hence, both have their benefits. So, let’s compare Flutter and React Native with the different criteria.

    1. Programming Language

    React Native uses JavaScript to make the user interfaces. It is easy for web developers to work with React Native because of its robust popularity of JavaScript. JavaScript is the highly preferable and the selected programming language among the programmers, and also it simplifies training the development team to work on React Native.

    On the contrary, Flutter uses the Dart language, which Google launches. As it is a client-centric language, Dart gives various benefits. Hence, Dart enables the assembling of famous OOP languages such as C++ and Java. You will easily get the command over Flutter if you have complete knowledge and understanding of any OOP language.

    2. Architecture

    In React Native architecture, JavaScript builds the bridge between the Native language and JavaScript. It works through the two-sided conversation by sending the JSON message. Hence, due to an asynchronous message transmission, it needs a smooth user interface for the app. However, React Native app development has the chance of lagging UI in the end as the bridge affects rendering speed.

    In Contrast, Flutter is a package that does not need any bridge to communicate with the native components. Hence, it has everything within itself, such as the Cupertino framework, materials design, etc. The Flutter benefit makes an app more predictable and robust to perform on various platforms than React Native.

    3. Installation and Configuration

    React Native gives an easy configuration process. You can Install React Native CLI globally with the help of the command line. In addition, you need to install Yarn and NodeJS as the package manager. You can install Flutter by downloading the binary for the specific mobile platform and adding it to your PATH variable. Hence, it can be easily done by the command line. Therefore, Flutter goes one step down in the installation phase, as the installation procedure is not as straightforward as React Native.

    4. Development Tools and Documentation

    React Native is robust, and developers with experience with JavaScript can use this framework. For example, essential features like navigation need to be better documented. So, finding the info about creating native libraries can be troublesome.

    In comparison to React Native, Flutter has a rich set of documentation. It gives in-depth guides in video and graphics format. The best thing about Flutter is that it has multiple tools like the Flutter inspector and debugger, which aids you in the mobile app development process.

    Schedule an interview with React developers

    5. User Interface

    Due To the JavaScript bridge, React Native renders a native component for single platforms. A user interface gives the look and feel of the mobile application. React Native provides readymade elements that behave like an app’s building block. Hence, it is toughest to replicate the complex UI in a React Native app. Flutter gives the UI widgets packaged within itself, which simplifies the native mobile app development. Thus, it eliminates the requirement for third-party libraries as it has a huge set of framework widgets. Besides that, Flutter apps are constant across all platforms.

    6. Developers Productivity

    React Native gives the functionality of reusability across all platforms. You can use many libraries created by the development community as the building blocks to fasten the mobile app development procedure. Moreover, React Native has a hot reload feature that will show the app changes without recompiling them. On the other hand, hot reload in Flutter will simplify an app iteration and get feedback instantly. Hence, Flutter gives fast app compilation.

    7. Community Support

    A large community matters when we talk about open-source mobile app development frameworks and React native has all this functionality. It is the best cross-platform mobile app development framework which Facebook launched in 2015. In comparison, Flutter has a very smaller community than React Native. But, later on, Flutter gained massive popularity among tech professionals and grew quickly.

    8. CI/CD Support

    React Native does not support the CI/CD solution for Google Play Store and Play Store delivery. Unfortunately, manual deployment for Google is well-documented. You require a third-party solution to automate your app deployment procedure. On the contrary, Flutter has a well-defined documented guide to develop and deploy the app on the Android and iOS platforms. Therefore, it enables an app deployment via the CLI, and in the case of any advanced customization, it permits third-party integrations.

    Schedule an interview with WordPress developers

    Conclusion

    In the Flutter Vs. React native, as there are no winners or losers. Every framework has its benefits and drawbacks. Some experts assume that Flutter is the future of mobile app development. At the same time, React Native will stay complicated and contend with some of the remarkable advantages and impressive React Native-based apps that are accessible in the market. Therefore, it is dependent on your budget and project specification.

    At BOSC Tech Labs, we work both on React and Flutter frameworks. Let us know if you are interested, and we will reach out as soon as possible. Consult us if you want to hire React developers or hire Flutter developers.

    Get in touch with us today!


    Frequently Asked Questions


    1. Which server is considered best For Flutter app development?

    Firebase is a Google-Powered backend service that will work great as the Flutter server-side. This platform gives various development tools that expedite mobile and web development assignments. Hence, it is well-known for the JSON-enabled NoSQL database, which saves and syncs the data in real time.

    2. Should I use React Native or Flutter?

    The Flutter framework comprises UI rendering components, device access APIs, testing, and navigation. In comparison to that, React Native must rely on third-party libraries to access most native modules. Hence, for better performance, you should opt for Flutter.

    3. What makes Flutter better than React Native development?

    Flutter relies on the developed widgets for customization, whereas React Native incorporates third-party customization components. Hence, Flutter delivers the most compatibility. Moreover, Flutter development is constructed on widgets, whereas React Native uses JSX.

    Consult Our Experts

  • How to Scroll to a List Item in React?

    How to Scroll to a List Item in React?

    Scrolling mainly refers to the sliding-effect movements on text, images, or graphics across your system’s display vertically, horizontally, or both. During the development of web pages, you can enable scrolling very easily by default for the entire webpage or only those areas where it is needed.

    Otherwise, you can hire React developer to develop highly advanced and modern web applications according to your requirement. Today, we will learn how to scroll to an element in ReactJS. However, scrolling React is different from the other frameworks. You can specify an element and then scroll to it automatically or by hitting a button.

    How Can You Scroll To A Specific List Item In the React?

    The programmers generally use plain JavaScript to scroll to a specific element in React. However, as we mentioned, scrolling to a particular element in React differs from the other frameworks. Here, we will discuss different methods to learn how an individual can scroll to a particular list in React.

    Scroll to the Element Using React Refs or References

    The easiest and most convenient way to use the ref is to store the reference of that specific element you wish to scroll to. After that, you need to call myref. current. scrollIntoView() so that you can scroll it into the view.

    Refs in React contain multiple applications. One of the most popular uses is to reference elements in DOM. You will get easy access to the interface of the elements by referencing the elements. This step is crucial to capture the element you wish to scroll to. Let’s discuss how you can effortlessly create links in the applications to scroll to different web page sections.

    Step 1: Creating the React App and Installing the Package

    First, you have to create the React application to move forward. Then, you can select ViteJS or anything according to your preference. But, if you are a beginner, you can copy ‘npx create-react-app- my-app-name. After that, you have to install the package that you will need. (react-router-dom).

    Step 2: Develop the Section Components

    To do this step, first, you need to create three standard components which will further represent each section of the page you will scroll to. Those three components are About, Main, and Usage. Then, in App.js, you must import whatever you want from the ‘react-router-dom’ package. After that, you can easily curate the components, which will further be the sections of your one-page App.

    Step3: Properly Assemble the Page Components

    The next step that the individual will follow is assembling the page components. Then, the expert will add the components into the app component to quickly set up the components of the react-router.

    Step 4: Include the useRef into the App

    So, this is the step when the magic will start. In this step, you must import the useRef at the top of the created App,js file. Now, specify the sections you need to scroll to in React. After specifying the areas, you must add three refs to the created App. After that, you need to transfer the refs as props in React in every three section components.

    Step 5: Assign the Reference to the Components

    In the About, Main, and Usage components, you will get complete access to all three ref props from the before-mentioned step. Then, you can assign the values of those three components to their respective DOM elements.

    However, the useRef Hook initialized three props, including aboutRef, mainRef, and usageRef as the null in the App component. After that, with the ref attribute’s help, you can now assign them as values to the DOM element. In such circumstances, developers need to take the mainref prop to assign them to the DOM element in the Main. They will keep doing the same thing to the Usage and About components. So they must remember to assign the proper ref props without making mistakes.

    Also Read: Top 10 Most Used React Component Libraries in 2022

    Step 6: Produce the Scroll To the Function

    Now that every section component contains a reference to easily access the DOM element, it is time to develop a handleScroll function. The web page will scroll to the desired ref in this specific function. An expert will use the window.scrollTo function to indicate that you wish to scroll to the y-coordinates of the DOM element’s offsetTop property.

    Step 7: Include the onClick handler in the Link

    The final step is to include the handleScroll functionality in the link components. It is a crucial step because when the users tap on the links, it will directly go to the corresponding ref element of the web page. Note that to have the value of ref, you have used ref.current. For instance, mainRef.current is the value of the mainRef.

    Example

    	
    import React from 'react';
    
    const list = [
      {
        id: '1',
        firstname: 'Daniel',
        lastname: 'McConnell',
      },
      {
        id: 'b',
        firstname: 'Olga R',
        lastname: 'Gibson',
      },
      ...
    ];
    
    const ListItem = () => (
      <ul>
        {list.map(item => {
          return (
            <li
              key={item.id}
            >
              <div>{item.id}</div>
              <div>{item.firstname}</div>
              <div>{item.lastname}</div>
            </li>
          );
        })}
      </ul>
    );
    export default ListItem;
    

    Because scrolling wouldn’t function without a fake height for each list item, it has one. Let’s check out the execution.

    	
    import React from 'react';
    
    const list = [ ... ];
    
    const ListItem = () => (
      <ul>
        {list.map(item => {
          const ref = React.createRef();
    
          const handleClick = () =>
            ref.current.scrollIntoView({
              behavior: 'smooth',
              block: 'start',
            });
    
          return (
            <li
              key={item.id}
              ref={ref}
            >
              <div>{item.id}</div>
              <div>{item.firstname}</div>
              <div>{item.lastname}</div>
              <button type="button" onClick={handleClick}>
                Scroll Into View
              </button>
            </li>
          );
        })}
      </ul>
    );
    
    export default ListItem;
    

    Once more, a ref attribute is added to each item in the list to make the DOM node afterwards accessible. We cannot easily generate the refs for each item within the iteration of the map method, though, because we must work from the outside.

    Instead, we must use an additional reduction function to build refs for each list item and store them in an object that is accessible by the list item’s ids (dictionary).

    Then, separate from the rendered list itself, we add an additional list of buttons for each list item. Although the handler is the same for all buttons, the parameter is the item’s id. In order to navigate to the list item, the proper ref must be retrieved from the object of refs using the id.

    Undeniable Perks of Scroll Effects

    The users need to scroll down to navigate the entire website. However, constant scrolling can cause eye strain which may be annoying for the users. So, to combat this, you can hire dedicated React developers from a reputed company to include the scrolling effects on the web page. This way, users do not need to scroll down faster to get to the element they are searching for. Instead, they can click on a particular option to reach their desired areas on the web page more efficiently.

    The primary idea of the scrolling effect is to encourage website visitors to scan through multiple parts of a website quickly. Now, they do not have to concentrate on one specific area as they can smoothly access specific portions of the website. However, companies prefer to include the scroll effect on their website to highlight specific areas of the page. It effectively draws website visitors’ attention to the specific content they want their users to look at.

    Schedule an interview with React developers

    Conclusion

    Adding scroll effects to the web page is easy with the correct steps and helpful tools. However, if this is not your cup of tea, consult a trustworthy software development company, Bosc Tech Labs. Their engineers will help you in the mobile app development process to successfully implement the scroll effect using the proper sequence. The company’s expert team has years of experience in this field, so that they will offer adequate guidance. So, without thinking twice, contact the expert team at your convenience.

    Frequently Asked Questions (FAQs)

    1. How do I ScrollTo the section of the page in React framework?

    To scroll an element, click in React: Set a ref prop on the component which you wish to scroll. Set the onClick prop on the other component. However, whenever an element is clicked, it calls the scrollIntoView() method on the ref object.

    2. How to develop the scrollable widget?

    To include the scrollbar to ScrollView, wrap a scroll view widget in the Scrollbar widget. Hence, you can use this widget as a scroll for the page.

    3. How can I scroll horizontally in React JS?

    It is a horizontal scrolling menu component for React framework. A menu component has the adaptive width and will set the width for the parent container. However, the item’s width is determined by CSS styles. For navigation, you can use the scrollbar, mouse wheel, drag it by mouse, or the native touch scroll.

    Book your appointment now

  • Understanding React Native New Architecture in 2026

    Understanding React Native New Architecture in 2026

    If you still haven’t got a chance to look at the new React Native architecture, it is known as the React Native re-architecture. Then, this blog will give you information about a Fabric Rendered and TurboModule System. Let’s see React Native New Architecture and also its benefits.

    What is React Native?

    React Native is a well-known open-source mobile app development framework that is being developed by a framework. It uses JavaScript to simultaneously develop cross-platform mobile applications for iOS and Android using a single codebase. Therefore, this unique feature has made React Native one of the most popular mobile app development frameworks in the industry.

    What are the edge of using React Native for Mobile App Development?

    Now, let’s see the advantages of React Native and why enterprises use it for mobile app development.

    1. Reusability of Code

    The major benefit of React Native is that a developer does not need to write different code for the various platforms. However, approximately 95% of the code is reused between the two platforms, which aids in increasing development speed and efficiency. Hence, you will get a faster time-to-market and need fewer maintenance efforts.

    2. Native Look and Feel

    React Native components map 1:1 with the native development components. It will merge the building blocks from a native user interface with its JavaScript, giving an app a native-like appearance. Therefore, as the building blocks are the same for Android and iOS, the look and feel of the app are the same across the two platforms.

    3. Live Reload

    The live reload functionality of React Native permits you to view and work with the changes in real time. You can create the fixes in code while an app is loading, which will be reflected in the app with the automatic reload. Hence, it reloads the specific area of change to save time on the application.

    4. Cost-Efficiency

    As code is reusable in React Native, it helps you to save development costs by 40%. Therefore, you weren’t required to hire two teams to create apps. There are many pre-built components in React Native, which are a fast development process.

    5. Third-Party Plugins

    Developing the app from scratch is expensive, but React Native provides several third-party plugins, including JavaScript-based and native modules. Hence, the third-party plugin will eliminate the requirement for the particular web view functions and helps to enhance an app’s functionality and performance.

    Also Read: Benefits of using ReactJs for Web Development

    Why was there a requirement for the New React Native Architecture?

    Before beginning with the new React Native architecture, let’s understand the existing architecture of React Native. As we are all aware, the single-threaded of React Native and its major three tires are the JavaScript thread, the main thread, and the shadow thread, and all do not have direct communication. As they majorly communicate by asynchronous JSON threads via the Bridge.

    A bridge plays a crucial role in this communication among the threads; hence, there is dependency, delay, and uncertainty. Therefore, to overcome this dependency, there was a requirement for the new React Native architecture.

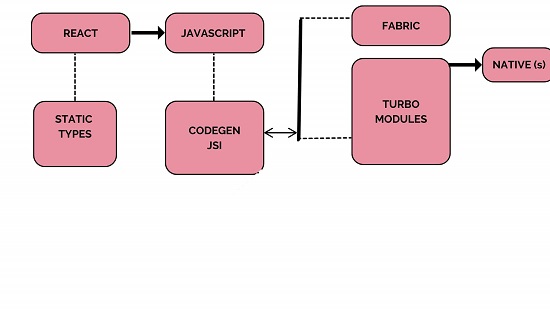
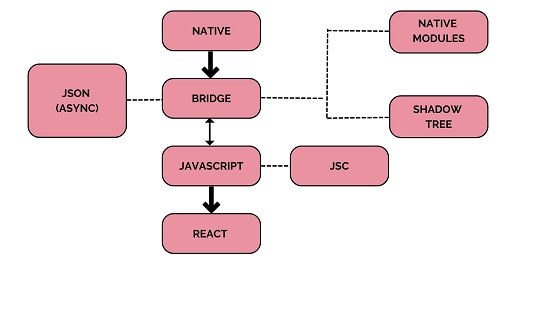
    Let us look at some advanced reasons to adopt the new React Native Architecture. The cons of the current React Native Architecture are:

    • The dependency of the Bridge for the intercommunication of the threads in React Native application is most useful in the development phase.
    • The serializable Bridge demands more copying than sharing memory between the app threads.
    • The asynchronous model does not ensure the message’s delivery time at the destination.
    • It exceptionally slow data transmission.
    • Unexpected page jumps because of the asynchronous UI updates.

    However, since the second quarter of 2018, RN was just newly launched, and at that time, the re-architecture of react Native was under-planning.

    All you need to know about new React Native Architecture

    To enhance and overcome the drawbacks of the previous architecture of React Native, the new architecture, React Native V 0.70, which has launched recently in October 2022, has added performance and flexibility to the framework.

    But, the one thing that remains unchanged in the new architecture is the JavaScript engine Hermes, which has become even more optimized for React Native applications.

    As the redesigning of React Native architecture takes on continued development, more data is becoming accessible and readable. Hence, this new design aims to enhance performance and brings it nearer to native apps. It facilitates the integration of React Native framework with a JavaScript-based hybrid framework.

    Here are a few of the crucial elements in the React Native re-architecture, and we can also call them the pillar elements.

    1. Fabric

    Fabric is the misnomer usually used to refer to an entire React Native architecture. In actuality, Fabric will only illustrate one tier of a complete structure, i.e., the UI layer.

    Initially, Fabric will enable the direct shadow tree creation in C++ with the help of the UI manager. Hence, it enhances UI interactivity by removing the necessity to travel between the threads.

    In addition, Fabric benefits JSI to disclose UI functionalities to the JavaScript side. It leads to a direct interaction from both ends rather than connecting with the JavavScript side via the Bridge. However, the JavaScript side prioritizes time-sensitive UI tasks and performs them concurrently ahead of any other tasks. Hence, it prioritizes queues for the UI side.

    2. Turbo Module

    TurboModules are old Native modules with new integration and behavior. The best functionality of TurboModules is that they are lazy-loaded. Hence, JavaScript will load modules as needed and maintain an explicit reference. For programs with a huge number of Native modules, it will automatically reduce the startup time.

    3. Codegen

    Codegen is another practical component of the new React design. The RN program will automatically check it for synchronization and interoperability between JavaScript and Native threads. It will generate the native code during the build time, which is opposed to the run time.

    Turbomodules utilize the interface components, and Fabric is called Codegen. All of this is intended to erase the need for duplicating code, enabling the transferring of data without doubt, and is much quicker as there is no longer a need for data validation at each iteration.

    4. Bridgeless

    The progressive replacement of Bridge with the redesigned JavaScript Interface (JSI) component is the primary objective of the new architecture.

    The Bridge is fully removed from React Native, and the major reasons are that it developed unneeded issues and doubts about whether data was received or there are considerable delays.

    A layer will supersede Bridge called React Native JSI or JavaScript interface. The objective is to enable communication between the JavaScript and the Native sides without requiring Bridge as the intermediary step.

    The JS bundle independence from JSC is the one modification made possible by the JavaScript Core, i.e., JSI. It implies a different JavaScript engine like the Chrome Engine V8, which will frequently take the place of the JSC engine.

    In addition, by utilizing JSI, JavaScript will be able to recognize and connect with the Native components explicitly by holding the references to C++ Host objects and invoking their methods.

    How to Migrate to New React Native Architecture?

    To update the React Native application to the latest version, you might wish to migrate to the new React Native architecture. Let’s begin with the initial priorities.

    You need the specified release of the ReactNative app for easier updating. You require the react version to access the most recent changes, and you will eventually upgrade to React Native stable release.

    After that, please find the most recent react native and install it. We can move to OS-specific improvements later.

    You can install the most recent React Gradle plugin for Android after updating to the newest Gradle version. Use the code directly from a Reference guide of React Native. For iOS app development, turn on the C++ language feature that supports iOS application development.

    As there are two major migration methods, let’s see below.

    1. RNNewArchitectureApp

    The first migrating method involves transitioning from the previous one to the new one. You only need to take the native components from the most React Native version, 0.67, and apply them to the latest React Native Architecture.

    Each commit is subject to a separate migration process. Hence every branch demonstrates a transition between various React Native versions. Therefore, these sections are readable and accessible via the main branch.

    2. RNNewArchitectureLibraies

    This method demonstrates the development of TurboModule and Fabric components step-by-step. Hence, unlike the first method, these branches are mostly used for creation.

    Hence, it will ultimately come down to maintaining compatibility with earlier versions of the React Native parts.

    Schedule an interview with React developers

    Conclusion

    React Native is a great choice for cross-platform modern business applications. A new react native architecture will add the prevailing benefits of the framework.

    If you want to connect with the leading mobile app development company , then, hire React developer who has the expertise and is ready to help you!

    Let’s get in touch with us!

    Also Read: React Hooks Best Practices in 2022


    Frequently Asked Questions (FAQs)


    1. What are hooks in React Native?

    Added Hooks to React in version 16.8. The function components can access the state and the various React features. However, the class components are generally needed. Hooks generally replace any class components, as there are no plans to erase the classes for React app development.

    2. What is the new architecture in React Native development?

    The new architecture dropped the concept of The Bridge in favor of the other communication mechanism: the JavaScript interface (JSI). jSI is the interface that permits the JavaScript object to hold the reference to C++ and vice versa. Hence, once the object has the reference of another one, then it will directly invoke the methods on it.

    3. Which architecture is considered the best for React Native?

    The container-View pattern is the most efficient and widely used feature that builds the pattern in a react environment.

    Book your appointment now