• Parse CSV File by Using React JS

    Parse CSV File by Using React JS

    People prepare CSV files for different types of documentation and transfer them between devices. However, it is not simple to extract data directly from these files. In this case, users have to handle the full parsing process to access and view the data in CSV files properly.

    Hire React Developers from the leading app development company that utilize the solutions and commands that are related to the React framework to handle the parsing steps. It is possible to use various packages available with React.js that can read the files, but most of them do not accept the same for CSV files. Therefore, specific steps should work to enable this functionality.

    What is React?

    Before discussing how the parsing process is possible, let’s first understand the React framework. It is a type of JavaScript-based library that Facebook created to develop user interfaces.

    It introduces virtual DOM as a usable process and showcases the best side of DOM manipulation, unlike many other currently active frameworks. Typically, programmers utilize this solution and the related languages and APIs for single-page app development.

    To note, the best features that the React.js framework supports are:

    • One-sided data flow
    • High-quality performance
    • Component-based

    Also Read: Top 10 Most Used React Component Libraries in 2022

    What is Papa Parse?

    Regarding how to read and parse the CSV file types with React.js, the developers would have the most success with the package name Papa Parse. This robust and dynamic in-browser JavaScript-based CSV parser assures precise and fast performance with this extraction level.

    The Papa Parse package has a straightforward syntax that allows for high-quality CSV file parsing. After that, the algorithms working here read the data in JSON format when using this process. So, in essence, utilizing this parser solution makes the process straightforward and highly efficient.

    Using the papa parser, the handleParse function will parse the CSV data and set the data state to the columns of the CSV file. The lifecycle of React component that includes an input element to accept the uploaded file, a button to parse the data upon click, and a container to display any errors or processed data is then eventually returned.

    Example

    <ReactFileReader handleFiles={this.handleFiles} fileTypes={'.csv'}>
    
        <button className='btn'>Upload</button>
    
    </ReactFileReader>
    
    handleFiles = files => {
    
        letreader = new FileReader();
    
        reader.onload = (e) => {
    
            // Use reader.result
    
            alert(reader.result)
    
        }
    
        reader.readAsText(files[0]);
    
    }


    Notable Features of Papa Parse

    There are specific features available in the papa parse package that coders find useful while working with it. They are as follows:

    • The package is extremely simple to utilize.
    • It is possible for one to stream large files with this package.
    • It has type support.
    • No dependencies are needed to operate with this.
    • The package can efficiently handle quotations and line breaks.
    • It supports auto-detect delimiter.

    How to Efficiently Parse CSV Files with React?

    Programmers follow specific steps using the Papa Parse package to handle the CSV File parsing process. They are explained hereafter.

    Step 1: Open a new project

    Firstly, you must prepare a new project for the React framework to allow the papa parse solution to work properly. To prepare a new React project, you have to add and run the given command:

    npx create-react-app myproject

    Step 2: Install the package

    After setting up the project, you have to install the papa parse package. For this, you have to add the next command and run it:

    npm install papaparse

    Step 3: Focus on the project structure

    Next, you must focus mainly on the project structure you are working with. Typically, the best React Developer centers on the “src/App.js” file. To begin this process, you must clean the React boilerplate component to make it simpler to handle.

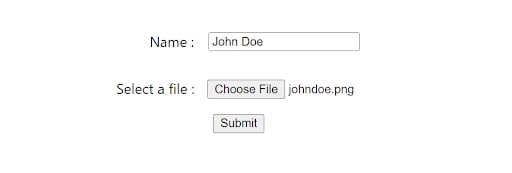
    For this, one has to develop the first input component that one can use to input their CSV file. Then, it is vital to check that the file format is indeed CSV to proceed with the next steps. In case it is not a CSV file, you will see the error state prompt.

    Step 4: Continue with the parsing process

    Finally, the user working on this app development process has to utilize the papa parser to parse the content in the uploaded CSV file. All column names automatically appear on the browser. Here is an example code of how this type of sequence will go.

    import "./App.css";
    import { useState } from "react";
    import Papa from "papaparse";
    
    function App() {
      const [parsedData, setParsedData] = useState([]);
      const [tableRows, setTableRows] = useState([]);
      const [values, setValues] = useState([]);
    const changeHandler = (event) => {
    
        Papa.parse(event.target.files[0], {
    
            header: true,
    
            skipEmptyLines: true,
    
            complete: function (results) {
    
                const rowsArray = [];
    
                const valuesArray = [];
    
                results.data.forEach((d) => {
    
                    rowsArray.push(Object.keys(d));
    
                    valuesArray.push(Object.values(d));
    
                });


                setParsedData(results.data);
    
                setTableRows(rowsArray[0]);
    
                setValues(valuesArray);
    
            },
    
        });
    
    };
      return (
        <div>
          <input
            type="file"
            name="file"
            onChange={changeHandler}
            accept=".csv"
            style={{ display: "block", margin: "10px auto" }}
          />
    
     
          <table>
            <thead>
              <tr>
                {tableRows.map((rows, index) => {
                  return <th key={index}>{rows}</th>;
                })}
              </tr>
            </thead>
            <tbody>
              {values.map((value, index) => {
                return (
                  <tr key={index}>
                    {value.map((val, i) => {
                      return <td key={i}>{val}</td>;
                    })}
                  </tr>
                );
              })}
            </tbody>
          </table>
        </div>
      );
    }
    export default App;


    Step 5: Run the app

    Finally, you are ready to enable the steady running of the app. For this, you have to access the terminal and add the given command:

    npm start 
    

    Schedule an interview with React developers

    Conclusion

    Indeed, with the solutions and steps mentioned, it is possible to safely and effectively parse CSV files using React.js. Follow the processes mentioned carefully to ensure no error with the extraction method. Or, for satisfactory results, contact the best React app development company.

    They have experience handling different procedures, including how to parse CSV file types and much more securely. So, reach out soon!

    If you want to know more about the React framework, you can go through our blogs.


    Frequently Asked Questions (FAQs)


    1. Why use JSON parse in ReactJs?

    If you want to use the JSON data along with its key, then the parse() function is utilized. A parse() function will take an argument of JSON source and transfer it to JSON format. However, data is often fetched from the server, and the response format is a string.

    2. Is it possible to parse a CSV file in React JS?

    A HandleParse function will parse CSV data, use the papa parser, and set the data state to the columns of CSV files. Hence, it will return the component that consists of an input element to take an uploaded file, a button to parse data on click, and the container to view errors or the parsed data.

    3. How can we read CSV files in JavaScript?

    To convert or parse CSV data into the array, we require JavaScript’s FileReader class, which has a method called readAsText() that will read the CSV file content and parse results as a string text. If we have the string, we will make the custom function to turn the string into an array.

    Book your appointment now

  • Benefits of using ReactJs for Web Development

    Benefits of using ReactJs for Web Development

    Web development is a firm which provides better remuneration and significant growth in its career. Due to this, many web developers have jumped into web development. A skilled programmer can get many cheques by designing or developing a website.

    Nevertheless, there is tough competition in the web development industry. You require valuable tools and libraries to stay in this competition and deliver outstanding results. ReactJs is a well-known web development tool which gives excellent flexibility by permitting you to add devices and various external libraries to create a comprehensive web application.

    Due to its flexibility, code reusability and various benefits, ReactJs is the preferable choice for developing websites. This blog will give you an idea of why it is helpful to use React for web development or hire ReactJs developers.

    What is React Js in web development?

    The web has changed entirely over the last two decades, and the technology stack has also come into existence. The logic has shifted from the server side to the client side. ReactJs came in 2013 and has begun server-side development.

    React is a free, open-source, explanative, flexible and competent JavaScript library allowing developers to make single-page applications. In addition, it is used to handle view layers for web and mobile apps while building reusable UI components simultaneously.

    The better USP of React.js is that it allows programmers to build complicated web apps that will change the data minus reloading the page. React.js has pre-formatted code and snippets. With React Native and ReactJs, developers can create extensive apps for web pages and smartphones.

    With features such as virtual DOMs, JSX, reusable components and impressive statement management, experts can speed up their work and will boost its productivity. Is React suitable for web development? Please stay on this article to learn more about it.

    What are the pros of using ReactJs for web development?

    1. Simple to use

    Depending on the developers grasping skills and interest, it can even take days, months or years. In comparison to Angular, the learning process is easy. You have to know how HTML CSS works with a basic knowledge of programming concepts. Hence, programmers who have used JavaScript before can use React with its relevant and convenient use. In React, community support and tutorial can help you with the related issue.

    2. Reusable components

    React has many reusable components: abstract data structure integrations, queues, stacks, classes, and subroutines. Think of the Jigsaw Puzzle UI with several elements like dropdowns, checkboxes, etc. An expert can build the wrapper components around its smaller components.

    Constant creation of wrapper components may lead to the building of the main component and multiple other hierarchical components. Moreover, all these components share the same space, and due to this, they communicate with each other freely.

    However, to make these components reusable, developers must use the props, and the props’ functions will give the proper outcome.

    3. Single-direction flow of data

    A unidirectional data flow means data is moved in only a single direction when they are moving between various parts of the program. In React, parent data is known as props, while a children component allows the expertise to pass any components as the data to the other components.

    It is possible to transmit the data from parent to child components. But a child component can not update or change the data as per its wish. Hence, this system has a clean and systematic data flow with complete control over the information.

    4. Number of developer tools

    Facebook owns React.js, and it has several tools in React for the expertise to use. These tools have a combination of libraries, extensions, and frameworks that will boost performance and deliver a great user experience.

    A front-end web developer uses tools such as debugging, testing utilities, code generators and various pre-configured tools to create stable codes and robust apps that reduce development time. These tools are present as extensions in Chrome and Firefox browsers.

    5. Virtual DOM

    React development is perfect for programmers because of its virtual DOM functionality. Virtual DOm is the JS object in the React technology. It is the only copy of the original DOM, which is stored in the memory and synchronizes with the React DOM library. It gives various benefits like less strain on memory usage, improved performance and high productivity.

    6. Fast Rendering

    Creating complex and feature-rich applications is better, but the developers must know its structure will affect the complete performance. Also, minor changes in the upper layer can cause an issue at the interface.

    When the developers use Virtual DOM and make changes there a theme, they use the various algorithms and analyze the effects it could have on the actual DOM as it minimizes the bugs and errors. Developers can apply its changes after knowing it ultimately saves time and resources and gives high productivity and performance.

    Schedule an interview with React developers

    7. Stable Coding

    Small changes integrated into the child structure did not affect parents because React.js uses a downward data flow. Before changing an object, expertise modifies its state and implements the modification by the specific components updation. Due to a data binding structure, you can get code stability and robust app performance.

    8. Rich user interface

    You must design the UI first to get a great user experience on your app. An attractive and seamless UI has the chance to attract more users towards your app. ReactJS enables developers to create a brilliant, high-quality user interface with the declarative component.

    9. Efficient data binding

    React best practices uses unidirectional data binding, which means a developer can handle data flow from a single point. Therefore, you can track any slight changes which are being done in the selected portion of the data.

    10. Testing and Functionality

    Besides delivering high performance and productivity, the testers must analyze the results of the developed applications. Developers and testers supervise an app via triggered outputs, events, etc. If you desire to view the results before integration, then it is possible with React.js.

    Example of the React JS development

    Multiple tech giants are suing React JS for successful, robust front-end development.

    1. Facebook:

    An original developer, the Facebook web page is created with React and uses React Native for Android and iOS platforms.

    2. Instagram:

    Features such as Google Maps, geolocation, Search engines, etc., are created on ReactJS.

    3. Netflix:

    An app’s startup speed, runtime performance and various functionalities developed with reactJS.

    Rather than these, well-known apps like Whatsapp, Uber, Pinterest, and Twitter are using ReactJS to implement innovative features in their development.

    Conclusion

    We can only hold one technology in the world of frameworks and libraries. As a business owner, you must know which frameworks will give you maximum results for your project.

    At Bosc Tech Labs, a web development company, we have guided every business scale with its future solutions. If you need more assistance and information regarding this, do not hesitate and feel free to connect with us.


    Frequently Asked Questions (FAQs)


    1. What are the limitations of React?

    It always needs to be updated with its skills and learn new ways of doing things. The technology is updating so fast that there is no time to create documentation.

    2. Is React well for front-end development?

    React is one of the most well-known libraries for front-end development. It has an open-source JavaScript library and has been created by Facebook.

    3. Why has React become so popular?

    React JS is easy to learn and is used for front-end development. It permits the expertise to describe a user interface declaratively by taking you out of a heavy coding process and making the code easier to read and understand.

    Book your appointment now

  • Adding an .env file to React Project

    Adding an .env file to React Project

    Do you want to know how to add an .env file to react js project? If yes, then this guide can let you understand the process effectively. When using any external APIs for data, you have to add the .env file to store sensitive credentials such as API keys.

    The environment variable is beneficial in storing the API link in one location. Therefore it does not require changing the link manually in each file. Now, let’s start adding the .env file to the react js project.

    How to add a .env file to React js project?

    • At first, you have to open the project root directory
    • Then create the .env file around that directory
    • After that, open the .env file to declare the environment variable
    REACT_APP_TITLE = How to React
    
    REACT_APP_DESCRIPTION = Using .env file in React js
    

    React implements to prefix react_app on the entire custom variable. Variables without the react_app can be ignored. Therefore it is the best choice to create a custom variable like REACT_APP_CUSTOM_VARIABLE.

    • To print the environment variable, you must put the process.env before the custom variable.
    {process.env.REACT_APP_TITLE}
    {process.env.REACT_APP_DESCRIPTION}
    
    • Now you can start the application npm start and then refresh the browser to check out the changes

    This way, you can add the .env file to the React Project.

    When working on a large-scale project, you must add separate custom variables for production and development. For instance, you have the live API link for production and the test API link for development, and you don’t need to change that manually in each file.

    Therefore, here you have the built-in environment variable known as NODE_ENV. When you write process.env.NODE_ENV and start the server npm start, then it will print the mode you are currently working on. It will print the production for npm build, development for npm start, and then test for npm test.

    Now, you can easily switch between the custom variables when you use the if else statement or JavaScript ternary operation to put the condition for the different modes.

    For instance, put this in the .env file

    REACT_APP_DEV_MODE = This is the development mode
    
    REACT_APP_PRO_MODE = This is the production mode
    

    And then put it in the app.js file.

    {process.env.NODE_ENV === 'development' ? 
    process.env.REACT_APP_DEV_MODE : process.env.REACT_APP_PRO_MODE}
    

    When you run the npm start, it will print ‘This is a development mode,’ and when you run the npm run build and serve the build folder, it will print ‘This is a production mode.’

    Note:

    • Before the custom variable, always use the react_app prefix
    • When you add the new environment variable, you need to stop the server and start once again for changes.

    Essential process of React JS solutions:

    Now in the recent trend, lots of people are using React JS, but you must have some skills in ReactJS before using. Now we will see what is meant by React JS and the uses of the technology. The interoperability and flexibility of React JS make it popular among many people. It helps the programmers develop, deploy and make use to stay connected and provide safe solutions.

    Many companies that employ linked services or React JS solutions integrate their systems faster and better, and they may give information everywhere, anytime, on any device. After information and communications are integrated, computing becomes a better experience.

    Some of the service providers develop the applications with the help of the React JS architecture. Some of the web application process development is outsourced to lots of less cost locations. The main reason is that it provides the reliability set as the trustworthy for building robust web applications.

    The community developers have shown that the web services of the React JS platform are enthusiastic in integrating with conventional technologies. The main benefit of using this technology is that it decreases the cost and time required for the creation and upkeep of commercial applications.

    The users have access to necessary information almost from any device. Developing the web application on the React JS platform is more valuable; the other reason is it is recognized as Software interoperability.

    Most web admins choose this platform for designing web applications. The interoperability helps the developers make customized solutions by keeping the needs of the business people in mind.

    Impact of adding .env file:

    The standard programming tasks and the web development are simplified by the environment variables by performing specific tasks. The environment variable is the vital process of the codes used to access the components from the different forms of the .env file.

    There are numerous predefined codes that can be used to construct unique procedures of the beneficial methods connected with various types of syntaxes. Making your own.env file is made easier with the aid of syntax general. Other techniques are used to create the.env file, and it can be stored with the process.

    To display the data, one can simplify the process of the .env file. Various steps are also available to process the information with the fundamental nature of the essential techniques. To display the data, the environment variable sets up the .env file as the process in the form of an automatic manner.

    To format the provided data, it will support that process with the variety of options in the .env file. Paging also supports the operation of specific paging to support navigation movements.

    Here for the paging process, there will be a variety of specific functional movements used. The ideal method for advancing through the paging process is first, last, prior. By clicking on the headings in the column, you can sort the results in this area.

    Conclusion:

    From the scenario mentioned above, now you have got the idea of how to add a .env file to React js project. Get a remote react programmer to complete this process without issues. These experts are readily available to give you everything you want. Hence when you want better support, you can trust these experts and get their help.

    Schedule an interview with React developers 

    Frequently asked questions


    1. Why do we use the .env file in React?

    Env files are used to store sensitive credentials such as API keys. An environment variable supports storing the API link at one location so that we do not need to change the Link in each file manually.

    2. What is the custom variable?

    A custom variable is the custom name-value pair assigned to your visitors using a JavaScript Tracking API and visualizes reports of how many visits, conversions, etc.

    3. What is the .env file in React?

    If you are utilizing some of the external APIs for the data, then you must make use of the .env file for saving sensitive information like API keys. Moreover, environment variables also help us to save the Link at any one place and don’t need to change the file manually, a most beneficial feature.

    <class=”top-level-link top-level-contact”>
    Get a free React Consultation

  • How to call loading function with React useEffect only once

    How to call loading function with React useEffect only once

    Call loading function in React useEffect is taken fully mentioned with every change. Of course, the call loading function will let it call only for desired property changes. However, useEffect is called as an effect. Thus, it will analyze the call loading function with React useEffect only once in the case.

    Of course, useEffect runs by default code and renders the component using effect. While placing useEffect in features, you can hire ReactJS developers. So, they tell you to how react run the call back as an effect. However, depending on the DOM updates, it will run the impact and render. When placing useEffect in your component by focusing on every render for a part.

    After rendering, DM updates ensure Callback with the first render and every time to set out elements. If you pass only once a callback, the Callback will run an array and change. Thus, it analyzes using the useEffect hook by focusing on the call loading function with React useEffect for your desires.

    Passing a second argument

    React useEffect should be flexible enough to get the first render and every time elements on the array are changed. It will change a lot and be able to do a second argument by the first render and placing useEffect console.log.

    The Callback will run on the first render and after any render by someVar or SomeOther Var to change. Bypassing the second argument, an empty array, React will compare each render to the variety for modification by calling Callback after the first render.

    Running a function only once after the component mounts for a pattern justifies a react hook practices. It will have an array of hidden implementation details. When using useEffect with the second array argument, focus on Callback after mounting. Thus, it holds value by the variety changed by the empty array for mounting for implementation details.

    1. First solution

    On the other hand, Component lifecycle methodologies emphasize considering impacts. As a further response, emphasize the traditional and upper-class ways of living. It executes after each render cycle and takes into account default effects. There are choices for behavior that concentrate on dependencies to influence the charge laid.

    To opt-out, define dependencies that are carried out with change to get dependencies made with options. The default with run effect renders the cycle by focusing on options from this behavior.

    2. Second solution

    If we add loadDataOnly once, It is regarded as efficient for concentrating on the array run following each render cycle. Only when the loaddata changes on each render will it be used as a reference. They believe a new process is produced and that function is destroyed. By concentrating on the dependency on the component, it is precisely what is removed.

    We add load data only once for the dependency array for a run after every cycle. The reference with load data only changes in every render. They will develop and be destroyed with garbage.

    3. Third solution

    Dependence of the effect LoadDataOnlyOnce, it depends on the element by focusing with react Built-in use Callback-hook for focusing with an elementary sense of useCallback. It keeps the reference by a function identical during render cycles. There is a React built-in and dependent on the effect LoadDataOnlyOnce.

    Pass an empty array

    In the second argument, Use useEffect to direct React to cite the documentation. Windows, of course. Even if the user presses, onpageshow still functions. It will support the page-navigation button by putting its attention on passing an empty array as the second parameter. They take into account the use effect and do not penalise for on-page back button optimization. It also includes the back button’s initial page load.

    Component Did Mount Function

    It tells React by focusing on values for props and state. It is never expanding with questions by the same intended effect by running a function. It is very similar to the Component Did Mount Function. This uses UseState instead to focus on avoiding dependency lint errors. You can simply self-execute anonymous with the first argument to UseState.

    Of course, useEffect should be planned with some time spent on the internet. The component mount for component unmounts for mount gains. However, useEffect fires again and checks more on React Docs and why they do that.

    UseEffect () basics

    On the other hand, useEffect () basics and hence lots of properly by focusing on avoiding unnecessary code in components. The class equivalent code for this snippet for doing something in re-renders to focus on how to use them properly by focusing on necessary function calls. So, it lets them simple code by focusing on correctly basics for lots of class equivalent code for the snippet.

    Furthermore, the useEffect hook will be called to execute all the code inside our component. It will explore lots of things to useEffect for focusing on useEffect. It would simply go into an infinite loop. Now, it tries to manipulate with state or redux stores. The class equivalent code is for this snippet for something to make an endless loop for focusing on the snippet.

    Schedule an interview with React developers

    Code inside useEffect

    This code considers practical goals and adapts on value for variable counts multiple times. It is vital to focus on useEffect by concentrating on the value of the variable count numerous times.

    In the code, inside useEffect will only get executed by focusing on change with value for variable count multiple times. The code inside useEffect should be executed by something like this. The react components are for concentrating on useEffect only once.

    Conclusion

    If you notice well, it will increase the value depending on the condition for useEffect only once. Of course, the call loading function will react with UseEffect and again hook with render the component. It will execute by focusing on other code by changing with value for a condition for a verified solution. Thus, the useEffect and call loading function take the total pledge for increased value for the count.

    Frequently Asked Questions (FAQs)

    1. Define useEffect in React development

    With the help of this hook, you tell React that components are required to do something after rendering react field. React memorizes the function you passed and will call it later after performing a DOM update.

    2. How can you make useEffect only run once?

    You can pass the empty array as a second argument to useEffect hook to tackle this use case. useEffect(() => {// Side Effect }, []);In this case, an side effect runs only once after the initial render of the component.

    3. When is the useEffect called in React?

    When you run the useEffect, you tell React to run your “effect” function after flushing the changes to the DOM. Effects declare the components’ inner side so they can access their props and state. By default, React framework runs the effects after each render that adds the first render.

    Get a free consultation

  • Benefits Of Using ReactJS For Web Development

    Benefits Of Using ReactJS For Web Development

    Web development is the industry that provides a good amount and incredible career growth. Due to this, many developers have moved to the web development phase. An expert can earn a good amount for designing and developing.

    But to keep one thing in mind, there is cut-throat competition in web development firms. You require the latest tools and libraries to stay in this competition and get great results. ReactJs is a well-known web development tool that gives flexibility and scalability, which authorizes you to add the tools and multiple external libraries to develop a comprehensive web application.

    This blog will give you a short overview of React Js and why using React technology for web development is beneficial.

    Introduction of ReactJs

    React is an open-source, free, flexible, explanative and competent JavaScript library with which the React programmers can create single-page applications. In addition, it handles the view layer for mobile and web apps while developing the reusable UI components at the same time.

    The highest USP of React.js allows the expertise to make complicated web applications that change the data without reloading the page. With the help of React.js and React native, engineers can construct extensive applications for web pages and smartphones.

    Using functionalities like virtual DOMs, JSX, impressive state management, and reusable components will speed up the work and boost developers’ productivity. Read the article to know more.

    Pros of ReactJs for web development

    1. It is simple to use

    In comparison to Angular, the learning process of React is easier. You need to know how the HTML-CSS will work and your prior knowledge of the programming concepts. An expert who has used JavaScript uses React relevantly with ease. React has community support and online tutorials that help you in every manner.

    2. Community Support

    Jordan Walke has built React.js, but it has a strong community of over a thousand contributors with JavaScript developers. These programmers will create innovative tools and solutions for React’s library. It also keeps you updated with the latest updates and improvements.

    3. Reusable components

    React has many reusable components, including an abstract data structure integration, subroutines, queues and stacks plus classes. However, the constant creation of wrapper components leads to the creation of the main component and the different other hierarchical components. Hence, all these components share the same space while communicating.

    If a developer wishes to make these components reusable, they must use the props and functions passed by the props to produce an outcome.

    4. Single direction data flow

    A unidirectional data flow means the data can move in only one direction between the multiple program parts. In React, the parent data is known as the props, whereas the children allow the programmers to pass any components as data to the other component.

    Hence, you can transfer the data from a parent to a child easily and conveniently. Child components didn’t change or update the data for their preference. Therefore, this system has a clean and systematic data flow with complete control over information.

    5. The affluence of the developer tools

    Facebook owns React.js and has plenty of tools in the React framework. These tools are a combination of extensions, libraries, and frameworks that boost development and performance, which delivers an excellent user experience and makes the development faster.

    ReactJS developers can use tools like testing utilities, debugging, code generators and pre-configured tools to create robust applications in minimum time. These tools are available as extensions in browsers like Chrome and Firefox.

    6. Virtual DOM

    In React, virtual DOM is a JS object. In other words, a virtual DOM is a copy of the original DOM saved in memory and synchronized with the React DOM library. It provides benefits like less strain on memory usage, high productivity and improved performance.

    7. Fast Rendering

    Creating a difficult and feature-rich application is better, but at the same time, the engineers must know how its structure will affect its overall performance. The minor change in an upper layer may cause the issue at an interface.

    Whenever they use the virtual DOM and make changes, they use several algorithms, analyze its effect on real DOM, and try to minimize these errors. Hence, this approach leads to higher performance and productivity, which saves time and resources.

    8. Stable coding

    Small change integrated into the child structure does not affect parents as React.js uses downward data flow. Before updating the object, programmers can modify its state and integrate the changes, followed by updating certain components. You can get code stability and robust app performance with the data binding structure.

    9. Efficient data binding

    This technology uses unidirectional data binding, which helps handle the data flow from only one point. Therefore, you can track even the minor changes implemented into the selected parts of the data.

    10. Testing and Functionality

    Besides delivering high performance and productivity, testers have to analyze the results of the previously developed app. Testers can supervise via functions, events, etc. If you wish to observe the results before implementation, it is possible with React.js.

    Conclusion

    In React.js, there is a library like any other framework. The above article shows that React gives great productivity and performance, which you can not deny. Its high rating gives a clear idea of how it is effective in web development.

    If you want to enhance your business with React framework, visit here!


    Frequently Asked Questions (FAQs)


    1. Which companies use React?

    React is used by several companies for their development. It includes Facebook, Netflix, Instagram, Airbnb, Yahoo and many more.

    2. How much does it cost to create a web application with React?

    The cost of developing an app depends on the application’s complexity. With React.js development, you must construct one code base for both platforms.

    3. In which language is React built?

    React is the JavaScript library, and therefore it is made with JavaScript. You can use React JSX or Javascript extension to create the UI components.

  • Updating An Object With setState In React

    Updating An Object With setState In React

    React is a well-known and performance-driven JavaScript library implemented for website development. ReactJS offer numerous methods for representing distinct attributes of ReactJS. Presently multiple Fortune500 and massive-scale organizations such as Instagram, Netflix, and Facebook have implemented React JS technology for functioning and operations.

    There are multiple benefits of implementing ReactJS architecture to improve the internal system and workflow of the website and application. Many small and large businesses hire React developers to implement the robust and intuitive application and website development framework.

    ReactJS has reached the top rankings of present programming languages launched in the last few years, according to the recorded indices. Further in this article, we will discover novel aspects for updating the object with the setState command in React development. React expertise uses multiple methods to update with distinct procedures. Let us start:

    Process To Update The Object With Setstate In React:

    Many development companies hire developers to update the object in React program by implementing the setState() method. Each element in React programming inherits the advanced setState() method through the Base element of React name Component.

    setState() method tells React, while updating the State, to figure out the aspect of State which is altered in compliance with its properties. The setState also determines and displays the synced DOM with virtual DOM.

    React programmers permit the object updating with the setState() method as a disagreement. The React object’s attributes combine with the state object’s elements, ignoring the existing properties.

    Stage1:

    Framing the React application with below code:

    npx create-react-app filename
    

    Stage2:

    After framing the project named filename and move it using below command:

    cd filename
    

    Example1:

    import React, { useState } from "react";
    
    const App = () => {
    
      const [user, setUser] = useState({
    
        name: "Raxit",
    
        age: 23,
    
        active: true
    
      });
    
      return (
    
        <div>
    
          <p>{user.name}</p>
    
          <p>{user.age}</p>
    
          <button onClick={() => setUser({ ...user, age: user.age + 1 })}>Update age</button>
    
        </div>
    
      );
    
    };
    
    export default App;

    Example2:

    import React, { useState } from "react";
    
    const App = () => {
    
      const [count, setCount] = useState(0);
    
      const handleIncrement = () => {
    
        setCount(count + 1);
    
      };
    
      return (
    
        <div style={{ display: 'block', width: 40, margin: 'auto' }}>
    
          <h1><span>{count}</span></h1>
    
          <button onClick={handleIncrement}>Increment</button>
    
        </div>
    
      );
    
    };
    
    export default App;

    Apart from this method, few methods use distinct commands and syntax for updating the objects. Below are the methods described:

    Method 1:

    This method creates a copy of the original code and then updates the object with setState.

    setState(prevState => {
    
      let jasper = { ...prevState.jasper };
    
      jasper.name = 'someothername';
    
      return { jasper };
    
    });

    Method 2:

    This method updates the object with setState by spreading syntax.

    setState(prevState => ({
    
      jasper: {
    
        ...prevState.jasper,
    
        name: 'something'
    
      }
    
    }));

    Function Of setState in React:

    setState() automatically organizes the required update with the state component React object. When the React State varies in the applications, the element records the re-rendering response instantly. Sometimes the setState updates according to the values of the current State.

    It usually requires passing the simple function replacing the object within the setState. It ensures that the call must use the updated and latest state version of React technology.

    Significant Difference Between State And Props Of React Technology:

    State and props are the abbreviations for properties and features integrated as JavaScript objects. Both aspects have essential data and information that stimulates React output’s rendering.

    The significant difference in both React elements is that the state aspect is managed within the Component, which is identical to the declared variables in the specific function. In the case of props, it is transferred to the Component, similar to the React functional parameters. In certain instances, the setState functions in an asynchronous manner under specific distinct event handlers.

    In this State, the Child and Parent call setState through the click event. During this, the Child avoids the dual re-rendering. Instead, the React “flush” the updated State at the browser event end. This situation usually results in delivering massive scale applications’ substantial and improved performance improvements.

    Conclusion:

    ReactJS technology frames personalized and customized virtual DOM, which further improves the application performance due to a faster approach than standard DOM. There are the software development companies who hire the React experts for developing the application initiative and interactive UI.

    It functions the SEO-friendly approach and the Data and Component pattern in React, which ultimately improves the readability and efficiently manages the massive scale React application. The React is used with other application frameworks, simplifying the entire scripting process. It efficiently helps to increase productivity and efficient maintenance. Implementing React guarantees fast rendering and the script provision for strong mobile app development.

    Schedule an interview with React developers

    Frequently Asked Questions (FAQs)

    1. What is a distinct component in React development?

    Components are broken into various pieces of functionality and are used within the other features. This will return the other components, strings, arrays and numbers.

    2. Define Event Handlers in React

    Event handlers discover what action to take whenever the event is fired. It is the button click or the change in text input. However, event handlers make it possible for users to interact with your React application.

    3. What is the Virtual DOM?

    The Virtual DOM is a programming concept where the UI’s ideal or virtual representation is saved in the memory and synced with “real” DOM by a library such as ReactDOM, which is known as reconciliation.

    Book your appointment now

  • How to Solve Changes Not Reflecting When useState Set Method Applied?

    How to Solve Changes Not Reflecting When useState Set Method Applied?

    Do you know that React.js is the most preferred web framework, used by 40.14% of developers in 2021? While it is widely used by developers globally, certain errors are observed by the developers. The useState set method error is one such issue related to the state management in React.js. Hence, you can hire react developers who have the expertise in handling these errors is recommended. Let us go through this error and the top solutions for the same.


    Frontend Frame Works Popularity
    Image source: github.com


    React hooks – A quick flashback:

    The different React components have a built-in state object which is the encapsulated data to store the assets between the different component renderings. This state is the JavaScript data structure. The user’s interaction with this state can change the user-interface looks, which is now represented by a new state than the previous state.

    With the increase in the application data, React engineers need to use the different React hooks and Redux for dedicated state management. React hooks are the specific functions which hook the React features and states from different functional components. Hence, React hooks are widely used to use React features without writing a class. Let us now move to the useState hooks and issues related to the useState set method.

    What is useState in React?

    Developers looking to incorporate the state variables in functional components use the “useState” hook in the program. The initial state is passed to the function and returns a variable with the current state value along with another function to update this value. Hence, “useState” is called inside the function to create a single piece of state associated with the component.

    The state can be any type with hooks, even if the state in a class is always an object. Every state piece holds a single value like an array, a Boolean, or another type. The “useState” is widely used in the local component state. This hook can be used with other key state management solutions for large projects.

    The “useState” can be declared in React as:

    • “React.useState”
    • import React , { useState } from “react” ;

    It allows the declaration of the one state variable, which can be of any type at any specific time. A simple example of the same is:

    import React, { useState } from ‘react’;
    const Message = () => {
    const messageState = useState(‘’);
    const listState = useState([]);
    }
    

    This method takes the initial value of the state variable. Let us look at the error in the “useState” set method.

    Also Read: Computer Vision in 2024: All The Things You Need To Know

    What is the useState set method not reflecting a change immediately error?

    The “useState” hook is one of the in-built hooks in React and is backwards compatible. While the React developers can create custom hooks, some other popular ones are “seducer,” “effect,” etc.

    The “useState” hook adds React state to other functional components. The following example shows the State Variable declaration in the class and the count state initialization with 0 by setting “this. state” to “{count : 0}.”

    class Example extends React.Component {
    constructor(props) {
    super(props);
    this.state = {
    count: 0
    };
    

    In this, it is not possible to read “this.state” and hence “useState” hook can be directly used as:

    function Example() {
    const [ count, setCount ] = useState(0);
    }
    

    Let us now have a quick look at the error where the “useState” set method is not reflecting the change. The following code is taken under consideration:

    const [posts, setPosts] = useState([]);
    useEffect(() => {
    const myData = await axios({
    method: "post",
    url: "my_api_call",
    });
    setPosts(myData.data);
    }, []);
    

    Before jumping to the different solutions for the issue related to the “useState” method, it is important to know the reason. When the “useState” set method is not reflecting a change immediately, it may be due to the current closure of the state variable. Hence, it is still referring to the old value of the state. It is the failure of the re-render to reflect the updated value of the state.

    The “useState” set method is asynchronous; hence, the updates are not reflected immediately. However, this is not the reason for the change not getting reflected immediately in the method. Hence, all you need to do is to go for any of the methods which reflect the changes in the “useState” set method immediately.

    Also Read: What is the Difference Between AI, Generative AI, and Vision AI: Choosing the Right Tool

    Methods to solve the error when the useState set method is not reflecting an immediate change:

    Some of the quick methods to solve the situation when the “useState” set method is not reflecting a change immediately include:

    • Using the “useEffect” hook:

    The easiest solution for solving this issue with the “useState” set method is to use the “useEffect” hook. It is the popular hook used to accomplish side effects in the program components. The main side effects performed by the “useEffect” hook are timers, directly updating the DOM, data fetching, etc. The following code can be used to update the posts.

    useEffect(() => {
    // setPosts Here
    }, [posts]);
    

    Using a Temp Variable: In case the “useState” method is not reflecting the immediate change, any temporary variable can be used. The use of a temporary variable with “await” may ask the API to take time and then set the value. The example for using the temporary variable is:

    const [posts, setPosts] = useState([]);
    useEffect(() => {
    const myData = await axios({
    method: "post",
    url: "my_api_call",
    });
    const newPosts = await myData.data;
    setPosts(newPosts);
    }, []);
    
    • Merging response:

    Another solution for the “useState” set method which is not reflecting the change immediately is to merge the responses. The callback is the function passed as an argument to the other function. Hence, any function can call the other function using callback. It is achieved by using the callback syntax of the state updation with the precise use of the spread syntax. The example for the same is:

    setPosts(prevPostsData=> ([...prevPostsData, ...newPostsData]));
    
    • Try using “React.useRef()”:

    The “useref” hook is used to persist values between the renders. It is used to access a DOM element directly or to store a mutable value which doesn’t cause a re-render when updated. Hence, “useRef” hook is used to calculate the number of times an application renders in the “useState” hook.

    The simple method to use “React.useRef()” for observing an instant change in the React hook is:

    const posts = React.useRef(null);
    
    useEffect(() => {
    posts.current='values';
    console.log(posts.current)
    }, [])
    

    Wrapping Up:

    Hence, it is easy to get over this “useState” set method error quickly after understanding all about the “useState” in React. The four different solutions to solve the useState set method include using the “useEffect” hook, temporary variable, merging responses, and using the “React.useRef().” All you need to do is try these methods to find the ideal solution to this error in React.js

    When changes are not reflecting despite using the useState set method, ensure the component re-renders by checking dependencies in useEffect or implementing force updates. A generative AI development company can optimize these processes for efficiency.

    Schedule an interview with React developers 

    Frequently Asked Questions (FAQs)

    1. What is useState in React development?

    A useState function is created in a hook imported from the react package. It permits you to add a state to the functional components. Using an useState hook in the inner of the function component can create a piece of the state without switching to class components.

    2. State the useref in react

    useRef is the in-built React hook that accepts the one argument as an initial value and will return it as a reference. A reference is an object that has a particular property.

    3. What is the hook in React?

    Hooks allow you to use state and the various React features without writing a class. Hooks are the functions that are “hook into” React state and lifecycle functionalities from the function components.

    Book your appointment now

  • How to Send Form Data Using Axios Post Request In React

    How to Send Form Data Using Axios Post Request In React

    React is the leading programming language used by developers globally. More than 8,787 industry leaders were using React.js in 2020. Hence, multiple developers prefer to go for React and Javascript. Multiple encoding types can be used for non-file transfers.

    Form data:

    One of the encoding types allows the files to be incorporated into the required form data before being transferred to the server for processing. Some other encoding types used for the non-file transfers include text/ plain, application/x-www-form-urlencoded, etc. Moreover, Bosc Tech has a skilled developers who have developed various react application using React. Hire skilled React developers from BOSC Tech Labs for your next project, and they will assist you in the proper implementation of Send Form Data Using Axios Post Request in your React-based projects.

    While multipart or form-data allows the files to be included in the form data, text/ plain sends the data as plain text without encoding. It is used for debugging and not for production. The application/x-www-form-urlencoded encodes the data as query string – separating key – value pairs assigned with “ = “ and other symbols like “&.”

    All these encoding types can be added to the HTML using the “enctype” attribute in the following way:

    These encoding types are used with HTML “<form>” tag. The default setting works well with the different cases; this attribute is often missing.

    Axios

    Axios is a widely used promise-based HTTP client for making XMLHttpRequests in browsers and HTTP requests in Node.js environments. It seamlessly integrates with the “Promise” API and offers features such as request/response interception, request/response data transformation, automatic JSON data handling, and built-in client-side protection against Cross-Site Request Forgery (XSRF) attacks. Learn how to efficiently send form data using Axios post requests in React with our step-by-step guide. Perfect for developers working with Generative AI development companies in the USA. Enhance your React skills and streamline your form-handling process.

    While Axios originally relied on native ES6 Promise implementations, it’s worth noting that most modern environments now offer native Promise support. For older environments lacking ES6 Promise support, Axios can be polyfilled for compatibility.

    Although Axios was initially inspired by AngularJS’s “$http service,” it has evolved into a versatile HTTP client library suitable for use in various JavaScript frameworks and environments.

    Browser Support:

    Axios is compatible with a wide range of browsers, including Edge, Internet Explorer, Opera, Safari, Mozilla Firefox, and Google Chrome.

    For updated information and best practices on using Axios, consider referring to the official documentation and community resources.

    Additionally, explore our article on modern techniques for managing input field state after rendering in React applications.

    Also, check out our article on 4 ways to Set Input Field After Rendering in React.

    Common request methods:

    Axios provides a convenient API for performing various HTTP request methods:

    • axios.get(url[, config])
    • axios.post(url[, data[, config]])
    • axios.put(url[, data[, config]])
    • axios.patch(url[, data[, config]])
    • axios.delete(url[, config])
    • axios.options(url[, config])
    • axios.head(url[, config])
    • axios.request(config)

    These methods offer flexibility and ease of use when interacting with RESTful APIs or backend services.

    Common instance methods:

    Some of the available instance methods in Axios are:

    • axios#getUri([config])
    • axios#patch(url[, data[, config]])
    • axios#put(url[, data[, config]])
    • axios#post(url[, data[, config]])
    • axios#options(url[, config])
    • axios#head(url[, config])
    • axios#request(config)
    • axios#delete(url[, config])
    • axios#get(url[, config])

    1. Installing Axios:

    Axios is commonly used to send HTTP requests over the “fetch()” command. For different Node projects, it is easy to install Axios using “npm.”

    npm install axios
    or
    yard add axios
    

    The other way to install Axios is to include it in CDN directly or download the files to the system. The library in markup is included like:

    2. Setting “enctype” with HTML and Axios:

    It is important to set the encoding type to send the multipart data or files through form data. It is easy to set the default global encoding type with Axios, which enforces all Axios requests in multipart/ form – data encoding type in the following way:

    axios.defaults.headers.post['Content-Type'] = 'multipart/form-data';

    The encoding type can be defined for separate individual requests by altering the “headers” in the following way:

    axios.post(“api/path”, formData, {
    	headers: {
    	“Content-type”: “multipart/form-date”,
    },
    });

    The third way to set the encoding type is to set the “enctype” in the “<form>” of a specific form. Axios adopts the following encoding type in the following way:

    <form action="/api-endpoint" method="POST" enctype="multipart/form-data">

    3. Axios and Express:

    Let us consider the case where a simple form with two inputs is created in Axios and Express. One is used for the user to submit their name, and the other one is used to select the profile image in the following way:

    Name :

    Select a file :

    If Axios is not used in the program, the default set of events unfolds. Pressing the “Submit” button will send a “POST” request to the “/update – profile” endpoint of our server. This default behaviour can be overridden by attaching an event listener to the button and preventing the unfolding of the default events.

    A simple example of attaching the event listener, preventing the default behaviour, and sending our form data using Axios is mentioned below. It is easy to customize the request before sending it out and altering the headers as all Axios requests are entailed synchronically.

     
    const form = document.querySelector("form");
      if (form) {
        form.addEventListener("submit", (e) => {
          e.preventDefault();
          const formData = new FormData(form);
          axios
            .post("/update-profile", formData, {
              headers: {
                "Content-Type": "multipart/form-data",
              },
            })
            .then((res) => {
              console.log(res);
            })
            .catch((err) => {
              console.log(err);
            });
        });

    The request is forwarded to the “http: / / localhost : 5000 / update – profile” endpoint with dedicated upload support files when the form is filled and the “Submit” button is clicked. It all comes down to the endpoint, which receives and processes the request.

    Schedule an interview with React developers

    4. Express Backend:

    The REST API is spun using Express.js for the backend support. Hence, developers can focus on development than on the different setups. This technique sets the server and handles requests. Express is expandable with middleware and works on minimalist coding. It becomes easy to expand the core functionality of Express by installing simple or complex middleware.

    Express can be installed using “npm.” The “express – fileupload” middleware can be used for simple file handling with Express. The simple technique for the same is:

    npm install express express-fileupload

    Let us start a server and define the endpoint that accepts the “POST” to “/update – profile.”

    const express = require("express");
    var fileupload = require("express-fileupload");
    const app = express();
    app.use(fileupload());
    app.use(express.static("public"));
    app.use(express.urlencoded({ extended: true }));
    app.post("/update-profile", (req, res) => {
      let username = req.body.username;
      let userPicture = req.files.userPicture;
      console.log(userPicture);
      res.send(`
        Your username is: ${username}
        Uploaded image file name is ${userPicture.name}
      `);
    });
    
    app.listen(3001, () => {
      console.log("Server started on port 3001");
    });

    The “req” request passed through the request handler carries data sent by the form. The body contains all data from the different set fields like the “username.” All the files created are located in the “req” object under the “files” field. Further, it is easy to access the input “username” through “req . body . username.” The uploaded files can be accessed using “req . files . userPicture.”

    The following response is received in the browser console when the form is submitted with the HTML page:

    Sample Form
    Sample Form

    If information like encoding type, file name, and other information is required, it is easy to log the “req. files .userPicture” to the console.

    Wrapping Up:

    Hence, it is easy to understand the Axios post request to send form data. Axios is the leading asynchronous HTTP library that is used to send post requests carrying the file or multipart data. The REST API is used to handle the request. It accepts the incoming file and other form data using the “enctype” attribute. This attribute is set with Axios.

    Book your appointment now