• 8 Mistakes to Avoid When Creating React Native Apps

    8 Mistakes to Avoid When Creating React Native Apps

    The developers’ demand for React Native app development is not simply a result of the sector’s growth to the point where Native and React Native modes of development are now being compared. The framework’s constant advancement fuels the need for updates.

    However, this desire is only so strong. Developers will ultimately need to become familiar with the development process’s fundamentals, particularly in comprehending and preventing React native app development errors that can harm users’ experiences and skills.

    Learn how to become accustomed to the mistakes made when developing React Native apps and what it takes to become a developer who makes few errors.

    Why is React Native Popular among Developers?

    1. Use of JavaScript in React Native

    One of the languages a developer starts with is JavaScript. As a result, they closely resemble the subject matter. The fact that React Native mainly utilizes JavaScript reduces the learning curve considerably.

    2. Develop native apps

    Despite employing JavaScript, the developers don’t use the web view to render React Native components. React Native should be your only option because it renders proper native elements, allowing developers to employ platform-specific components like activity indicators to give platforms a recognizable, native-like* feel.

    3. A simple installation procedure

    The installation process must always be simple, without any problematic processes. Developers with a background in JavaScript will find the Node Package Manager a straightforward tool to install the React Native framework. React Native will save you the work of downloading binaries from the source, even if you don’t understand JS.

    4. Strong support from the community

    React Native’s popularity has increased significantly since it was introduced in 2015. React Native has gained popularity among developers as well as businesses from a variety of industries as a result of the many advantages it delivers.

    As a result of this tremendous demand, a robust and active community has emerged that works every day to adapt the benefits and drawbacks of React Native.

    5. Improved productivity

    The key to developing apps more quickly is the productivity of the developers. Even if JavaScript is reliable, the procedure is still made simpler by the live reload ability and the user’s option to use any IDE or text editor.

    6. It works on cross-platform

    React Native is a cross-platform app development framework that can be used for more than just developing mobile applications. With React Native, developers can use their abilities on Windows smartphones, smart TVs, smartwatches, and VR headsets.

    It is advised to work with a React Native App Development Company in the USA to create and develop unique react native apps with the latest features, regardless of where you are located, such as Los Angeles, New York, etc., to eliminate the React Native challenges.

    Developer Mistakes in React Native App Development

    Here, we’ll look at a few of the most frequent issues when building React Native apps and explain how to fix them.

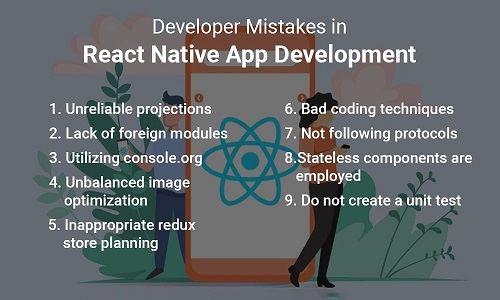
    1. Unreliable projections

    Even though React Native encourages code reuse and offers several reusable components, developers should be aware that page structure and app layout may vary significantly between platforms. Second, when creating a web app, test the endpoints of each backend. The application’s logic will be under your control, so check that everything is appropriately coded. Always plan for two different layouts for your application, and consider the database architecture before evaluating.

    2. Lack of foreign modules

    Many businesses stay away from using foreign modules and codes. Using the foreign module streamlines processes and helps with documentation. However, modules might eventually stop operating according to plan, making the app’s value argument irrelevant.

    Therefore, it is essential to read the code and view this development as distinctive compared to other techniques for generating translated applications. If an unfavorable module is predicted, this will assist you in successfully resolving issues.

    3. Utilizing “console.org”

    Generally, programmers should avoid directly including log statements in their code. Even though the console log statements are simple, they help with app debugging. However, if programmers continue to use rendering logic that requires synchronization, problems may occur.

    It’s valid to claim that a piece of unsynchronized code results in a congested JavaScript thread. The React app’s performance will be slowed down due to all of this traffic congestion.

    4. Unbalanced image optimization

    The most crucial stage in creating apps is image optimization. Many app development teams must still finish this phase, however. Because of this ignorance, the final product is more likely to have images that require precise alignment.

    Poor image optimization is frequently the cause of slow-loading graphics on websites and mobile apps. Additionally, optimization will make it easier to resize local images, enabling direct upload to cloud storage.

    The application can be made significantly lighter with the proper image optimization, which improves speed and enables faster scaling. As a result, you should avoid this typical React Native app development mistake if you want to make a helpful app.

    5. Inappropriate redux store planning

    A Redux store stores the information describing the state of the application. Redux architecture can only have one store in your application.

    More than only the layout needs to be considered when designing the redux store for a new project. In the absence of caution, improper planning ensures mistakes. Redux stores that have been carefully thought out simplify data management and storage. It can also be used to fix data problems and enhance the functionality of your app. As a result, if you make a mistake, your entire application could be ruined. Furthermore, you can skip redux store planning and maintain clear, concise code if you’re working on a tiny project.

    6. Bad coding techniques

    The fact that sloppy programming won’t let you add new features to the app is a crucial issue to remember. You’ll need to constantly update the code as the requirements for the app change. Because the code isn’t modular, you must develop an immense new program to address the problem. What steps should you take next?

    Once you’ve started creating the code, don’t try to figure out how to keep going. Before beginning to work with the code, take the time to develop a plan. To make your code understandable, use correct coding practices. Consider breaking down the display parts into practical utility techniques. Give variables meaningful names to help you differentiate between different types of props, life cycles, methodologies, and other parts.

    Schedule an interview with React developers

    7. Not following protocols

    It might be terrible to violate even the most basic React Native App development standards. This is because if programmers reject using established protocols, the development process will be cumbersome. Therefore, the React app development team and designers should always follow best practices.

    8. Stateless components are employed

    The stateless component was an excellent solution for developers to boost React Native’s speed until React 16. Even though it no longer works as well, some people still use it.

    A stateless component doesn’t extend any classes or have any local variables. They give the DOM value that was assigned to them again. They accelerate the time it takes to get the product to market by making testing more accessible and enabling quick deployment.

    There are, however, better alternatives available right now. It has been superseded by the Pure component, which asserts that it will accelerate performance and streamline the React Native development process.

    9. Do not create a unit test

    When creating React Native apps, working without unit testing is a common mistake. This is so that the developed app will continue to function whether or not testing units are written. However, it is a gamble, and you won’t know the result until you make your product accessible to users.

    Therefore, it is preferable to test your app’s functionality before releasing it on the market rather than leaving its fate in the hands of users.

    Writing unit tests will cut down on the stress that arises when an app is first released. This streamlines the development process and improves your app’s reputation. The developers can access different sections of the apps independently due to a well-documented unit test. Therefore, always test each component at the appropriate stage to ensure trouble-free operation. The error can also be caught early on by app developers, who can fix it without pausing the entire development cycle.

    React Native App Development Challenges

    1. Dependence on Native App Developers

    Due to the way JavaScript functions, programmers occasionally use native programmers, particularly when an application requires a complex computing process; these programs require native programmers since developers must offload computation to the native component of the app.

    2. Abstraction Layer limitations

    An abstraction layer is introduced to the native platform to expand functionality in React Native apps. When creating React Native applications, the abstraction Layer should be avoided because it has some reoccurring issues, such as:

    • Identifying the issues that occur in the abstraction layer is challenging.
    • High dependence on third-party services and libraries.
    • Dependency on implementing custom designs into practice.

    3. Multiprocessing and parallel threading are not supported

    Due to React Native’s single Javascript thread, engineers may experience slow performance while trying to run multiple processes simultaneously. It is one of the significant limitations of react native.

    4. iOS deployment is very challenging

    Since they will have to deal with the challenges of obtaining provisioning profiles and appropriate certificates, developers find it incredibly frustrating to test their iPhone app on any testing services in addition to Apple’s Testflight when utilizing React Native.

    However, the procedure is not particularly challenging on Android, as testing and deploying Android apps is relatively easy and hassle-free.

    Conclusion

    For developers who take their work seriously, knowing weaknesses that might impair the user experience can be an excellent place to start. Additionally, partnering with a mobile app development company that recognizes the value of learning from mistakes and promotes self-improvement is another excellent place to start. You will be guided through the process and assisted to make it easier. If you want more information about React Native framework then get in touch with us.

    Frequently Asked Questions (FAQs)

    1. Why is React Native such a difficulty?

    React Native mobile app development is quite challenging to debug. Debugging becomes highly time-consuming because these apps were created using Java, C/C++, JavaScript, etc.Developers must therefore be proficient in the language used by the platform.

    2. How do you handle errors in React Native?

    “Error Boundaries” is a new component added by React to manage failures that occur inside other components. React components known as “error boundaries” can log JavaScript errors that occur anywhere in their child component tree and display a fallback user interface instead of the component tree that crashed.

    3. When should React Native not be used?

    React Native is probably not the most excellent choice for your mobile app development project if you want to create a mobile app with numerous screen transitions, interactions, and animations. In general, React Native is not used to build mobile apps that need complicated gestures.

    Book your appointment now

  • A Guide to React Mobile App Development: Creating a Dynamic User Interface

    A Guide to React Mobile App Development: Creating a Dynamic User Interface

    In recent years, there has been a flurry of massive app development initiatives in the tech sector. Every organization strives to employ technology as effectively as possible to succeed, and they frequently do so. However, developing an app with the potential to rule the market is not an easy task. Any program can become well-known and successful using the proper UI and language. The days of developing native apps individually for iOS and Android are long gone. React app engineers are in high demand as businesses look to create cross-platform apps that can be developed and maintained more efficiently. We must create the most with limited resources if we wish to win in the market nowadays, as both the market environment and technology paradigm have fundamentally altered.

    For precisely this reason, hybrid apps use developers’ ingenuity to craft seamless user interfaces on both the iOS and Android platforms, leveraging simple language and rich native functionality. React Native is a promising and well-liked solution that successfully makes it easier to create hybrid apps and has several benefits. React mobile app development has additionally proven to be effective and time-saving.

    Hybrid Apps and Dynamic User Interfaces: The Future of React Native

    The dynamic user interface of a mobile app is crucial. They are the interface users utilize to use the app, and they can improve or degrade the user experience. This interface adjusts and changes based on the user’s demands, making it more exciting and straightforward. A solid and flexible framework is required to create a dynamic user interface, a critical component in developing mobile apps. Hybrid mobile applications enable developers to construct highly responsive and understandable user interfaces optimized for mobile devices via their component-based architecture and declarative syntax.

    Software called hybrid apps includes features from both native apps and web applications. In simple terms, hybrid apps are just native app shells wrapped around web-based applications. Once a hybrid app has been installed locally, the shell could use an embedded browser to connect to the mobile platform’s functionality. Because the browser and its plug-ins work behind the scenes, users cannot see them.

    Must have skills to use React Native’s ecosystem and the power to create engaging UI/UX

    You must thoroughly understand the framework’s fundamental ideas, such as components, states, and props, to build a dynamic user interface for any hybrid application. You should also be familiar with the various tools and libraries for creating user interfaces, such as the React Native Elements library, which offers a collection of pre-built UI components that can be quickly customized and incorporated into any application. Developers can design mobile apps with dynamic and engaging user interfaces optimized for performance and usability by utilizing the power of React Native and its ecosystem of tools and libraries.

    Your Quick Guide for Using React Native to Create a Memorable UI Experience

    Let’s first become familiar with a dynamic UI. A dynamic user interface adjusts and changes to meet the user’s demands. Several methods, including the following, can be used to achieve this:

    1. User input:

    The UI can modify itself in reaction to user input, such as when a button is clicked or text enters a field.

    2. Real-time updating:

    The user interface (UI) can update as you scroll through a list of things or play a video.

    3. Adapting to various screen sizes:

    The user interface can adjust to various screen sizes so that it seems excellent on smartphones and tablets. It would be best if you used React to create a dynamic interface for the user. Hence, establish a React project and create components for your user interface. Connect the data sources to your components. Handle user input real-time UI updates, and build your user interface screen size-responsive.

    Schedule an interview with React developers

    Practices for React app development

    The following are some best practices for creating React mobile applications.

    • Use a library for state management. Create dynamic user interfaces by tracking your application’s state with a state management library.
    • Use a framework for testing. Using a testing framework will enable you to validate the functionality of your code.
    • Use a coding editor that supports linting. You can find problems in your code with the aid of a code editor that has linting capabilities.
    • Utilize a server for continuous integration (CI). You can automate testing and deployment with a CI server.

    Conclusion

    React Mobile App Development has become the leader in hybrid development due to its better component-based, modular, and native-focused development approach. It offers advantages like better cross-stage and various UI development project management and the capacity to implement complex highlights with less code. This Live Reload function helps with coding impact review and seamlessly transitioning from a web to a mobile app interface. UI development is possible by using gadgets like cameras, accelerometers, and GPS.

    Contact a reputable React app development company if you are considering building a React mobile app with a dynamic user interface. They can help you to create a dynamic user interface that will meet your needs.

    Frequently Asked Questions (FAQs)

    1. How do you create a user interface for a mobile application?

    Views are a tool for UI (User Interface) design customization. A view is a component of an appropriate user interface built using the view class. In Android development, a view can be described as a little rectangular box that responds to user inputs like buttons, checkboxes, etc.

    2. How can I create a React UI that is dynamic?

    You must create a React project and then create the UI components to design a dynamic user interface. Connect the data sources to your components. Consider user input, update your UI in real-time, and adjust it for various screen sizes.

    3. How does React display dynamic data?

    In ReactJS, there are numerous ways to display dynamic data. Changing a component’s state property with the setState() function is the most straightforward approach to displaying dynamic data. The state-owned property can then be leveraged to create new components instantly.

    Book your appointment now

  • React Hydration: A Complete Guide

    React Hydration: A Complete Guide

    There are some fundamental ideas that you need to understand before learning about hydration.

    CSR, or client-side rendering

    Client-side rendering uses JavaScript to render all pages directly in the browser. It is evident that the page loading would be delayed and result in a poor user experience when the browser rather than a server handles all data retrieval.

    The ideal example of a client-side rendering library is ReactJS.

    SSR, or server-side rendering

    JavaScript pages are rendered using server-side rendering, which uses the servers’ request-response process. Since the servers are responsible for data retrieval, the user experience is good. But why?

    As a result, while JavaScript is loading in the background, the server in SSR initially loads HTML content to give the user at least some content on the webpage. With CSR, that is not the case. CSR always starts with a blank page; the markup isn’t shown until after loading JavaScript. Remember that this only applies to the initial rendering of the React tree from the DOM or the initial render.

    After the DOM has been rendered once, it is simpler to maintain the DOM modifications with CSR because doing so is much faster and more effective than making server requests for each DOM change. Small applications might not notice the difference, but as applications grow and have more state changes, using CSR after the entire React tree has been rendered becomes more advantageous.

    What does hydration mean?

    Hydration is the process of attaching React to HTML that has previously been rendered in a server context. Our React application has already been rendered on the server, and we are now hydrating the JavaScript bundle on the client for improved user experience and SEO.

    Rendering vs. hydration differences

    Rendering (Client-Side Rendering):

    	
    import React from 'react';
    import ReactDOM from 'react-dom';
    
    const App = () => (
      <div>
        <h1>Hello, React!</h1>
      </div>
    );
    
    ReactDOM.render(<App />, document.getElementById('root'));
    

    Hydration (Server-Side Rendering):

    Node:

    ./server.js

    	
    // On the server (Node.js)
    import React from 'react';
    import ReactDOMServer from 'react-dom/server';
    
    const App = () => (
      <div>
        <h1>Hello, React on the Server!</h1>
      </div>
    );
    
    const html = ReactDOMServer.renderToString(<App />);
    
    // Send `html` to the client as part of your server response.
    

    React:

    ./index.js

    	
    // On the client
    import { hydrateRoot } from "react-dom/client"; 
    import App from "./App";
    const App = () => (
      <div>
        <h1>Hello, React on the Client!</h1>
      </div>
    );
    
    hydrateRoot(document.getElementById('root'),<App/>);
    

    The hydrateRoot() API’s parameters are domNode, reactNode, and? options.

    domNode: A DOM element was displayed as the tree’s root element.
    reactNode: The React node used to render the current HTML is called reactNode. It is an object with options for the React root and often consists of JSX files like App.js and other settings. We won’t investigate it too deeply at this time.

    Things to keep in mind

    • When hydrating, hydrateRoot() will compare the displayed content with the server-rendered content and alert you if there are any discrepancies.
    • HydrateRoot () is only permitted if the HTML content is not displayed. Use createRoot() in this situation.
    • Your entire React project will likely have just one call to hydrateRoot().

    Schedule an interview with React developers

    Returns

    render and unmount are the two methods on an object that createRoot() returns.
    Let’s now examine these techniques.

    root.render(reactNode)

    In the hydrated React DOM tree, it is invoked to update or interact with React component.

    	
    const root = hydrateRoot(domNode, reactNode, ?options)
    

    root.unmount()

    It is used to destroy the React tree. No parameters are required for this technique.

    	
    root.unmount();
    

    There won’t be any calls to unmount() in a React-only app.

    Root.unmount() is particularly beneficial when the root’s DOM node or any of its ancestors are removed; by invoking this function, we can halt the removal of all items inside that are connected to it. By executing the unmount() method, we are instructing React to stop deleting React nodes once we have eliminated all unnecessary ones.

    Calling unmount() typically unmounts every root node and removes React from the root DOM node, along with any state managers and event handlers.

    You cannot call root.render() again after using root.unmount() since it will throw an error saying Cannot update an unmounted root.

    Use hydrating HTML generated by a server

    	
    import {hydrateRoot} from "react-dom/client";
    
    hydrateRoot(document.getElementById('root'),<App/>);
    
    //App.js
    import React from "react";
    import { Counter } from "./Counter.js";
    export default function App() {
    return(
    <>
    <h1> React Hydration </h1>
    <Counter/ >
    </>
    )}
    
    // index.js
    import React from "react";
    import { hydrateRoot } from "react-dom/client";
    import App from ".App.js";
    
    hydrateRoot(
    document.getElementById('root'),
    <App/>
    );

    // Counter.js

    import React, { useState } from "react";
    
    export const Counter = () => {
    const [count, setCount] = useState(0);
    return (
    <button onClick={() => setCount(count + 1)}>
    Total Clicks: <strong>{count}</strong> times
    </button>
    );
    };

    Hydrating a whole document

    Apps built entirely with React can render the entire document as JSX, allowing for simultaneous hydration.

    Pass the document as a React node to hydrate it in its entirety.

    	
    import { hydrateRoot} from "react-dom/client";
    import { App } from
    
    hydrateRoot(document, <App/>);
    

    Eliminating hydration mismatch mistakes that cannot be avoided

    You can turn off the hydration mismatch alert if one element’s attribute or text content (such as a timestamp) naturally differs between the server and the client.

    Add suppressHydrationWarning=true to an element to turn off hydration warnings.

    Handling various client- and server-side content

    You can use two-pass rendering if you need to render something differently on the server and the client purposely. A state variable like isClient, which you can set to true in an Effect, can be read by components that render distinct content on the client.

    Conclusion

    In conclusion, hydration in React is an essential procedure that ensures fluid rendering and interactivity for React applications rendered on the server. It enhances performance and user experience by swiftly converting the server-rendered HTML into a fully complete React app on the client side.

    Consult a React app expert to make the best possible use of React and ensure your web application is adequately hydrated. These skilled professionals can maximize your software’s functionality, maintainability, and user interface, ensuring your project’s success.

    Frequently Asked Questions (FAQs)

    1. What distinguishes React’s render and hydrate functions?

    However, hydrate() is used to hydrate a container whose HTML contents were produced by ReactDOMServer. It is the same as render(). React will make an effort to integrate event listeners with the current markup.

    2. Why do we utilize React’s render () function?

    The function intends to display the provided HTML code inside the specified HTML element. We can read props and state in the render() method and deliver our JSX code to the app’s main component.

    3. How do render and return in React differ from one another?

    The render method configures the lifetime and initial states of the child component. A value is given back via the return method. You construct a new component using the render method. Reusing an existing component requires the use of the return method.

    Book your appointment now

  • A Complete Guide to Developing Dynamic Routes in React – Navigating with React Router

    A Complete Guide to Developing Dynamic Routes in React – Navigating with React Router

    React, a popular JavaScript library for building user interfaces, provides React app developers with powerful tools to create dynamic and interactive web applications. One crucial aspect of web development is navigation, and React Router is the go-to library for handling routing and navigation in React applications. In this comprehensive guide, we’ll take you through the process of developing dynamic routes in React using React Router, empowering you to create seamless and user-friendly web experiences.

    Getting Started with React Router

    1. Setup and Installation:

    The initial step in integrating React Router into your project is installing it as a dependency. React Router conveniently provides two distinct packages: “react-router-dom” for web applications and “react-router-native” for native app development. In this guide, we’ll focus on “react-router-dom,” ideal for web applications.

    To initiate the installation process, make use of a package manager such as npm or yarn within your project’s terminal. Execute the following command to seamlessly integrate React Router into your project:

    npm install react-router-dom
    
    Or 
    
    yarn add react-router-dom

    Once installed, you can import the necessary components and start using React Router in your project.

    2. Primary Usage and Configuration:

    To use React Router effectively, wrap your application’s components in a “BrowserRouter” component. This component provides the routing functionality and ensures that the URL stays in sync with your application’s state.

    Here is an illustration of how to configure React Router for simple routing:

    import { BrowserRouter, Route, Routes } from 'react-router-dom';
    
    <BrowserRouter>
    
      <Routes>
    
        <Route path="/" element={<Home />} />
    
        <Route path="/about" element={<About />} />
    
      </Routes>


    In this setup, we import essential components from ‘react-router-dom’ library, which is a fundamental part of React Router for managing routing and navigation in React applications. The ‘BrowserRouter’ component is used to establish the routing context for the entire application. It essentially listens to changes in the URL and keeps the UI in sync with the current URL.

    Inside the ‘BrowserRouter,’ we use the ‘Routes’ component to group our route definitions. Each ‘Route’ component specifies a ‘path’ attribute that corresponds to a particular URL path, and a ‘component’ attribute that defines the React component libraries to render when the URL matches the specified path.

    With this fundamental setup, you can begin building the routes and components for your application that correspond with your unique needs.

    Defining Routes

    1. Configuring Route Components:

    You utilize the ‘Route’ component in React Router to define routes. With the help of this component, you can link a specific path to a related component that will be displayed when the path is matched. Here’s an example:

    <Route path="/" element={Home} /> 
    
    <Route path="/about" element={About} />

    Two routes are defined using the ‘Route’ component. The first route renders the ‘Home’ component and precisely matches the root URL (“/”). The second route represents the ‘About’ component and matches the “/about” path.

    2. React Parameters and Matching:

    You can also define dynamic segments in your routes by using parameters indicated with a colon (“:”):

    <Route path=”/users/:id” element={User} />
    

    The ‘:id’ parameter in the previous example can match any value in the URL. This enables you to utilize the ‘useParams’ hook or the ‘match’ object to get the parameter value in the rendered component.

    3. Nested and Exact Routes:

    React Router’s default for routes is partial matching. This signifies that the associated component will be presented if a URL matches the start of a given path. Use the ‘exact’ prop to ensure an exact match:

    <Route path=”/” exact element={Home} />
    

    React Router also supports nested routes. Nesting ‘Route’ components inside one another allows you to develop child routes. You can design more complex routing structures as a result.

    Handles Navigation

    1. Relating to Different Routes:

    Link Component:

    React Router provides the ‘Link’ component for seamless navigation between routes. The ‘to’ prop of the ‘Link’ component generates an anchor tag with the appropriate URL.
    Here’s an example:

    <Link to="/home">Home</Link> 
    <Link to="/about">About</Link>
    

    The navigation links to the home and about pages are made using the ‘Link’ component in the example above.

    NavLink Component:

    The NavLink component is an enhanced version of the Linkcomponent. It provides additional styling options to indicate the currently active route. When a route is active, you can apply specific CSS classes or styles to highlight the active link.

    Here’s an example using the NavLink component:

    	
    <NavLink to="/home" activeClassName="active-link">Home</NavLink>
    <NavLink to="/about" activeClassName="active-link">About</NavLink>
    

    In this example, when the user is on the “/home” route, the “Home” link will have the “active-link” class applied, allowing you to style it differently to indicate the active route. The same applies to the “About” link when the user is on the “/about” route.

    useNavigation Component:

    An useNavigate hook that allows the programmatic navigation with the React Router. It’s a convenient way to navigate to specific routes within your components. Here’s an example:

    import React from 'react'; 
    
    import { useNavigate } from 'react-router-dom'; 
    
    function MyComponent() { 
    
      const navigate = useNavigate(); 
    
      const handleClick = () => { 
    
        navigate('/about'); 
    
      }; 
    
      return (
    
        <button onClick={handleClick}>
    
          Go to About
    
        </button> 
    
      );
    
    }
    
    export default MyComponent;

    When the button is clicked, the handleClick function is called, and it uses navigate(‘/about’) to programmatically navigate to the “/about” route.

    Complex Routing Methods

    1. Authentication and Route Guards:

    Route guards are employed to prevent unauthorized access to some routes. By implementing a higher-order component that checks the authentication status and redirects the user if necessary, you may add route guards in the React Router. Here’s an illustration:

    	
    const ProtectedRoute = ({ component: Component, ...rest }) => {
      const isAuthenticated = // Check authentication status...
      return (
      <Route
       {...rest}
      render={(props) => isAuthenticated ? <Component {...props} /> :
      <Redirect to="/login" /> } />
      );
    };
    

    The ‘ProtectedRoute‘ component in the example above determines whether the user is authenticated. If they are, the specified component is rendered. If not, the user is redirected to the “/login” route.

    2. Code Splitting and Lazy Loading:

    By loading components only when required, lazy loading and code splitting are two strategies for improving the efficiency of your application. The React Router allows lazy loading with the help of the ‘React.lazy’ method and dynamic imports. Here’s an illustration:

    	
    const LazyHome = React.lazy(() => import('./Home'));
    <Suspense fallback={<LoadingSpinner />}>
    <Route path="/home" component={LazyHome} />
    </Suspense>
    

    The ‘Home’ component is loaded lazily in the above mentioned example using ‘React.lazy’ and dynamic imports. While the lazy-loaded components are loading, the ‘Suspense’ component shows a fallback user interface (for example, a loading spinner).

    3. Search Filtering and Query Parameters:

    Query parameters are a technique to send information to a route via the URL. The React Router gives access to query parameters through the ‘useLocation’ hook or the ‘location’ object supplied to the component. Here’s an illustration:

    	
    const location = useLocation();
    const searchParams = new URLSearchParams(location.search);
    const paramValue = searchParams.get('paramName');
    

    The ‘useLocation’ hook is utilized to access the current location in the example above. ‘URLSearchParams’ is used to extract the search parameters, which are then presented in the component.

    By comprehending and utilizing these advanced routing approaches, you can use React Router to generate dynamic and safe Navigation in your React applications.

    Schedule an interview with React developers

    Managing Nested Routes

    1. Layout Components and Route Nesting:

    Thanks to React Router’s ability to nest routes inside one another, you can build intricate page structures with nested components. This is helpful when you have portions of your program that want various layouts or share standard parent components. Here’s an illustration:

    	
    import React from ‘react’;
    import { Route, Routes} from ‘react-router-dom’;
    import Home from ‘./components/Home’;
    import About from ‘./components/About’;
    import Contact from ‘./components/Contact’;
    import NotFound from ‘./components/NotFound’;
    function App() {
    return (
    <div>
    <header>Header</header>
    <main>
    <Routes>
    <Route path=”/” exact component={Home} />
    <Route path=”/about” component={About} />
    <Route path=”/contact” component={Contact} />
    <Route component={NotFound} />
    </Routes>
    </main>
    <footer>Footer</footer>
    </div>
    );
    }
    export default App;
    

    The ‘Header’ and ‘Footer’ components in the example above are displayed globally.The ‘Home,’ ‘About,’ and ‘Contact’ components are nested inside the Routes component and will be displayed according to the matching route.

    2. Route Organization and Configuration:

    Organization and configuration of your routes are crucial for maintaining the maintainability of your application as it expands. One typical method is defining routes in a separate file and importing them into the main router component. This enhances the separation of concerns and increases the readability of the code. Here’s an illustration:

    	
    // routes.js
    const routes = [
      { path: '/home', component: Home },
      { path: '/about', component: About },
      // ...
    ];
    // App.js
    {routes.map((route, index) => (
      <Route key={index} path={route.path} component={route.component} />
    ))}
    

    This example simplifies handling and maintaining the routes by defining them in a distinct ‘routes.js’ file. Based on the configuration, the ‘map’ function dynamically creates the ‘Route’ components.

    3. Route Transition Animations:

    While React Router doesn’t natively support route transition animations, you can implement them using third-party libraries like React Transition Group or CSS transitions. These libraries provide React hooks and components to manage route transition animations effectively.

    Note: In the new version of React Router, the Switch component and useHistory hook are no longer supported.

    Tips and Best Practices

    1. Route Hierarchy & Structure:

    Create a logical, hierarchical structure for your routes corresponding to the application’s UI flow. Use nested routes for areas that need separate layouts or share functionalities, and consider grouping relevant routes under a single parent component.

    2. Route Configuration Patterns:

    To keep your route definitions arranged and up-to-date, use configuration patterns like declaring routes in a separate file or employing a hierarchical data structure. This makes it simpler to navigate and comprehend the pathways of your application.

    3. Performance Optimization Strategies:

    Use code splitting and lazy loading approaches for routes that are not immediately required or have a lot of dependents. This can optimize the bundle size and speed up how quickly your application loads initially.

    For routes that are expected to be visited next, preload and prefetch resources to speed up perceived loading times and improve user experience. You can employ strategies like dynamic ‘import()’ commands or tools like Webpack’s code-splitting features to do this.

    You may build a solid and organized routing system in your React apps by successfully managing nested routes, structuring your route configuration, integrating transition animations, and adhering to best practices.

    Conclusion

    React Router allows you to design dynamic and effective navigation experiences for your React applications. You have learned how to build routes, control navigation, manage nested routes, and use cutting-edge techniques for routing by reading this deep guide. With this understanding, you can create React applications that are scalable, user-friendly, and offer seamless Navigation and a better user experience. React Router can help you fully realize the possibilities of your applications as you progress along the React journey.

    Consider collaborating with an experienced React app development company in the USA if you’re seeking for React app development services. Their knowledgeable team can assist you in utilizing cutting-edge technologies, high-quality applications that satisfy your business requirements.

    Frequently Asked Questions (FAQs)

    1. Define React Router navigation state in React development.

    React Router is designed to handle URL-based navigation and rendering components based on the URL path. While it may internally manage some routing state, it doesn’t expose a specific navigation state object in the same manner as React Navigation.

    2. What distinguishes React navigation from React router?

    React Router belongs to the “JavaScript Framework Components” category, whereas React Navigation is under the “Cross-Platform Mobile Tools” category. Both React Navigation and React Router are open-source applications.

    3. What does React’s primary Navigation mean?

    JavaScript is used to build React Navigation, which enables you to design navigation patterns and components that feel and look fully native. According to the path a user has walked inside the app, React Navigation employs a stack navigator to manage the navigation history and display of the appropriate panel.

    Book your appointment now

  • The Top 10 React Native Components Will Maximize Your Software Development

    The Top 10 React Native Components Will Maximize Your Software Development

    React Native is an open-source mobile application framework that Facebook developed that enables programmers to create high-performance mobile applications for the Android and iOS platforms. It gives developers access to a graphical user interface with a selection of components such as containers, texts, photos, or lists by fusing the strength of React with native platform features. When nested inside one another, all of these components make up an application’s various facets.

    Software Development Using React Native

    The only difference between React Native and React is that React Native doesn’t change the DOM using a virtual DOM. Instead, it executes as a background process on the client system, understands JavaScript code written by developers, and uses serialized data for asynchronous bridges and batch communications with the origin platform.

    React Native is a framework worth investigating if you’re interested in software development, particularly in developing mobile applications. With React Native, you can build cross-platform mobile applications that work on iOS and Android devices from a single codebase. The framework comes with a wide range of components and tools that can speed up your development procedure and enhance the functionality of your apps.

    The Top 10 React Native Components for Software Development are listed below so you can maximize the most of your software development efforts. By leveraging these components, you may create strong and effective mobile applications that satisfy your business goals and provide a seamless user experience.

    Best React Native Components For Software Development

    You should include a few key components when creating an app with React Native. These components will not only assist you in building an enticing and helpful app, but they will also help you develop it faster and more efficiently. Let’s examine these components and how they might help your software development project.

    1. React Native Elements

    A cross-platform interface tool called React Native Elements combines various open-source user interface elements in specific locations. These elements have unique features that developers can change at runtime without reloading the application. This is extremely beneficial because it enables programmers to concentrate on the app’s functionality and create attractive applications with a unique aesthetic. React Native Elements also includes generic UI elements for the overall user experience and application design.

    2. React Native Vector Icons

    It’s simple to customize, design, and integrate React Native Vector Icons into your application development. They enable you to locate particular substances that meet your requirements. A very intuitive design, quicker icon import, and easy expansion, design, and integration are all advantages of using the vector icon component.

    The following are some benefits of the Vector Icons Component:

    • It is well-known for developing nav/tab bars, buttons, and logos.
    • You can import icons more quickly if you use vector icons.
    • They are easy to update, extend, and integrate into your apps.

    3. React Native Material Kit

    The application template for React Native Material Kit is completely developed, allowing software engineers to create applications rapidly and effectively. Over 200 component variables, including input, navigation, buttons, maps, and more, are available for developers to choose and combine freely. Theme files’ color variations are simple to manage and modify.

    React Native Material Kit’s advantages include:

    • Expo.io for iOS and Android
    • Google Material Design
    • Open-Source Fonts
    • Documentation

    4. React NativePaper

    React Native Paper is a set of customizable, ready-to-use components to develop React Native mobile applications. You can customize the functionality with this component. Theme support is also useful when transitioning between light and dark settings.

    The benefits of React Native Paper are as follows:

    • It is a top-notch Material Design standard-compliant library.
    • Additionally, it covers every significant app development use case.
    • React Native Paper is readily available and free to download.
    • On both platforms, it performs consistently, has a quick UI, and is responsive.

    5. React Native Ignite

    Because it unifies the concepts of styles, layouts, and stacks from Infinite Red in one place, React Native Ignite is a well-liked approach that is excellent for software development. An immense amount of development time is saved by this tool. Additionally, it includes support for AsyncStorage, fin, MobX-React-Lite, MobX-State-Tree, TypeScript, and Reactive Navigation 5.

    Schedule an interview with React developers

    6. React Native Base

    With the aid of the utility library React Native Base, engineers can create a single design system that works on iOS, Android, and the web. If you hire React app Developers, they can personalize the look and feel of their app’s themes and components using the theming tools included in the React Native Base elements. ARIA provides app developers with rapid access to many React Hooks for designing systems. You can alter how your application behaves on various platforms with NativeBase.

    Below are some of NativeBase benefits:

    1. Naturally Beautiful – Native Base creates a naturally beautiful app with attractive components.
    2. Multi-Platform – It is simple to develop and supports an array of platforms. Utilizing platform-specific mounts, you can request that developers change an app’s attributes.
    3. Accessible – NativeBase delivers the box effect, focus management, and keyboard navigation and is easy to access and utilize.
    4. Customizable – It is a default theme that may be modified to add components to the app according to the requirements of that particular app.

    7. React Native Bit

    The components used in React Native Bit tools are designed to help you write software more quickly. With the help of this extensible system toolkit, professionals may more easily understand, test, maintain, and work together on software development projects. Bit components let programmers create components independent of their apps and use them to create various applications. Additionally, programmers can modify an application’s component’s functionality.

    8. React Native Debugger

    Developers can inspect and debug React Native projects using the Chrome Developer Tools interface using the desktop application React Native Debugger. It offers potent debugging and performance profiling tools for React Native projects, including network, Redux architecture, and performance debugging.

    9. React Native Image Picker

    Popular library React Native Image Picker makes it simple to choose photos from the device’s camera roll or capture brand-new pictures using the device’s camera. It is often used in mobile applications like social media and e-commerce apps that ask users to upload or edit photographs.

    10. NativeWind

    NativeWind is a framework that uses Tailwind CSS’s strengths as a scripting language to develop a universal style system for React Native. NativeWind enables developers to build styles with a utility-first approach by implementing Tailwind CSS, making it effective and simple to maintain styles across many components and screens. The ability to share elements between platforms is one of NativeWind’s main benefits. As a result, you can utilize NativeWind to design UI components and use them seamlessly in projects for both Android and iOS, thereby cutting down on development time and maintaining consistency in the user experience between platforms.

    What Are React Native Advantages in Software Development?

    React Native Advantages in Software Development

    1. High-Performance Code That Is Shared And Reusable

    Much of the code can be shared between iOS and Android apps because of React Native, which speeds up the development and maintenance processes. When native components are used, and a dedicated thread is used for the most resource-intensive operations, React Native applications perform similarly to native ones. Additionally, you may reuse the existing code of your React web applications and convert it into mobile applications using React Native.

    2. Third-Party Integrations

    Integration with third-party platforms is crucial for a startup. Many additional capabilities can be integrated to accelerate program development. Many are already included in React Native, making it a reliable and effective development environment.

    3. Simple And Advanced Code

    JavaScript, the core language of React Native, is not as complex as other programming languages. It already has a significant development community and is widely used on the development of the web app. Less redundant code results in shorter strings of code and a shorter overall file size, ultimately resulting in faster product development and release to market times.

    4. Significant Time Saving

    When a developer creates a web application, all he needs to do to see the changes is to keep the modifications and reload the browser. It is different for a native application because it requires recompiling every time, even if only a text or pixel change has occurred.

    With React Native, developers can instantaneously reload an application rather than having to recompile it. By emphasizing the truly important information, developers can save time.

    5. Performance And User Experience

    Applications created using React Native give a similar experience to those created natively and generated by the platform, unlike solutions based on straightforward embedded WebViews. Also, elements are delivered to the screen. This provides faster loading times and a natural grip.

    6. Cross-Platform Compatibility

    Businesses can create applications for iOS and Android using the same code with the help of React Native. On both platforms, developers can obtain precise performance results without incurring additional money. A startup must only be concerned about finding developers who can use the React Native platform’s advantages.

    7. Cost-effectiveness

    Unlike on-premise approaches, a single code base offers the chance to reduce development time and costs drastically. React Native is thus less expensive. Additionally, it guarantees consistent user interfaces across all platforms, functional code, and the full product life cycle. React Native includes a hot reload feature as part of its development. By enabling developers to observe the effects of their changes without recompiling the entire source code, this saves them time.

    8. Reusable Components

    Platform developers frequently use a variety of components to enhance the functionality of native components while developing hybrid apps. To deliver native-like mobile experiences and satisfy all necessary functionalities, React Native offers components for both Android and their native iOS counterparts, which may also be used as reusable components.

    9. Improved Performance

    React Native, in contrast to other frameworks, enables the development of high-performance native mobile apps. It gives a pleasant user experience and interface (UX and UI) and is adaptable and responsive. Without using a web browser, connect your Javascript code to the native components of your device. Therefore, there has been no performance compromise. At the interface level, it also responds well.

    10. A Growing Developer Community

    React Native has an active developer community routinely contributes to its development and shares knowledge on online forums, offering developers efficient support. The framework’s community is constantly expanding because it is open source and updated regularly by Meta. Additionally, React Native enables you to view changes made to your app in real time without having a reboot.

    11. The Usage Of JavaScript

    The first of its unique features is that this framework enables the development of native mobile apps for iOS and Android that use the React concept and design.

    Conclusion

    To sum up, React Native is a powerful mobile software development platform that may assist you in developing stunning and useful apps for iOS and Android devices. The components we covered above are just a few of the numerous choices available to developers, and each one offers special advantages and capabilities that boost the process of developing apps. These components will undoubtedly simplify your work and improve your projects’ functionality and aesthetic appeal, whether you’re an experienced developer or just getting started with React Native.

    BOSC Tech Labs is the best choice if you’re seeking a reliable and experienced development partner to assist you in creating your React Native application. Our team of experts can assist you in bringing your app idea to life and deliver a high-quality solution that satisfies all your business demands. We have a team of talented developers and a track record of success. Please don’t put it off any longer; contact us immediately to start developing your dream app!

    Frequently Asked Questions (FAQs)

    1. Which React Native component library is the most widely used?

    A well-liked library for React Native mobile app development is React Native Paper. It gives developers access to various components, including buttons, cards, lists, etc. In addition, it offers developers multiple options for customizing their applications’ appearance and feel.

    2. What are the components of React Native?

    The user interface of mobile applications is built using React Native building blocks. You can combine them to make the app’s interface and functionality. They contain UI components like Text, View, Buttons, and more.

    3. Does cross-platform compatibility exist for React Native components?

    Yes, React Native components are designed to work across platforms. This implies that UI elements for iOS and Android platforms can be built using the same features.

    Book your appointment now

  • Thread Variations: Unlocking React-Native Potential

    Thread Variations: Unlocking React-Native Potential

    Are you a fan of React-Native? Are you interested in learning how to implement threads into React-Native projects in the best way possible? In such case, you are in the appropriate location.

    Many mobile applications depend heavily on threads, and React-Native developers have many choices for including them in their work. We’ll review the various thread types used in React-Native programming in this article and offer code samples so you can begin immediately.

    This post includes something for everyone, regardless of your expertise with React-Native development. You’ll discover how to develop effective threading code and how to select the thread type that will best meet the needs of your mobile application development. Let’s use thread variants to realize React-Native’s potential fully!

    Introduction: React-Native Threads

    React-Native offers several strong capabilities to generate quick and effective mobile apps if you’re comfortable with React framework. But did you realize that utilizing the power of various thread kinds is the key to realizing its full potential?

    Running JavaScript code in several JavaScript contexts is referred to as threads in React Native. They also make it possible to run parallel jobs without pausing the main thread, which improves performance and makes the user interface more responsive.

    React-Native’s ability to carry out many tasks concurrently is made possible by threads, which are small processes that run simultaneously. Developers can utilize these threads’ asynchronous nature by managing them to attain the required performance levels.

    Let’s examine some of the React-Native threads that are most frequently used. While background threads are primarily intended for carrying out I/O tasks like downloading data from a server, the main thread manages the user interface and main loop functions. With native hooks for data transfer between JavaScript and native code, worker threads enable asynchronous JavaScript functions like setTimeout and setInterval. Each thread has a unique set of code snippets that must be used appropriately.

    Implementing Background Threads

    Thread safety is a feature of the React Native renderer. In the internals of the framework, the use of immutable data structures provides high-level thread safety. In other words, rather than updating data structures, React updates the renderer by creating or cloning new objects. This enables the framework to make synchronous and thread-safe APIs available to React.

    It’s time to explore the field of background threads after your React-Native app is set up. These are necessary for executing lengthy tasks, such as downloading and uploading big files. Without them, the application may appear to freeze or hang while the operations are being performed.

    Thank goodness, React-Native supports a wide range of thread types. Each has advantages and disadvantages, so let’s look at the most common ones:

    1. Runnable:

    These lightweight threads can perform operations without blocking the user interface. They provide rapid execution speeds and operate in the same process as your app. It’s simple to write code that uses Runnables; all you have to do is create an instance of your Runnable class, pass it as an argument to runOnUiThread(), and then call the method.

    2. AsyncTasks:

    In terms of threading, this is one of Android’s most effective solutions for I/O and time-consuming tasks. It contains a few helpful settings that give you additional control over thread management, such as defining priority levels or permitting tasks to be carried out by numerous threads simultaneously—ideal for multitasking tasks.

    Whichever thread type you decide to use for your application’s background operations, setting them up correctly is crucial to ensuring that they function properly and do not hamper your user experience.

    import React, { useState } from 'react';
    import { useEffect } from 'react';
    import { Thread } from 'react-native-threads';
    
    const App = () => {
      const [data, setData] = useState([]);
    
      useEffect(() => {
        const thread = new Thread(() => {
          const response = await fetch('https://example.com/api/data');
          const data = await response.json();
    
          setData(data);
        });
    
        thread.start();
    
      }, []);


      return (
        <div>
          {data.map((item) => (
            <div key={item.id}>{item.name}</div>
          ))}
        </div>
      );
    };
    
    export default App;
    

    Types of React-Native Threads

    You should know about various thread types to get the most out of your React-Native apps. “Threading” describes how different pieces of code can run simultaneously. Depending on the project, there are definite benefits to using many threads, whether for performance or coding simplicity.

    Let’s explore the various thread types utilized in React-Native and how to use them to unlock their potential.

    1. UI thread :

    The primary thread that carries out synchronous operations is this one. Given that it resides at the bottom of our entire component hierarchy, this is also known as a UI thread. Data from the Shadow Thread was used in this thread. This thread, for instance, handles the measure, layout, and draw events for Android.

    2. JavaScript thread :

    React and JavaScript code logic are both executed by JavaScript thread in our app. All DOM hierarchy operations were carried out by this thread directly from the developer-written code. The Native module Thread receives the hierarchy of code when it has completed execution and performs any necessary optimizations.

    3. Background thread :

    Before sending an update to the UI thread, the background thread first makes sure that JavaScript hasn’t already sent a newer update. This prevents the renderer from rendering an outdated state when it anticipates a newer state.

    It avoids interrupting the main thread; worker threads might do longer-running operations like accessing data across a network or performing more complicated calculations. Running these more extensive operations on the main thread, which may lock up crucial resources that should be available for small tasks, results in a better user experience. Here is an example of a React-Native app using worker threads:

    React Native Inter-Thread Communications

    Performance-wise, multi-threaded apps can be made with React-Native, which is incredible. The efficiency and usability of your application can be significantly improved by using Inter-Thread communication (ITC) between various threads of code.

    Any form of communication between two or more threads is called ITC. Here are a few prevalent ITC kinds used in React Native:

    1. Message Passing

    Communication between threads can be handled by using message passing. When two or more processes interact continuously, sending messages or data between two or more threads is necessary. You can exchange messages in React Native by using a messaging system like PubSub.

    2. Shared Memory

    Multiple threads can access the same data simultaneously using shared memory without copying information from one thread to the other. It is helpful for multi-threaded operations that demand intensive communication and synchronization between threads so that each thread can modify the contents of the shared memory. Use SQLite for shared memory operations in React Native.

    3. Semaphores

    Each thread can directly access a list of resources (referred to as tokens) via semaphores. The quantity of tokens available regulates how many requests can be made simultaneously by each thread at any given time; if all are already in use, new requests must be made while some tokens are still available. For semaphore operations in React Native, you can utilize AsyncStorage.

    Your React Native application’s efficiency and usage patterns can be optimized by integrating several ITC kinds into the code base!

    Schedule an interview with React developers

    Using Threads and AsyncStorage

    Consider using AsyncStorage with threads to realize React Native’s potential fully. With the help of the cross-platform JavaScript module known as AsyncStorage, you can store simple information without needing a native application. You can run asynchronous background activities and have the results seamlessly return to the foreground by combining this library with threads.

    This is how it goes:

    1. Configuring AsyncStorage

    For instance, as AsyncStorage works, your data must be represented as a JSON object. Then, using this storage object, users can access and store different data types, such as string, boolean, and array values. You can configure your application to store this data in a readily accessible location and retrieve it when needed.

    2. Threads

    The thread paradigm enables asynchronous task execution in the background while preserving your main application thread’s foreground processing of requests. You can spin off new jobs and run them concurrently with other tasks using React Native’s threading capabilities. This will enable more sophisticated activities that can profit from the additional resources provided by operating on numerous threads simultaneously while also assisting in keeping the main application alive.

    You may improve your development experience with React Native by using AsyncStorage and threads. Your app will function more smoothly, quickly, and dependably than it did previously.

    3. Coding Snippets to Wrap up

    Let’s look at some code snippets that illustrate how to use various thread types with React-Native as a conclusion.

    4. Responder Thread for JS

    The JavaScript Responder Thread (JSRT) handles processing and responding to events. It comprises a main thread that is constantly active and several secondary threads that can be spawned as needed. The required code snippet to launch the JSRT is as follows:

    5. UI background Threads

    UI background threads perform heavy-duty operations like running animations or getting data from the web. Here is a sample of the code needed to begin these:

    6. Shadow Threads

    Shadow threads measure user interaction with your app’s components and compute its dimensions and layout. How to start a shadow thread is as follows:

    Your app development projects can have more significant potential by utilizing these various thread types, resulting in quicker loading times, improved performance, and more responsive user interfaces.

    Conclusion

    In conclusion, React-Native threads may be an effective and versatile tool when developing mobile apps. You may further control and customize your app’s user experience by using the associated code snippets to produce unique thread variations. By using these variants, you may make your app more engaging for users, accelerate the development of your project, and maintain its competitiveness. Employing React-Native’s thread variations can be a valuable technique to optimize mobile development and enhance your app to an advanced level.

    Using thread variations, React app developers can unlock the full potential of React Native and build high-performance mobile applications.

    Frequently Asked Questions (FAQs)

    1. What are thread variations in React Native?

    Thread variations are a way to offload work from the main thread in React Native. This can improve performance by preventing the main thread from becoming blocked.

    2. Why should I use thread variations in React Native?

    There are a few reasons why you might want to use thread variations in React Native:

    • It can improve performance by preventing the main thread from becoming blocked.
    • It can help to avoid memory leaks.
    • It can make your code more modular and easier to maintain.

    3. How do I use thread variations in React Native?

    There are a few different ways to use thread variations in React Native. One way is to use the new Worker() constructor. This will create a new thread that can be used to execute arbitrary code. Another way to use thread variations is the setTimeout() and setInterval() methods. Hence, these methods can be used to schedule code to be executed on a different thread after a delay.

    4. What types of tasks can be offloaded to threads?

    Data processing, heavy calculations, image manipulation, and network requests are examples of tasks that can be offloaded to threads.

    5. What libraries can help implement thread variations in React Native?

    Libraries like react-native-workers and react-native-thread enable developers to manage thread variations efficiently by creating separate worker threads.

    Book your appointment now

  • The Ultimate Guide to Using React Bootstrap

    The Ultimate Guide to Using React Bootstrap

    The popularity of single-page apps over the past few years has led to a flood of JavaScript frameworks like Angular, React, Vue.js, Ember, and many others. As a result, building web apps no longer require using a DOM library like jQuery. This has corresponded with developing CSS frameworks intended to help programmers create responsive web applications.

    Bootstrap is a potent CSS framework that enables programmers to create responsive web apps quickly. However, some people may find it difficult to integrate Bootstrap with React.

    If you’re a front-end developer, you’ve probably used or heard of the responsive (mobile-first) CSS frameworks Bootstrap, Foundation, and Bulma, which all provide a wealth of features and built-in utilities. React is the most well-liked JavaScript framework for building online apps, while millions of websites use Bootstrap, the most popular CSS framework.

    React, Bootstrap will be covered, and how to integrate Bootstrap into a React project. This article will outline how to create a React app using Bootstrap and how to install React Bootstrap packages like react-bootstrap (with examples).

    Integrating Bootstrap with React

    The three most popular approaches to incorporating Bootstrap into React are as follows:
    1. Utilize BootstrapCDN.
    2. Import Bootstrap as a React dependency.
    3. Install React Bootstrap (such as bootstrap-react or reactstrap) as a package.

    Use of BootstrapCDN

    Using BootstrapCDN is the simplest way to integrate Bootstrap into your React app. Installations or downloads are not required. Simply add a link to your app’s head section, as seen in the example below. The following Script> tags must be added just before the closing /body> tag on your pages if you wish to use the JavaScript components that come with Bootstrap.

    Bootstrap 5, released in 2021, no longer requires jQuery for its JavaScript components, using vanilla JavaScript instead. It’s recommended to use Bootstrap 5 for new projects to take advantage of these improvements.

    Import Bootstrap to React as a Dependency

    If you’re using a build tool or a module bundler like webpack, this is the best way to integrate Bootstrap into your React application. Bootstrap must be installed as a dependency for your application. After installing Bootstrap, include the JavaScript framework code in your app. Src/index.js must be the file for everybody utilizing the create-react-app. You’ll see that the Bootstrap minified CSS is the first dependency.

    	
    npm install bootstrap
    

    Our lifecycle of React app components may now use the built-in Bootstrap classes. You must first install jquery and popper.js if they aren’t already installed before you can use the JavaScript components of Bootstrap in your project. Then, as shown in the following sample, add the new dependencies by making additional changes to the src/index.js file.

    With Bootstrap 5, you no longer need jQuery or Popper.js for its JavaScript components, as Bootstrap 5 uses vanilla JavaScript.

    Install the React Bootstrap package

    Utilizing a package with rebuilt Bootstrap components that can be used as React components is the final option for integrating Bootstrap into a React app. The two most popular packages are as follows:

    • react-bootstrap
    • reactstrap

    You don’t have to use either package, but they are great options for Bootstrap with React projects. Many of their traits are similar.

    import { Container, Row, Col } from 'react-bootstrap';
    
    
    function App() {
      return (
        <Container>
          <Row>
            <Col>Column 1</Col>
            <Col>Column 2</Col>
          </Row>
        </Container>
      );
    }
    export default App;
    

    Using the built-in classes and components of Bootstrap

    You may utilize Bootstrap directly by applying the built-in classes to elements and components in your React app as you would any other class. Let’s build a simple theme switcher React component to demonstrate how to leverage Bootstrap classes and components. Use a dropdown component from Bootstrap to develop our theme switcher, as seen in this sample. The built-in button classes also control the dropdown button’s size and color.

    As you begin creating the ThemeSwitcher component’s code, double-check that your React application is already setup. A simple theme switcher component may be made using the dropdown component from Bootstrap and a few pre-built classes. First, create the component’s state using a theme attribute, then change it to null.

    The component class must then include two click event handlers, resetTheme() and chooseTheme(), for selecting and resetting the theme. Use the render() method to create a split button dropdown menu with three themes. The words “primary,” “danger,” and “success” immediately come to mind. A click event handler for each menu item performs the specified action.

    Observe how calling the theme to toLowerCase() allows you to obtain the theme color class for both the dropdown buttons and the text. You can use secondary as the default color if no theme is defined. Therefore, using Bootstrap’s built-in classes and components is straightforward after comprehending how it works in the example above. If you’re looking for expert assistance with your React app, don’t hesitate to hire react app experts from us who can provide valuable insights and solutions.

    Rebuilding the theme switcher with React-Bootstrap

    The command-line program create-react-app will be used to generate the app. Make sure the create-react-app tool is set up on your computer for this. React-bootstrap currently favors Bootstrap version 3. Support for Bootstrap v4 is still being worked on, though. You can use two components from the react-bootstrap package: SplitButton and MenuItem.

    First, we created the component’s state using a theme attribute; then, we set it to null. To choose or reset a theme, we write a chooseTheme() click event handler. Because we’re using Bootstrap 3.3.7, we created some container styles in the render() method to assist us in achieving horizontal and vertical centering.

    The SplitButton component’s bsSize property is used to define the button size. Additionally, note how the bsStyle attribute receives the themeClass parameter, which dynamically changes the button color based on the present theme. Each MenuItem component receives the theme name as an eventKey prop. The onSelect handler is also set here. We previously defined a function called chooseTheme().

    Schedule an interview with React developers

    Properties used to configure the state of the component

    • The theme property is now set to null.
    • By default, dropdownOpen was set to false. Reactstrap’s ButtonDropdown component will use this property to maintain the dropdown’s toggling state.</li<

    Toggle the dropdown’s open state as specified by the toggleDropdown() method. This will be used by the ButtonDropdown component as well.

    Reactstrap UncontrolledButtonDropdown is the part of uncontrolled component and may be used without Open or toggle handler properties. In most cases, this can be used instead of ButtonDropdown.

    The DropdownItem component is used to render each item in the drop-down menu. Note how the DropdownToggle component uses the size prop to set the button size. Also note how the themeClass is given to the color prop on the Button and DropdownToggle components, allowing the button color to change dynamically depending on the state’s theme.

    Additionally, the onClick handlers for each DropdownItem can be adjusted using the chooseTheme() and resetTheme() handlers. Change the src/index file.js final. The first file loaded is the Bootstrap minified CSS file. After importing the ThemeSwitcher component, you must also render it to the DOM. The app should run if you start it right now with a yarn start or npm start command.

    App Using React and Bootstrap

    Let’s go one step further and create a more feature-rich app. We’ll try to use as many classes and elements from Bootstrap as possible. We’ll also use reactstrap to connect Bootstrap with React because it supports Bootstrap 4. You’ll use the create-react-app command-line tool to create the app. Ensure that your computer has the create-react-app program installed.

    Install Axios in React as a prerequisite.Axios is a promise-based HTTP client for the browser and Node.js. With it, we can obtain posts from the BaconIpsum JSON API. Add the Bootstrap minified CSS file by making a small change to the src/index.js file. Create a component called a Post that renders a page post. To begin the component’s state, set the post property to null.

    Once the component is installed, use Axios to alter the post field in the state to a random, four-paragraph post obtained from the BaconIpsum JSON API. Last but not least, modify the src/App.js file.

    Conclusion

    Several approaches for integrating Bootstrap with your React projects have been covered above. Two of the most well-liked React Bootstrap packages, react-bootstrap, and reactstrap, have also been described in detail.

    Hence, several Bootstrap elements, including alert, badge, dropdown, navbar, form, button, and card, have been considered in this article. Tables, modals, tooltips, carousels, jumbotrons, pagination, and tabs are just a few of the many Bootstrap components that are currently accessible for testing.

    If you need help getting started with React Bootstrap for your next project, contact BOSC Tech Labs, a leading React app development company with experienced developers who can help you build a custom React app that meets your needs.

    Frequently Asked Questions (FAQs)

    1. How should Bootstrap be used with React?

    There are various approaches to doing this. However, installing the Bootstrap npm package in your React application and adding it as a dependent is the most efficient choice. Using these commands, the most recent Bootstrap version will be installed on your React project. The next step is to put the following line at the top of the./src/index.

    2. Do Bootstrap and React Bootstrap differ from one another?

    React, let’s say, is unaware of how Bootstrap uses Jquery to implement animation and other DOM modifications. In summary, React mainly uses virtual DOM to manipulate real DOM. Therefore, each modification to the DOM must first be registered in the virtual DOM.

    3. How can I use React Bootstrap to make a website responsive?

    To ensure that all themes continue functioning with React Bootstrap, you will require a stylesheet from the Bootstrap library. Accessibility is standard. When building your website, accessibility is crucial. React Bootstrap makes creating accessible components even simpler than standard Bootstrap.

    Book your appointment now

  • A comprehensive guide for React Native healthcare applications

    A comprehensive guide for React Native healthcare applications

    Due to their great demand and effectiveness, healthcare applications and the React Native framework are the two latest trends in business. We’ll discuss the advantages of React Native in healthcare applications in the article below today. Discover React Native’s importance to the healthcare industry by reading further.

    Well-known Frameworks among Developers in 2023

    By 2023, Node.js had overtaken React.js as the most widely used web framework among programmers worldwide. Node.js and React.js are used by 42.7 percent and 40.6 percent of respondents, respectively, to the survey.

    Web Framework

    A software framework that helps with the overall development of online applications is referred to as a web framework or a web application framework. Web frameworks are used to automate mundane duties usually done in web development. In other words, it simplifies the process of web development, making it easy to create a website.

    React Native Advantages for Healthcare Apps

    Facebook introduced React Native, an open-source JavaScript framework. It may be a cross-platform development tool to create web and mobile apps for various platforms.

    Well! All cross-platform app development tools, including React Native, can be utilized to create healthcare apps. For healthcare apps, you should, however, prefer React Native for several reasons, some of which are listed below.

    • Reusability and code maintenance make development easier with React Native.
    • Compared to developing native apps, using React Native for cross-platform development can help you cut development expenses by up to 50%.
    • One line of code can be used to create a mobile healthcare application.
    • It is the go-to option for creating logical user interfaces because it takes advantage of elements from React, a JavaScript package.

    Benefits of Using React Native in the Development of Healthcare Apps

    Let us list the main arguments for selecting React Native while developing healthcare applications:

    1. Quick Development

    React Native offers a streamlined development approach that empowers programmers to quickly and effectively develop applications. Your healthcare application’s cross-platform features, which use a single codebase for various platforms and include an array of substantial React Native elements, can help you accelerate the development process.

    As a result, it drastically cuts down on development time. Additionally, the Hot Reloading feature of React Native enables your engineers to see changes in real time, which helps speed up the process. As a result, business owners benefit from shorter development cycles and efficient solutions.

    2. Current Update

    Real-time updates and information are essential in the healthcare sector to guarantee that patients receive the most up-to-date and correct medical guidance. You may update users and send important information to them using React Native’s live updates functionality without forcing them to download new versions from the app store specifically.

    This capacity is advantageous in urgent situations where sharing information quickly can affect patient outcomes. React Native-based healthcare application development can also enhance application services.

    3. Integration with Existing Apps

    Applications built with React Native allow seamless integration with existing applications. Healthcare providers can expand their services and engage with larger communities because of their ability to integrate with native modules.

    In addition, without having to redesign the application completely, React Native streamlines the application process, increases healthcare services, boosts patient engagement, and improves the user interface.

    4. Cost-Efficiency

    React Native reduces development time and costs by enabling a single code base for both iOS and Android. Additionally, it offers pre-built libraries and components, effectively reducing the development cost.

    Furthermore, due to its ability to share code across various platforms, React Native is more affordable than alternative native mobile app development frameworks. Thus, using React Native to create healthcare applications can cut costs by 25–30%.

    5. Flexible Strategy

    Healthcare apps demand a flexible strategy since they frequently require improvements and updates to satisfy user needs and evolve industry norms. The adaptability of React Native enables programmers to make changes quickly and effectively, which improves the user experience.

    Additionally, it guarantees that the software remains relevant in the fast-paced healthcare industry. Also, React Native enjoys strong community support and keeps up with advancements in tools, resources, and technology.

    6. Enhances Scalability

    A key component of mobile health applications is Scalability. In light of the new React Native architecture (React Native v0.70), which is component-based and modular, it will be simpler for developers to scale the application as the user base grows.

    Its compatibility with third-party libraries and plugins makes it possible to integrate new features quickly. Additionally, it ensures that your mobile healthcare application stays current with new developments and changes in technology following regulations.

    Healthcare React Native App Features

    Let’s talk about some of the dynamic features of React Native healthcare apps that improve your app’s performance and user experience now that you understand why you should choose React Native for mobile healthcare apps.

    1. Keeping Data Safe

    Data is essential in medical applications because it contains all patient records. The importance of protecting sensitive data increased, and the React Native healthcare app was aware of this responsibility. You can secure and save a lot of data using it.

    Here are a few React Native features that provide great alternatives for managing and storing data.

    • React Native provides AsyncStorage, a straightforward, asynchronous, persistent, key-value storage system. It can store app data, including authentication tokens, user preferences, and settings.
    • Developers may design and maintain incredibly intelligent React Native local databases owing to React Native’s support for SQLite (a relational database management system). It also handles structured data, which makes it a superior option for managing the complex databases used in healthcare apps.
    • A third-party database library called React Native Realm can be utilized for quicker and more secure data storage. Healthcare apps benefit from stability and security in data storage because of their capacity to manage complicated data, real-time data synchronization, and ability to handle larger datasets.

    2. Medical Management and Tracking

    Healthcare apps may track and manage medical conditions, treatments, and medication with the help of React Native. Data entry is made simple by React Native’s mobile-responsive and interactive UI.

    You can track and manage health data more efficiently using React Native’s real-time updates and UI. The communication between the patient and their healthcare practitioner is improved.

    • Healthcare apps need easy access to device sensors, and React Native perfectly satisfies this need. Following patients’ movements and activities is simpler by using device sensors like the GPS, accelerometer, and more.
    • React Native healthcare apps may easily incorporate camera capabilities. It facilitates capturing and uploading medical pictures like lab results or X-rays.
    • React Native is known for its simple API integration. It enables faultless real-time data retrieval and display from wearables and health monitoring gadgets.
    • When utilized for healthcare apps, React Native provides access to a speech recognition function. With this function, patients and healthcare workers can manage and input data without using their hands.

    3. Integration of Electronic Health Records (EHR)

    You may integrate Electronic Health Records (EHR) systems into your mobile healthcare application with the help of React Native. EHR integration in healthcare mobile apps allows licensed medical staff to access and examine thorough patient data.

    Professionals can more easily keep track of patients’ medical histories, lab results, diagnoses, medication lists, particular health conditions, and treatment plans with seamless access to data. EHR system integration with React Native is seamless, which improves customer care coordination and efficient healthcare services.

    • For seamless interaction with native EHR libraries and APIs, you can use Native Module interaction to integrate native modules created in Swift (for iOS) and Java/Kotlin (for Android). It ensures that data interactions with the EHR systems are safe and secure.
    • Regarding supporting OAuth and other secure authentication techniques, React Native is the best. It is essential for starting the process of obtaining permission to access patient data from EHR systems.
    • Implementing Health Insurance Portability and Accountability Act (HIPAA) compliance requirements is more straightforward because of React Native’s flexible architecture. It enables the maintenance and management of patient data security and privacy in compliance with industry standards for the healthcare sector.
    • React Native facilitates data transfers between the healthcare app and the EHR system by supporting interoperability with several health data standards, including HL7 (Health Level Seven) and FHIR (Fast Healthcare Interoperability Resources).

    4. Book Appointments

    The ability to quickly schedule appointments is one of the key benefits of using a healthcare application. Many patients prefer not to stand in a queue, and adopting React Native in the healthcare industry makes it simple to schedule an appointment.

    It is designed and organized so that no appointments clash with one another. It will alert users if any scheduled appointments are already registered, accelerating the booking process. Now, on to the essential characteristics:

    • React Navigation is a package from React Native used to develop smooth and seamless navigation flows so that users can explore and book appointments without interruption.
    • The React Native framework also includes a built-in date and time picker. It simplifies selecting the preferred time and date for an appointment when it is used to book it.
    • React Native healthcare app development can use the Redux state management library. It makes creating a centralized store for appointment data possible, guaranteeing accessibility and consistency across the application.

    5. UI/UX customization

    The user experience is one of the most essential aspects when selecting a mobile healthcare application. You can create engaging, user-friendly interfaces with React Native’s configurable UI components. You can improve the user experience by the demands of the application.

    Create compelling healthcare mobile applications using React Native by customizing your app’s design, color scheme, and interactive elements. Moreover, it gives your healthcare app a customized and user-centric approach.

    • The component-based design used by React Native allows for a breakdown of UI elements into reusable components. It makes it simple to style and customize specific UI elements.
    • Utilize React Native’s support for Flexbox Layout to build layouts that may be altered to fit multiple screen sizes and orientations. You can develop user interfaces that are strong, clear, responsive, and adaptable.
    • If you hire React app developers then they will make smooth and interactive animated transitions and effects with React Native’s built-in support for animated components. To customize the UI/UX, you can select versatile React Native animation libraries and UI components.
    • With React Native’s Hot Reloading functionality, you can check the UI changes as you write in real-time, increasing customization’s effectiveness and granularity.

    Also Read: Flutter Vs. React Native: Which is Best For your Project in 2023?

    Use of React Native in Healthcare Applications: Challenges

    There are some restrictions if you choose React Native, but you can unlock the potential of cross-platform app development. Since nothing is flawless, there are going to be some difficulties. The following are a few challenges you might face when developing a healthcare application with React Native:

    1. Integration of Native Modules

    When React Native enables cross-platform development, some functionalities require native capabilities that React Native does not directly offer in the healthcare application. This represents another limiting case.

    Developers may integrate native modules with custom iOS and Android code. However, this problematic procedure necessitates native language proficiency from developers and takes time. Further, the native module integration becomes less user-centric and more complex.

    2. Regulatory Compliance

    Employing strong security measures to safeguard sensitive data from potential data breaches and illegal access offers obstacles. Because of the responsibilities of the Health Insurance Portability and Accountability Act (HIPAA) or General Data Protection Regulation (GDPR), it is essential to stick to regulatory compliance in healthcare apps.

    It can be technically challenging to incorporate encryption procedures into React Native healthcare apps since it is difficult to maintain encryption keys throughout data transmission. Also, the React Native application must carefully track and log user actions to establish healthcare regulatory auditing.

    3. Limited Integration with Third Parties

    The first challenge in healthcare application development with React Native is the absence of third-party plugins and modules compared to native frameworks. Although the React Native ecosystem is expanding, few components are available for certain functionality or APIs.

    As a result, you might have to develop unique solutions or consider various approaches to integrating third-party services. Additionally, it extends the development process, requires more work, and limits the potential for further development.

    4. Optimization of Performance

    React Native depends on JavaScript for performance because native and JavaScript threads cannot communicate. Performance bottlenecks ultimately turn out to be the cause, which leads to complex tasks and unappealing user interfaces.

    Additionally, due to such challenges, your development team must collaborate closely for code optimization. To reduce the initial load time, you should also use code splitting. You may ensure that your application loads necessary components seamlessly by properly implementing code memorization.

    Also Read: Cloud Computing in Healthcare Industry

    Future Trends in React Native Health Apps

    Let’s move on to the positive future developments of React Native in healthcare apps now that we have a better understanding of its essential characteristics and advantages:

    1. Utilization of AI and ML

    Healthcare is one of numerous industries where artificial intelligence (AI) and machine learning (ML) are booming. It aids in the diagnosis of illnesses and the prediction of health problems. React Native and AI/ML technologies deliver a personalized and intelligent user experience.

    With AI chatbots, patient or user inquiries can be resolved faster. AI-powered applications also allow you to analyze the data to enhance patient care and make informed decisions.

    2. Various Cloud Services

    Multi-cloud-based services are the newest trend in React Native healthcare applications. You may offer seamless integration with numerous cloud platforms using React Native. Additionally, storing sensitive data in data storage and abiding by privacy laws help secure it.

    Integration of cloud platforms helps streamline operations in healthcare applications, whether you are doing medical research or keeping health records. As a result, it effectively preserves data security and makes your app scalable.

    3. Remote Monitoring of Patients

    Remote patient monitoring is another promising trend on the list. Your healthcare app may track patient vital signs, offer real-time consultations, and instantly exchange records with them using React Native.

    Due to its cross-platform skill sets, patients can access telemedicine services from any device, including a smartphone or tablet. As a result, it guarantees universal and easy access to healthcare. Finally, it aids in effectively monitoring and tracking patient records.

    4. IoT Integration

    IoT is developing and becoming more well-known for its innovative technologies. React Native-based healthcare applications have revolutionized the delivery of medical services. IoT gadgets like wearable watches and innovative medical equipment collect patient data in real time while helping to monitor health conditions.

    React Native’s ability to interact with IoT devices makes it easier to get up-to-date patient data, which supports remote monitoring, individualized treatment regimens, and preventive care. This integration will improve patient involvement and diagnostics, and more proactive healthcare solutions will result.

    Conclusion

    Both patients and medical professionals depend on mobile healthcare applications; therefore, they must be simple to use and interpret. You must now understand why React Native is the best framework for developing mobile healthcare applications after reading this blog. It makes sense that React Native Healthcare Apps, a new framework, will revolutionize your application with its dynamic features and capability for cross-platform development.

    We are aware that you require company because the journey is arduous. We at BOSC Tech Labs are always willing to assist. You can create a cutting-edge yet secure healthcare mobility app with the help of our well-known React Native development business. Our team of experts will also make your healthcare application according to the specifications of your project.

    Frequently Asked Questions (FAQs)

    1. Is React Native an excellent option for developing apps?

    React Native is a good option for mobile app development due to its compatibility, code reuse, live-to-reload feature, and accessibility to third-party plugins.

    2. Why use React Native for healthcare apps?

    Using React Native for healthcare apps provides the advantage of developing cross-platform applications with a single codebase, reducing development time and cost. Its ability to deliver a native-like user experience on both iOS and Android, coupled with its growing community support, makes React Native an efficient and practical choice for healthcare app development.

    3. What is the cost of developing a React Native healthcare app?

    The cost of building a React Native healthcare app can vary depending on several factors, including the app’s complexity, the features it needs, the development team’s location, and the developers’ experience. However, you can generally expect to pay anywhere from $25,000 to $300,000 for a basic React Native healthcare app.

    Book your appointment now

  • How do components in React interact with one another?

    How do components in React interact with one another?

    The hierarchy in which React components are composed resembles the hierarchy of the DOM tree that they are used to construct. In the hierarchy, there are elements that are lower (children) and elements that are higher (parents). Let’s examine the data flow and directional communication that React allows between components.

    We examine in-depth each of the above-mentioned methods of component-to-component communication in React in this post. We will see how to accomplish the two communication scenarios in each case:

    • Parent to Child
    • Child to Parent

    The most straightforward direction for data flow is from parent to kid, or down the hierarchy. Props is the mechanism used by React to achieve this. Any function that takes in the props parameter is a React component. Props is an object that can have any number of fields in it; it is a bag of data.

    Props are the means by which a parent component transfers data to a child component. Assume that we have a BookList component with information for a book list. It wishes to provide the child Book component with the details of every book in its list as iterates through the book list during render time. It can use props to accomplish that. The child component receives these props as attributes in jsx.

    Parent-to-child with props Example

    	
    function BookList() {
      const list = [
        { title: 'The Great Gatsby', author: 'Harper Lee' },
        { title: 'The Catcher in the Rye', author: 'J. D. Salinger' },
        // ...
      ]
    
      return (
        <ul>
          {list.map((book, i) => 
          <Book title={book.title} 
          author={book.author} key={i} 
          />)}
        </ul>
      )
    }
    

    Afterwards, those fields as contained in the props parameter to its function can be received and used by the Book component:

    function Book(props) {
      return (
        <li>
          <h2>{props.title</h2>
          <div>{props.author}</div>
        </li>
      )
    }
    

    Child-to-Parent with function props

    It is undesirable, I know, but before a child can respond to a parent, it needs to be given a way to do so. We discovered that parents use props to convey information to their kids. A kid may inherit a “special” prop of type function. When a pertinent event occurs, such a user interaction, the child can invoke this function as a callback.

    function BookTitle(props) {
      return (
        <label>
          Title: 
          <input onChange={props.onTitleChange} value={props.title} />
        </label>
      )
    }
    

    It gets a message from its parent, the onTitleChange method, in the props. This function is bound to the input /> field’s onChange event. The change Event object will be passed to the onTitleChange callback when the input changes.

    The arguments supplied to the method can be received by the parent, BookEditForm, as it has a reference to it:

    In this instance, the handleTitleChange function was supplied by the parent, and upon calling it, it establishes the internal state by using the value of evt.target.value, which was obtained as a callback argument from the child component.

    From Child to Parent with Callbacks

    It is undesirable, I know, but before a child can respond to a parent, it needs to be given a way to do so. We discovered that parents use props to convey information to their kids. A kid may inherit a “special” prop of type function. When a pertinent event occurs, such a user interaction, the child can invoke this function as a callback.

    function BookTitle(props) {
      return (
        <label>
          Title: 
          <input onChange={props.onTitleChange} value={props.title} />
        </label>
      )
    }
    

    It gets a message from its parent, the onTitleChange method, in the props. This function is bound to the input /> field’s onChange event. The change Event object will be passed to the onTitleChange callback when the input changes.

    Schedule an interview with React developers

    Conclusion

    The techniques built into React for intercomponent communication are straightforward and efficient. Props enable data to move from parent to child in the component hierarchy. The callback function is supplied through props when a child wants to talk back to a parent. Context offers more convenience and opens the door to creative coding patterns by supplying data globally throughout the component tree hierarchy. React also integrates effectively with other frameworks and patterns to interact between components.

    If you need help developing a React app for your business, you can hire React app developer from BOSC Tech Labs. We have a talented team of experienced React programmers who can help you build a high-quality, user-friendly React app.

    Frequently Asked Questions (FAQs)

    1. What is the connection between the two components?

    Property-based communication, often known as prop communication, is the most basic method of component communication. Props are the informational components that parents send to their child components, much like arguments to a function.

    2. How are React components executed?

    Components are independent, reusable chunks of code. They accomplish the same thing as JavaScript functions but operate independently and return HTML. There are two kinds of components in React i.e., class components and function components. For this reason, we will focus on function components.

    3. What do React props do?

    Props are an acronym for “properties.” These components can only be read. It is an object that functions similarly to HTML attributes, storing the value of a tag’s attributes. It gives a technique for data to be sent between components. They are comparable to function arguments.

    Book your appointment now

  • Implementing Push Notifications In React With Firebase: A Step-By-Step Guide

    Implementing Push Notifications In React With Firebase: A Step-By-Step Guide

    Firebase was acquired by Google in the year 2014. Google made many enhancements to the platform, and it became a one-stop backend-as-a-service solution. Firebase brings high-end Cloud messaging functionality features.

    These are quite helpful for getting the alert messages on the client side. Based on a recent report, more than 21.14% of developers have been using Firebase. Hence, this include managing the app notification features.

    Push Notifications Features

    Google brings many numbers of advanced features such as centralized authentication, Cloud functions, real-time databases, and more. Some of them are part of the Firebase umbrella.

    Firebase stands out as a go-to solution to easily manage the App notification. Many web application development involve the notification functionality for getting continuous features. These also involve user interaction features.

    Steps To Implement The Push Notifications In ReactJS With Firebase

    Push/alert message helps users easily get new updates about the application. The browser captures notifications and then forwards them to the corresponding application for a web app. Firebase also enables cloud messaging functionality, which is suitable for helping to get alert messages.

    Below are some of the steps for implementing the Push Notification in ReactJS with Firebase:

    • React project set-up
    • Install Firebase npm package
    • Initialize the Firebase
    • Create a project in the Firebase console
    • Create Firebase-message-sw.js file
    • User Permissions for getting the Notification
    • Testing in Firebase cloud message

    Steps To Install Firebase npm Package

    Firebase lets you easily develop a full-stack application. These do not require writing a single line of backend code.

    npm create-react-app push-notification-demo
    cd push-notification-demo
    

    Run the command npm start to run the app

      • Start a new Firebase project
      • Enter a project name
      • Click Continue
      • Select the Firebase account from the dropdown
      • Click ‘Create a new account when you don’t have one
      • Click “Create project.”
      • Move to Firebase initialization in React app
      • Run the following command:
    npm install Firebase –save
    
    • Initialize Firebase in the project

    Steps To Create A Project In The Firebase Console

    For initializing the Firebase in the created app, it is quite important to have the Firebase library. Initializing the Firebase simply allows the creation of the file Firebase.js in the src folder. Create a project inside a Firebase console by creating the Firebase.js in the app.

    • Click Web icon (</>) on top-left page
    • Create a project with name – first-cloud-messaging
    • A Firebase project with the name first-cloud-messaging is added to it.

    Steps for setting up the Firebase project

    • Go to Firebase Developer Console
    • Sign in with a Google email address
    • Click the ‘Go to Console’ button
    • Navigate to the console overview page
    • Click the “Create a project” button
    • Provide the project’s name
    • Navigate to the project’s overview page
    • Register application on Firebase
    • Generate API keys
    • Click the ‘Web’ icon to register the app
    • Provide app name
    • Click the “Register app” button
    • Copy Firebase configuration code
    • Register your React app

    Steps To Configuring The Firebase Cloud Messaging (FCM)

    Upon registering the Apps on Firebase, it is quite important to configure Firebase Cloud Messaging (FCM) service.

    • Navigate to the Project settings page
    • Click the Cloud Messaging tab
    • Navigate ‘Web configuration’ section
    • Click the “Generate key pair” button
    • Generate unique key in ReactJS

    Firebase Cloud Messaging especially uses the unique Application Identity key pairs. These are suitable options for connecting the external push services. So the developer is required to generate the identity key for quick accessibility.

    Set Up The React App

    Creating the React app helps to easily implement the Push Notifications using the Firebase. Upon installing the React app, it is quite a convenient option for installing Firebase. These involve the react-hot-toast packages for implementing Push Notifications on the React app.

    npm install firebase react-hot-toast
    

    Steps To Configure Firebase And Firebase-Message-Sw.Js File

    Configuring the Firebase as well as Cloud Messaging Service plays an important role in all these aspects. These enable the better option for easily implementing the Push Notification on the app. You can simply follow the below instruction for configuring the Firebase.

    • Open developer console
    • Click Project settings
    • Copy the Firebase configuration object
    • Create a new firebase.js file in the src directory

    Example

    import { initializeApp } from "firebase/app";
    import { getMessaging, getToken, onMessage } from 'firebase/messaging';
    const firebaseConfig = { 
    apiKey: "YOUR_API_KEY", 
    authDomain: "YOUR_AUTH_DOMAIN", 
    projectId: "YOUR_PROJECT_ID", 
    storageBucket: "YOUR_STORAGE_BUCKET", 
    messagingSenderId: "YOUR_MESSAGING_SENDER_ID", 
    appId: "YOUR_APP_ID" 
    };
    
    firebase.initializeApp(firebaseConfig);
    
    const messaging = firebase.messaging();
    
    messaging.onBackgroundMessage((payload) => { 
    const notificationTitle = payload.notification.title; 
    const notificationOptions = { 
    body: payload.notification.body, 
    icon: '/firebase-logo.png' 
    };
    
    self.registration.showNotification(notificationTitle, notificationOptions); 
    });

    It would help if you replaced the firebaseConfig object using the copied Project settings. These allow the code to be easily set up on the Firebase instances. It is quite a convenient option to initialize a Cloud Messaging object for easily accessing the FCM functionality in the app.

    Example of firebase.js

    export const onMessager = () =>
      new Promise((resolve) => {
        onMessage(messaging, (payload) => {
          resolve(payload);
        });
    });
    

    Example of Sendrequest.js

    export const Sendrequest = () => {
      console.log("Requesting User Permission......");
      Notification.requestPermission().then((permission) => {
        if (permission === "granted") {
          console.log("Notification User Permission Granted.");
    
    
          return getToken(messaging, { vapidKey: `Notification_key_pair` })
            .then((currentToken) => {
              if (currentToken) {
                console.log('Client Token: ', currentToken);
                
              } else {
                
                console.log('Failed to generate the registration token.');
              }
            })
            .catch((err) => {
              console.log('An error occurred when requesting to receive the token.', err);
            });
        } else {
          console.log("User Permission Denied.");
        }
      });
    }
    

    Example of pushNotification.js

    import React, { useState, useEffect } from 'react';
    import toast, { Toaster } from 'react-hot-toast';
    import { Sendrequest, onMessageListener } from './firebase';
    
    
    const PushNotification = () => {
      const [notification, setNotification] = useState({ title: '', body: '' });
    
    
      useEffect(() => {
        Sendrequest();
        onMessageListener()
          .then((payload) => {
            setNotification({
              title: payload?.notification?.title,
              body: payload?.notification?.body,
            });
          })
          .catch((err) => console.log('failed: ', err));
      }, []);
    
    
      useEffect(() => {
        if (notification?.title) {
          notify();
        }
      }, [notification]);
    
    
      const notify = () => toast(<ToastDisplay notification={notification} />);
    
    
      return <Toaster />; // The <Toaster /> should be inside the return block.
    };
    
    
    function ToastDisplay({ notification }) {
      return (
        <div>
          <p>
            <b>{notification?.title}</b>
          </p>
          <p>{notification?.body}</p>
        </div>
      );
    }
    
    
    export default PushNotification;
    

    Example of App.js

    import logo from './logo.svg';
    
    import './App.css';
    
    import PushNotification from './PushNotification'
    
    function App() {
    
      return (
    
        <div className="App">
    
          <header className="App-header">
    
            <img src={logo} className="App-logo" alt="logo" />
    
            <p>
    
              Edit <code>src/App.js</code> and save to reload.
    
            </p>
    
            <a
    
              className="App-link"
    
              href="https://reactjs.org"
    
              target="_blank"
    
              rel="noopener noreferrer"
    
            >
    
              Learn React
    
            </a>
    
          </header>
    
          <PushNotification />
    
        </div>
    
      );
    
    }
    
    export default App;

    Steps To Manage Notifications’ User Permissions

    Handling the User Permission is the most important process for receiving the React application. These can be easily accessed from Firebase’s Cloud Messaging service to enable more features.

    It involves constantly developing as well as calling request permission methods. These involve enabling the messaging object to excellence. This ensures better ways to handle the user’s attributes for notifications’ permission requests.

    • Get the registration token for the application with the getToken function
    • Replace placeholder Notification_key_pair using actual key pair
    • Open project overview
    • Register the app
    • Web Push Notification in ReactJS with Firebase is enabled
    • Copy FirebaseConfig object
    • Add Firebase.js file

    Steps for Testing Firebase Cloud Messaging

    Follow the below instructions for testing the push notification:

    • Go to the Firebase console
    • Open the Project Overview page
    • Send ‘test message” button
    • Click on Cloud Messaging
    • Send “first message” button
    • You will get a message stating that the FCM registration token

    Schedule an interview with React developers

    Conclusion

    Firebase has become the 4th most popular Cloud platform. Firebase become the evolving technology for integrating the backend seamlessly. Push Notifications in the applications helps send timely updates, personalized messages, and alerts. Push Notifications ensure continuous user engagement with instant connectivity.

    Contact BOSC Tech Labs if you’re looking for the best React app development company; they’ll show you the future of your enterprise. You can hire React development team who are highly experienced and knowledgeable in this cutting-edge technology.

    Read our blogs for more information about React.

    Frequently Asked Questions (FAQs)

    1. How do you use Firebase with React to implement Push Notifications?

    Click Create your first campaign, choose Firebase Notification messages, and provide a notification’s title and message. Press the Send test message button under the Device Preview area. To send the Push Notification, paste the client token and add it. Then click Test.

    2. What distinguishes Push Notifications from notifications?

    The primary distinction between notifications and Push Notifications is that the latter are generated internally by a device system that wishes to give the user information, a reminder, some news or updates, etc.

    3. How do I trigger notifications from Firebase?

    Send a trial notification message first. But make sure that the application is running in the device’s background. Open the Messaging page in the Firebase console. Choose Create your first campaign if this is the initial message you send. Deploy by choosing Firebase Notification messages.

    Book your appointment now