• App Gamification: 5 Examples How does gamification drive engagement?

    App Gamification: 5 Examples How does gamification drive engagement?

    You purchase a healthy smoothie online from your favourite restaurant to start your morning. Your food apps have allowed you to use your saved rewards to get a significant discount on the morning snack you’ve had your eye on. 

    You use your running app in the evening and head to the neighbourhood park. You compete with your friends across the globe, earn a badge for finishing first, and post it to your Instagram page. After all, who doesn’t like to brag about a victory like that? 

    Then, after taking a few deep breaths, you pick up your phone and spend 10 minutes reviewing the new language you’re learning (let’s say Marathi). You can be seen get the badge of Jhakkas on the leaderboard. 

    You’ll have had enough of a term called app gamification by the time you return from the office or workplace, and you won’t be alone because, according to a recent survey, 70% of the 2,000 biggest businesses in the world use gamification in their Mobile apps. 

    Why is gamification important?  

    User motivation and engagement can be highly impacted by gamification. As per studies, the presence of game aspects in non-gaming apps might influence the brain’s dopamine to be released, which encourages users to engage with the app longer. 

    Gamification can also encourage competitiveness, curiosity, and a sense of control among users. Considering these advantages, it’s worthwhile to consider gamifying your app to boost user retention and engagement.  

    All eyes are on stats 

    App gamification delivers a win-win! How? Brands gain engaged users while users enjoy a more fun and rewarding experience, a fact echoed in convincing statistics worldwide: 

    • As per Locatalytics, user retention rates for brands using gamification in their mobile apps have improved by 22% on average.  
    • On average, engagement rates for brands using gamification in mobile apps rise by 30%, as per research. 

    Know more : Slot Game Development: A Step-by-Step Guide

    And, what’s the starting point?  

    There are several things we can do if we want to understand and use app gamification to increase brand engagement and retention. Your application may climb the leaderboard with some foresight and gamification features, such as competitions, progress bars, badges, and points and leaderboards. 

    Here’s a quick checklist of things to do before beginning your app gamification adventure before we get into some of our favourite gamification-using apps: 

    Know your target audience 

    Understanding them will help you create gamification aspects that appeal to them by allowing you to recognize their interests, motivations, and pain points.  

    Set definite objectives 

    Are you looking for increased retention and engagement? Are you spending more now directionless? Nope. Establishing clear goals early on will help you develop a gamification strategy that meets your and your users’ objectives. 

    Begin with something basic 

    Although it may be irresistible to dive right in, it’s best to start basic to test and improve your gamification aspects before introducing more intricate features. 

    Give rewards, always 

    It’s only enjoyable if you do! Rewards encourage and provide incentives. The secret to success is figuring out what benefits your audience desires; therefore, keep your audience research in mind! 

    Make the experience unique 

    Stick-to-your-app rates are higher among users who feel the game is customized just for them. Following your progress with the essential gamification components, you can accomplish this in several ways: Provide users with the option to personalize their experience or offer challenges or incentives depending on their location, past purchases, or interests. Tailor content and rewards to each user’s preferences. 

    Make it the ‘social’ 

    People are considerably more likely to feel a sense of satisfaction when they share their accomplishments on social media, which promotes ongoing participation. Think about including social components like shared badges and incentives, tasks that can be completed with friends, or leaderboards that encourage rivalry. 

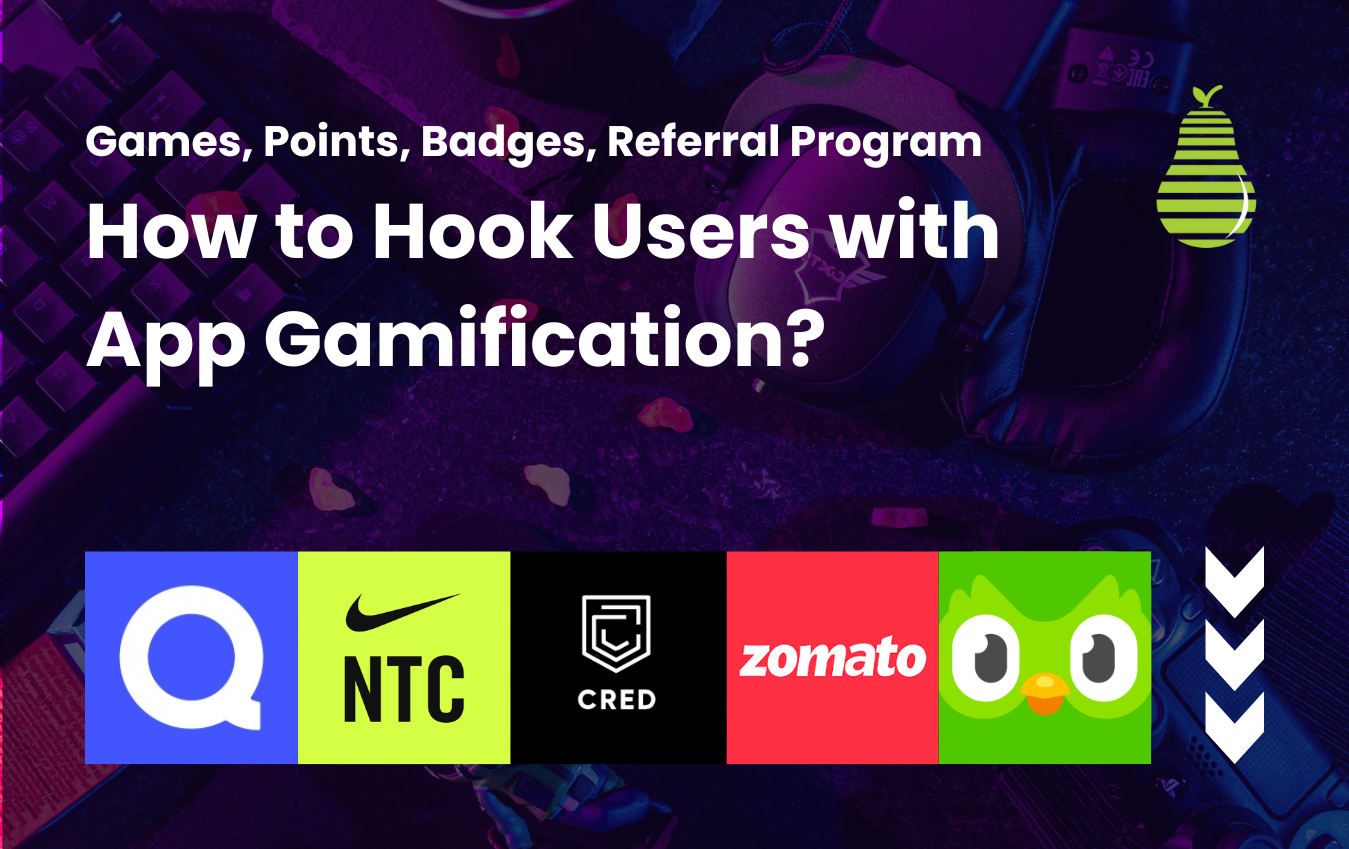
    The Curious Cases of – App Gamification = Engagement Increment 

    Nike Training Club 

    NIKE_logo

    Nike Training Club turns workouts into a rewarding experience!  More than just a fitness app, it gamifies your healthy lifestyle. Complete exercises to unlock exclusive content and rewards for added motivation.  With Nike Training Club, ditching the workout load and building lasting fitness habits becomes fun, always! 

    CRED 

    Cred logo - Gamification Case

    CRED offers an amazing gamified experience by incorporating aspects of games into every aspect of its software. A daily spin-the-wheel feature that offers chances to win prizes like gift cards, a referral program that allows users to earn gems that can be redeemed for rewards, and a CRED coin system, where each coin is equal to one rupee and can be used to unlock various rewards or access to CRED games for even greater prizes, are all part of their strategy. This multi-experience gamification strategy increases enjoyment and engagement while streamlining the user experience. 

    Quizlet 

    quizlet_Logo

    Quizlet transforms study sessions into an entertaining experience. Gone are the days of complex, tearing flashcards! Instead, Quizlet offers games like “Match” and “Gravity” to keep things lively. In ‘Match,’ you’ll race against the clock to pair terms and definitions, honing your memory in a fast-paced challenge. ‘Gravity’ adds an element of urgency, making you type in the correct answers before definitions disappear from the screen. With Quizlet, learning becomes a thrilling game! 

    Zomato 

    Zomato-logo

    Zomato is a widely used food delivery software that uses many gamification techniques on social media. One noteworthy example is a promotion that allows users to earn points for writing reviews, liking or commenting on social media posts, sharing food images, and recommending others join Zomato. Users were rewarded with free meals or discounts proportionate to their activity level.  

    Duolingo 

    Duolingo-logo

    We can only discuss gamification by mentioning Duolingo, the most popular learning program ever. Even while the app’s notorious badging system has come to be associated with Duolingo, the app’s appeal extends far beyond badges. It makes a very exciting learning environment that make users able to meet their language proficiency. 

    To inspire users, the program provides a variety of challenges and incentives, including daily streaks, levels, badges, and competitive leaderboards. Additionally, students can earn Lingots, virtual money that they can use to buy power-ups and access extra content. Then they can post about their achievements and growth stories on the various social media platforms.  

    App gamification amplifies engagement. Believe in it! 

    Gamification has completely changed how marketers approach user engagement and retention to drive app development. A few examples of this include health apps that offer rewards for reaching step goals and language learning apps that promote progress through levels and challenges. As technology develops, we can anticipate ever more imaginative and inventive ways to add gamification to our mobile experiences. 

  • Flutter vs. Native App Development: Making the Right Choice

    Flutter vs. Native App Development: Making the Right Choice

    When you think about developing a new app, there are several questions to be considered.

    The app must be superfast and smooth, or does it just need to function well?
    How much time do you have to develop it for all platforms?
    What is the vision for future features and updates?
    Most importantly, how is the budget?

    And with these questions, you decide what software to be used for development. Speaking about development, a crucial decision is choosing between Flutter and native app development? There are specific advantages and disadvantages, and the final choice is always influenced by your needs. 

    So now, we’ve written a blog that takes into consideration the various factors that you should keep in mind while you choose between Flutter and native app development. We’ll be going through a couple of these factors below, keep reading! 

    The Allure of Flutter: Cross-Platform Development with Speed 

    Flutter is a cross-platform framework developed by Google, and acts as the bridge between various platforms like Android and Apple, integrating both with just a single codebase.  

    This will in turn positively impact development times while lowering costs as compared to native development. This happens because developing natively basically means that you need separate codebases, while Flutter is all about a unified codebase.  

    Did you know that according to a Statista survey, over 42% of software developers use Flutter?

    How Flutter shines, specifically 

    Here are the ways in which Flutter triumphs over native development:  

    Rapid Prototyping and MVP Development: Flutter has a feature called hot reload, that allows for near instantaneous updates. This helps if you want to move an MVP out quickly to let the market do its magic (testing it in the market).  

    A design that’s consistent across platforms: Flutter’s got a rich set of widgets that render consistently across platforms. What this does is that it ensures a uniform user experience for both iOS and Android users alike, helping maintain brand consistency. 

    Cost-Effectiveness: Flutter’s single codebase consolidates development efforts. This will in-turn lead to reduced development costs, acting as a rather significant advantage for startups/businesses with limited budgets.  

    Where Flutter lacks, however little 

    App Size: Compared to native apps, Flutter apps are a bit larger in size as compared to native apps. Don’t worry though, advancements are being made in order to address it, but it’s still a factor. This comes out like a sore thumb for users with limited data plans or storage space.  

    Performance Overheads: When Flutter apps are hit with complex graphical tasks/animation-heavy processes – they experience a drop in performance. It’s primarily because Flutter uses a layered architecture, leading to overheads while rendering elements.  

    Native Development: Power and Performance at its Peak 

    Native app development involves using platform-specific languages (Java/Kotlin for Android and Swift/Objective-C for iOS). This approach offers several benefits: 

    Unmatched Performance: For graphically intensive apps, native apps work wonders as they’ve got direct access to a device’s hardware and functionalities. This leads to a performance that’s super-smooth.  

    Seamless Integration: Native development allows for effortless integration with features that are device-specific such as GPS, camera and sensors. This is super-important for apps that rely heavily on these functionalities.  

    Superior User Experience: Native apps leverage the specific design guidelines and functionalities of platforms, resulting in a rather natural and intuitive user experience for both Android and iOS users alike.  

    While native development offers undeniable advantages, there are also drawbacks to consider: 

    Development Time and Cost: When you go to build separate codebases for each platform, you end up adding to increased development time and cost. This isn’t considered ideal for projects with tight deadlines and limited resources. A survey by Stack Overflow in 2022 showed that only a third of mobile developers use cross-platform technologies.  

    Maintenance Challenges: Maintaining two separate codebases consumes a humongous amount of time and energy, especially as features evolve and updates are required. 

    Read About Flutter Vs React Native – From Developer Point Of View??

    Finding the Right Fit: Considerations for Your App 

    Now that you know both advantages and disadvantages, here’s a breakdown of how each approach aligns with your needs:  

    Flutter: When you’ve got rapid development, consistent user experience and cost-effectiveness as your top priority – Flutter is a brilliant option. But the potential for a larger app size demands careful consideration. You can explore techniques for reducing code size that’s offered by Flutter framework.  

    Native Development: If you want an app that’s more performance dependent, demands deep integration with native features and a platform-specific UI – native development might be the way to go. Make sure to factor in the increased development time and cost. 

    [custom_cta title_cta=”We’re Here to Assist You!” text=”Ready to Enhance Your Project? ” button_text=”Get Support Now” button_url=”/contact/”]

    Considering Third-Party Integrations 

    Integrating charts and other third-party tools in Flutter is a challenge. Native development offers a smooth integration process, but currently the landscape for Flutter integrations is constantly evolving. With that, the pub.dev package repository is a valuable resource for Flutter developers, boasting an ever-growing number of third-party solutions.  

    But what does it mean in real-life? 

    If we talk about a real-life example, let us share some conclusions of a case study. Versal Bank, part of Société Générale International Financial Group, wanted to create a new version of their mobile banking app. It was done using Flutter, and we can understand the below from the case study: 

    • Cross-platform development significantly reduced the app development cost. 
    • The new application got created within a short timeframe, indicating efficiency. 
    • It was easy to integrate the new app with the legacy backend banking services, without any compromise on the performance. 
    • Flutter allowed management of multiple companies due to its flexibility and scalability. 

    This was from an enterprise perspective.  

    When a mobile app developer used Flutter to develop an app that records mood and memories like a journal, below were the observations: 

    • Fast coding and Hot Reload feature let you see changes instantly. 
    • There’s extensive widget library and animations 
    • Packaging and deploying apps are pretty straightforward. 
    • Integration with Google’s Fuchsia OS makes it a key player in the future of app development. 

    How Flutter augmented Dow Jones 

    Dow Jones required an application that was to be delivered by a super-tight deadline. The app to be made was a stock market trading game that allowed users to see how their virtual portfolio is performing, including real-time updation.  

    With Flutter, Dow Jones experienced:  

    • Meeting deadlines effortlessly with pre-made widget libraries and features like hot reload wherein changes are reflected in an instant. 
    • The app was launched in just 3 months! 
    • Animations were created in Flutter’s library itself, again reducing time to market. 
    • Increased development efficiency and a 50% reduction in overall development cost. 

    Zerodha and Flutter: The Flutter Effect 

    zerodha logo

    Developing first and foremost for Android, Zerodha faced some tough challenges while they wanted an app that worked on both iOS and Android. The app to be developed was a live trading app, and is currently the company’s flagship product, Kite.  

    Challenges to be navigated:  

    • Getting an app that works on both Android and iOS, the initial app worked well on Android but didn’t developed app for iOS. 
    • They switched to React Native, which worked well with iOS. But, it didn’t work well with Android now. The platform tables were turned.  
    • The app faced many issues with regard to stability, bugs and other framework-related issues. 

    Challenges while maintaining 2 separate codebases: 

    • Increased Development and Maintenance Efforts: Developing and maintaining 2 separate codebases demands the devotion of time and resources. Both native Android and React Native for iOS requires their own set of development tools and environment setups. 
    • 2 Teams: Both iOS and Android require separate teams to develop. Not only to develop, but to also upgrade, implement features and navigate bug fixes. 
    • The UX part: To ensure a uniform user experience across both platforms (that too with different codebases) is not an easy endeavour. Each platform has its own set of design guidelines, sticking to them will ultimately lead to variation in the app’s interface. 

    Solutions given by Flutter: 

    • One codebase for both iOS and Android, leading to a rather simplified development process. 
    • Fewer third-party dependency issues like they used to have with the React Native platform. 
    • Performance that stood unmatched, owing to the real-time features of their trading app.  

    With the many advantages, there were also a couple of challenges while developing with Flutter:  

    • Graphics Glitches: A couple of times, graphical bugs seemed to have affected the app’s visuals. 
    • Shader Compilation on iOS: This caused initial slowness with respect to animations until the system had warmed up adequately. 
    • Native Library Handling on Android: There were issues regarding the management of libraries on certain Android devices that led to app crashes and extra storage usage. 

    Kite went through the following changes once it was paired with Flutter: 

    • Zerodha achieved consistency with a single, unified codebase that streamlined the interface and reduced development and maintenance costs. 
    • The same developer team could manage both platforms in tandem, leading to inherently faster development cycles. 
    • They also experienced way fewer unexpected breakdowns and compatibility issues while developing with Flutter. 

    Conclusion 

    There’s no one-size-fits-all answer when it comes to choosing between Flutter and native development. Here’s a quick recap to aid decision:  

    Choose Flutter if: 

    • You require rapid development and MVP creation. 
    • Consistent user experience is your top-most priority. 
    • You need to be as cost-efficient as possible. 
    • App size can be optimized using Flutter’s code reduction techniques.  

    Choose native development if: 

    • Unmatched performance is super essential for your app.  
    • Deep integration with native features like GPS/camera is a necessity. 
    • Platform-specific user experience is necessary for Android and iOS users.  

    With that, remember one thing – there’s no silver bullet. Consider a hybrid approach if your app’s got specific functionalities that benefit from native development while you leverage Flutter for the rest.  

    Connect with Our Experts Now!

  • How to Set Focus on an Input Field After Rendering in ReactJS in 2026?

    How to Set Focus on an Input Field After Rendering in ReactJS in 2026?

    The input areas are usually neglected in web development where every thread affects the user interface. Placing the cursor at the right time is one of the simplest things you can do that can significantly influence your users’ relationship with your React app. The focus management strategies discussed in this article are aimed at the seamless setting of emphasis on input fields after rendering with React.

    As digital architects, developers focus on user experience. Users desire a seamless first interaction with a web application, and focused management of attention is one of the ways to achieve this. A smooth React user experience requires setting focus on an input field after rendering.

    Thus, the requirement to hire react developer becomes essential to handle such complexities. The emphasis on input fields is brilliant as it increases accessibility, reduces friction, and provides a smooth, well-designed interface.

    Let us learn how to manage the focus of input fields in React in a better and more friendly manner for the desired web development.

    Understanding the importance of focus

    Web application focus should also be properly understood for enhanced user experience.Here are detailed reasons to focus on input fields:

    1. User-friendliness:

    User needs anticipation helps web applications, especially those with forms or data entry. It simplifies the user interaction with the application because it places the cursor in the first input field automatically. Streamlining the user journey humanizes your app.

    2. Accessibility:

    Web development requires accessibility. Screen readers help people move around and interact with web content. This allows disabled users to locate and use the interactive elements of your page by correctly pinpointing the input area. This is inline with accessibility standards and gives users a feeling of welcome.

    3. Improved user guidance:

    Highlighting an input area through visualizing it makes it easier for users to understand what they should do first. This is crucial when a page has several form fields or interactive elements. Users immediately recognize the focused input field as the beginning and the point of where their attention and input are directed.

    4. Streamlined processes:

    For sequential or multi-page forms, workflow is enhanced by automatically focusing on the next appropriate input field. The process is convenient because the program forecasts and accommodates user growth. Workflow streamlining enables a better user experience when tasks need to be completed promptly.

    How to build a live chat widget in React?

    Ways to set focus on an input field after rendering in react

    1.Using the autoFocus Attribute
    If you’re a developer working with React, you already have an easy and intuitive way to make an input field the main focus of your app. By including this functionality into the component’s JSX, you can simply instruct the browser to focus on the selected input field once component loaded.

    Implementation:

    import React from 'react';
    const LoginForm = () => {
      return (
        <form>
          <label>
            Username:
            <input type="text" autoFocus />
          </label>
          <label>
            Password:
            <input type="password" />
          </label>
          <button type="submit">Login</button>
        </form>
      );
    };
    export default LoginForm;
    

    Advantages:

    • AutoFocus offers a straightforward answer. The one-liner can immediately follow the input element, making the code clear and concise.
    • The attribute makes it automatically focus the input field when the component is shown, thus reducing the complexity of user interactions.

    2. Utilizing refs:

    The refs functionality in React allows developers to construct references to DOM elements in components.Using refs to concentrate input fields after rendering is programmatic and flexible. This approach is helpful for dynamic or conditional focus management.

    Implementation:
    import React, { useRef, useEffect } from 'react';
    const DynamicFocusForm = () => {
      const inputRef = useRef();
      useEffect(() => {
        // Set focus on the input field after rendering
        inputRef.current.focus();
      }, []);
      return (
        <form>
          <label>
            Username:
            <input type="text" ref={inputRef} />
          </label>
          <label>
            Password:
            <input type="password" />
          </label>
          <button type="submit">Submit</button>
        </form>
      );
    };
    export default DynamicFocusForm;
    
    • Advantages:
      Refs provide dynamic focus. Use the useEffect hook to conditionally set focus on events, state changes, or other triggers.
    • Refs allow developers to directly manipulate input fields by accessing the underlying DOM elements.

    3. Using component state

    Using the component state to concentrate input fields in React is dynamic and controlled. State management can conditionally set focus based on triggers or user interactions, providing a flexible solution for components whose focus behavior is connected to their internal state.

    Implementation:
    import React, { useState, useRef, useEffect } from 'react';
    const ConditionalFocusForm = () => {
      const [shouldFocus, setShouldFocus] = useState(false);
      const inputRef = useRef();
      useEffect(() => {
        if (shouldFocus) {
          // Set focus on the input field after rendering
          inputRef.current.focus();
          // Reset the flag to avoid continuous focus setting
          setShouldFocus(false);
        }
      }, [shouldFocus]);
      return (
        <form>
          <label>
            Username:
            <input type="text" ref={inputRef} />
          </label>
          <label>
            Password:
            <input type="password" />
          </label>
          <button onClick={() => setShouldFocus(true)}>Set Focus</button>
        </form>
      );
    };
    export default ConditionalFocusForm;
    

    Advantages:

    • Component state allows conditional focus. Developers can set focus based on user activities or other events.
    • State allows dynamic component response. Updates to the attention state activate the useEffect hook effect, providing reactive focus management.

    4. Focus delayed with setTimeout:

    A delay before focusing on an input field can be useful in some situations. The setTimeout function in the useEffect hook lets developers delay user experience for a smoother encounter.

    Implementation:
    import React, { useRef, useEffect } from 'react';
    const DelayedFocusForm = () => {
      const inputRef = useRef();
      useEffect(() => {
        const timeoutId = setTimeout(() => {
          // Set focus on the input field after a specified delay
          inputRef.current.focus();
        }, 1000); // Set a 1-second delay
        return () => clearTimeout(timeoutId); // Clear the timeout on component unmount or re-render
      }, []);
      return (
        <form>
          <label>
            Username:
            <input type="text" ref={inputRef} />
          </label>
          <label>
            Password:
            <input type="password" />
          </label>
        </form>
      );
    };
    export default DelayedFocusForm;
    

    Advantages:

    • Delaying focus might be advantageous when instant focus is not ideal. Developers can control focus timing this way.
    • An advantage of attention delaying is that it can enhance user experience, as users will have time to preview and to orient themselves before using the input area.

    5. Utilizing third-party libraries:

    In the ever-changing world of web development, third-party libraries provide ready-made fixed solutions for quick development and efficient performance. Third-party libraries can be very useful in attention management in React apps, specifically in more complex cases such as modal dialogs or user interface components.

    Implementation:

    npm install react-focus-lock
    import React from 'react';
    import FocusLock from 'react-focus-lock';
    const ModalComponent = () => {
      return (
        <FocusLock returnFocus>
          <div className="modal">
            <h2>Modal Title</h2>
            <p>Modal content goes here.</p>
            <button>Close</button>
          </div>
        </FocusLock>
      );
    };
    export default ModalComponent;
    

    Advantages:

    • Third-party libraries such as react-focus-lock are dedicated to controlling focus in complex UI components such as modals.
    • Third-party focus management libraries often adhere to accessibility best practices in order to meet standards and to address the needs of assistive technology users.

    Conclusion

    The approach of concentrating on input fields in the sophisticated React programming world is more than just a technical implementation. Focus management as a design philosophy emerges as we address user ease, accessibility, reduced friction, improved user assistance, and simplified workflows. The methods presented in this detailed guide provide React developers with a wide range of options for optimizing their apps. 

    React Success Starts at BOSC Tech Labs : Learn and Grow

    A skilled React developer knows lifecycle methods and creates elegant, efficient solutions. Thus, you ensure that your software meets functional requirements and has an easy-to-use interface, improving project quality if you hire React expert. The simplicity of autoFocus, the accuracy of React references, and the ability to control component state dynamically all contribute to the UI becoming more refined and user-oriented.

    Connect with Our Experts Now!

  • How to Create Your First Android App Step by Step

    How to Create Your First Android App Step by Step

    Are you looking to build a native Android app? Technological advancements make it easier to directly use Android phones or tablet devices’ features and functionalities. Various platforms, such as Java API framework and many others, are available to make the process easier. 

    Normally, the framework allows the user to easily perform various tasks like drawing shapes, texts, colours and many others on screen. The framework is also a suitable option for playing the sounds and videos. 

    In the modern day, the Android API framework has massively evolved to become one of the most stable and most intuitive for creating apps. Many businesses hire dedicated android app developers to create unique and innovative apps based on advanced frameworks.  

    Building the android app:

    Various strategies are involved in creating the Android app. Implementing the right strategies is helpful for easily getting complete results in app development. 

    In the modern day, many Android developers use official Android tools such as Android Studio to develop apps. Building the Android app using the Android Studio development framework is easier. 

    Android devices have been amazingly increased in usage, and there is a demand for new apps. Android Studio is the ultimate development environment for making tasks simple. Developing the right strategies is essential for Android app development.

    • Strategy Development
    • Analysis and Planning
    • UI/UX Design
    • App Development
    • Application Testing
    • Deployment
    • Support
    • Performance Monitoring

    Prerequisites for android app development:

    Before creating the Android app, it is essential to have basic knowledge of Kotlin. Developers are required to have the latest version of Android Studio to create the Android app. Get in touch with BOSC Tech Labs for professional Android app development services.

    Kotlin is one of the preferred languages for developing Android apps. It is important to choose Kotlin as the language and change the app name accordingly.

    Steps to create the first android app with android studio:

    Step 1: Create a new project

    Use the Android Studio for the project to design, develop and even build the Android app. You can simply launch the Android Studio by clicking the “Start” button for the Android Studio project. Follow the steps below to create the new project.

    • Go to http://developer.android.com/sdk/index.html
    • Download Android Studio
    • Install and open Android Studio
    • Choose the “Quick Start” menu
    • Click “Start a new Android Studio project.”
    • Open the “Create New Project” window
    • Name project “GORT”
    • Check the location of the project file and make necessary changes to it if desired.
    • Hit “Next”
    • Click the ‘Phone and Tablet’ box

    Test the app on the phone and ensure the minimum SDK is set below the phone’s operating system level.

    • Enter “Next”
    • Choose “Blank Activity”
    • Enter “Next”
    • Leave all Activity name fields as they are.
    • Enter “Finish”

    Using the updated version of the Android Studio lets you easily get your app running on many numbers of devices. These also require minimum API-level support. 

    Whether you are looking to set your unique theme or template, then you can choose ‘Add No Activity’ from Android Studio. You will be able to access the form to enter the details about the apps. These include the Name, package name and many more. 

    Set the names of users before seeing the phone when installing the app. The package name is the unique identifier for the app in Google Play, and you can follow the Java package naming to specify it.

    Step 2: Create a main activity:

    Activity is an important component in the Android app, which easily allows for the creation and displaying of the User Interface. These are suitable for the user to easily get access to more activities. Each of them allows the user to perform the action easily. 

    For instance, whether you are developing an email client app, it is essential to have major activities such as the user signing up, composing an email, and other activities for the user signing in. Follow the steps below to create the main activity.

    • Open activity_main.xml tab
    • Open Design tab on the activity_main.xml display
    • Click and drag the “GORT” to the tab
    • Open the values folder in the project file system on the left side of the window
    • Double-click the strings.xml file in the values folder
    • Find line “GORT” in file
    • Add “Welcome to my app!” after “GORT” message
    • Navigate to activity_main.xml tab
    • Check whether the centred text reads as” GORT! Welcome to my app!”

    Step 3: Adding button on main activity:

    Upon getting the welcome message for your app, it is essential to add the button on the main activity. Follow the instructions below to add the button to the main activity.

    • Open activity_main.xml display and click the ‘Design’ tab
    • Find “Button” (seen under the heading Widgets)
    • Open the Palette menu on the phone display
    • Click and drag “Button” to centred underneath the welcome message
    • Make sure the button is still selected
    • Scroll to find “text”
    • Add “Next Page”
    • Navigate to New
    • Click Activity
    • Click Blank Activity
    • Change the Name of this activity to “SecondActivity.”
    • Click “Finish.”

    Step 4: Create a layout:

    Normally, all the Activities involve a minimum of a single layout associated with them. Upon creating the activity in the previous step, you need to generate the empty layouts. 

    Open the activity_main.xml file to simply view the list of activities. Add the activity’s layout with Views and view groups. The View is sometimes referred to as the widget in the app. These are set with individual components on the user interface. 

    Adding the Buttons, labels, and text fields are some of the common examples in Views. View Group is the component that serves as a container for views. View groups help to set the position and dimensions of views.

    Button button = (Button) findViewById(R.id.button);
    button.setOnClickListener(new View.onClickListener() {
    @Override
    public void onClick(View v) {
    goToSecondActivity();
    }
    });
    private void goToSecondActivity() {
    Intent intent = new Intent(this, SecondActivity.class);
    startActivity(intent);
    }
    

    How do you hire a skilled Android developer for your project?

    Step 5: Test the application and launch:

    Testing the application before launching it is essential to ensure it runs smoothly on all devices. Follow the steps below to test the application easily.

    • Click the green play symbol from the toolbar in the Android Studio window
    • Click “Choose Device” dialog appears
    • Click the “Launch emulator” option
    • Enter “OK.”
    • Emulator opens
    • The app automatically launches the app on a virtual phone
    • Make sure all text displays correctly
    • Make sure the button takes you to the next page

    Conclusion:

    You have completed the first Android application using simple techniques. Upon opening the app, the application greets the user, and the button takes the user to the second page. The app will be a fully functional app for Android, and you can make changes based on your requirements.

    Connect with Our Android Experts Now!

  • How to create components in ReactJS?

    How to create components in ReactJS?

    Do you have any idea about React JS components? If you want to gather all the necessary details regarding such a topic, go through this blog. In general, React JS components are the major part of the UI (User Interfaces) in various web applications. 

    It consists of functional & presentation characteristics in self-contained and reusable components. Professional developers can easily maintain and reuse their code by dividing challenging UI into more manageable, smaller pieces using components. 

    React JS components can be either functional or class-based. Functional components use JavaScript functions, and class-based components use the ES6 classes to render user interface elements. 

    The components will receive the proper inputs to enable data exchange and customization between different components. React JS components enhance development productivity and increase creative, interactive, and dynamic UI ability. You can hire reactjs development company for your project and grab extraordinary benefits.

    Impact of react components:

    React components are the fundamental part of the React application. The code-encapsulated and small units can build UI across the complete program. The user interface of this program is divided into modular and smaller components. It lets developers build very effective, user-friendly apps. 

    The react component takes care of its state & events while producing a specific part of the UI. The standalone component can receive data, process it & output the react element without any issues. 

    Different types of react JS components:

    Two different types of React JS components are available: functional & class components. Some additional components are found, such as composing components, rendering components, react & decomposing components. 

    • Function components

    Functional components are the primary type of the React JS component. It is a JavaScript function that receives the input properties and will effectively return the react element. 

    The functional components are said to be stateless since there is no internal state. The functional components are responsible for rendering the UI using the input properties. 

    • Class components

    Compared to the class components, the function components are very simple with ReactJS. It will extend the react. The class components are built using the ES6 classes. It can manage complex logic and handle events since they have its internal state and lifecycle methods. There are some essential features you can explore in class components.

    Such features are:

    • State
    • Lifecycle Methods
    • Props
    • Class Methods
    • Event handlers
    • Render Method

    Additional components:

    • Render component react

    The render component react has a better user interface. Components are the building blocks of various react applications with independent and reusable user interface elements. 

    When the component begins to render, it will be instantiated & displayed on the screen. The virtual DOM (Document Object Model) is the actual DOM used by React. React can update & re-render the relevant components when the props or state changes. 

    • Composition in react

    A composition in React can combine & nest reusable, smaller components into the bigger ones to create a highly sophisticated UI. It is possible to design the UI in a scalable and modular way. There are many advantages available in this additional component. 

    Such advantages are: 

    • Composition in react can increase the code re-usage 
    • Can easily maintain the code as a result
    • Can extend the code easily as the result

    The major advantage of composition in React is that it is useful for developers.

    • Decomposing components

    How to Conditionally Add Attributes to React Components?

    The decomposing components are one of the additional types of react components that can divide the challenging components into reusable and smaller components. There are many advantages available in this additional component. 

    Such advantages are:

    • Readability
    • Reusability
    • Maintainability

    It is the primary advantage of decomposing components that are useful for developers.

    Nesting react components:

    The strong point of react is its ability to place the component into other components. It lets professional developers perfectly organize the components into a hierarchical structure. 

    Here, each component can generate a particular area of the UI – User Interface. Each component will be written & tested separately without creating issues for the other components. Such component layering will encourage code reuse & maintainability. 

    React components lifecycle:

    The react component will go through a lifecycle comprising many stages or phases from the document object model from the creation to the removal process. Users can use such lifecycle methods to perform specific essential tasks like initializing the state, depleting resources or obtaining data in the component’s lifecycle. 

    There are certain primary lifecycle steps one can explore with the class component. Such steps are:

    • componentDidMount()
    • constructor()
    • componentDidUpdate(prevProps, prevState)
    • shouldComponentUpdate(nextProps, nextState)
    • componentWillUnmount()

    It is a must to understand the component’s lifecycle to handle asynchronous activities and manage state & critical performance in react applications. 

    Best practices and principles of react JS components:

    The React JS components are a fundamental part of modern website development. It will let programmers and developers design better modular, maintainable and reusable UI. The class components are the effective type of react components that provide extraordinary abilities like lifecycle methods and state management. 

    The functional components are also other types of react components that create a better way to render the user interface based on props. The nesting of components and component lifecycle lets developers easily develop complex applications. To master react programming, following the best practices and principles of react components is best. 

    Such best practices are:

    • Reusable & Composable
    • Single Responsibility
    • Functional Components
    • Props validation
    • State Management
    • Component Lifecycle & Side Effects
    • CSS & Styling
    • Immutability
    • Consistent Naming & Code Organization
    • Testing
    • Documentation & Comments

    The above mentioned are the best practices of React JS components.

    Conclusion:

    You now have the idea of React JS components from the above-mentioned scenario. Get ready to hire react js developer and execute the process very quickly. You can certainly benefit from this process. It is effectively possible to build different applications with the help of React JS components. Hence, focus on this component and grab many exclusive impacts. 

    Connect with Experts Now!

  • How to make Google maps the default navigation app on your iPhone

    How to make Google maps the default navigation app on your iPhone

    You are setting up Google Maps as the default navigation app, a manageable task. Of course, users have to find out the easiest ways to set it quickly. Thus, you must consult an iOS app development team who is ready to guide you in the best way possible. 

    You can get ideas about making Google Maps the default navigation app on your iPhone. Hence, iPhone users are always keen on doing it based on the proper guidance. You cannot make it the default when you install Google Maps apps from the App Store

    The guide will prompt users to make the default Google Maps app on their iPhones. Of course, iPhone users get a new technique to make Google Maps default. You can automatically set a destination and reach it with the help of maps. 

    Why need to make google maps the default navigation for iphone?

    Apple Maps is the default iPhone map app used so far by iPhone users. The earlier version got shipped with Google Maps. The main difference is that the tech giant and Google neglect Apple’s rights to the voice-directed turn-by-turn navigation feature. 

    If you wish to download Google Maps and use it as the default navigation app, it does not work. In an alternative approach, Google’s open-source Android OS set out to make modifications and close the software ecosystem with controls. The apps can now be installed based on the software ecosystem to handle the default app. 

    On the other hand, iOS users must find out how Apple uses Google programs. Of course, users must find out the default browser and enough to find out Google Maps. Jailbreaking is a procedure that is not recommended at all. However, based on the norms and conditions, Apple policy, and the voids in your navigation process, 

    How to change your default navigation app to google maps on iPhone 

    The easiest method to change the default navigation app, Google Maps, on iPhone is easy. Of course, you have to install Google Chrome or Gmail. Then, make sure to find out the default email and browser apps. 

    Since Google apps and open map links are available in apps, you can only sign in and access the full functionalities once you have one. 

    Hence, the steps below are the procedures for running the iPhone on iOS and other versions:

    • At first, you have to change iPhone’s default mail app to Gmail
    • Then, download and install Gmail from the Apple App Store.
    • On the phone’s App Library, tap the Settings app.
    • After that, Scroll up and tap Gmail.
    • Then, tap Default Mail App.
    • After that, select Gmail.
    • Choose your phone’s App Library, then open Gmail. 
    • Then, tap the menu icon in the upper-right corner.
    • Finally, select Settings.
    • Choose and tap Default apps.
    • In the navigation, choose navigation between locations sections, and select Google Maps. Then, you must tap a map link in Gmail, which automatically opens in Google Maps.
    • Tap the checkbox and ask me to app use every time I choose
    • Choose Google Maps when you tap map links

    How to change the iPhone’s default web browser to Chrome?

    Of course, if you are a Chrome user, choose the default browser from the phone settings menu. Then, every map link should tap within the browser and open Google Maps automatically.

    You must follow the steps below to change Google Maps from the default browser:

    • First, download and install Chrome from the Apple App Store.
    • Then, navigate and Open Settings.
    • Of course, scroll up and tap Chrome.
    • After that, tap the Default Browser App.
    • Select Chrome and tap on the link on the phone to get automatic opens in Chrome instead of Safari or Siri. 

    How do you use Google maps via carplay on an iPhone?

    A vehicle navigation app is a must for riders to reach an unknown destination with the help of Maps. Of course, setting up Google Maps as the default app in CarPlay on iPhone is easy. However, you must follow the proper steps regarding the messages you find. 

    CarPlay on iPhone uses Google Maps as the default one to let passengers share locations and reach their destination as soon as possible. The voice assistant is always open for live navigation and must launch automatically when using it in your car. 

    The features are always unique, and the car users will check the necessary updates. IPhone users mainly support it, and they need to connect it properly. 

    Depending on your model, Google Maps supports CarPlay with a USB cord or wireless connection. CarPlay supports running iOS 12 or higher versions to use Google Maps with selected car models. 

    Download and install google maps on your phone

    Of course, users have to kick-start Google Maps on the phone and connect to the CarPlay connection. Then, it would help if you plugged the Apple lightning USB cable into the CarPlay port. 

    Hence, the port should be a tiny white Smartphone symbol to access next to it. A prompt should be an option, and CarPlay should be enabled when the phone is connected to the car via USB. 

    Once activated, CarPlay automatically launches the display and hits Google Maps to drive with a live or navigation shared. You can check the live locations using the display and reach the destination more easily by accessing phone, messages, music, apps and Google Maps without any hassles. 

    Finally, tap Google Maps and open to use 

    Conclusion

    Finally, Google Maps is a powerful navigation app that helps drivers reach their destinations with faster response and voice assistance. It offers powerful elements for getting to objections quicker and guaranteeing you never get lost. You can hire iOS app developer, who can make Google maps the default navigation app on your iPhone. 

    Google Guides allows you to appreciate one element on the right navigation app. You can design your course with more than one objective, assuming you want to make an unforeseen excursion or have numerous tasks to run.

    Connect with Experts Now!

  • How to build a live chat widget in React?

    How to build a live chat widget in React?

    Customer involvement is of the utmost importance in the modern digital era. Incorporating a live chat widget into your website can revolutionize real-time communication and improve user experience. React can be used to build a live chat widget.  

    According to the State of JavaScript 2022 survey, 69% of developers have used React. So, let’s learn everything you need to know to build a live chat widget in React, including the advantages of having one and how to make it work flawlessly for your users in this article below. .

    Essential elements necessary to develop a react live chat widget:

    1. ReactJS: 

    The benefit of this JavaScript toolkit is that it supports a user-interactive interface with the component-based design. It would be a great idea to keep the users entertained so that they continue to engage with a React project; this could be done by including live chat widgets.

    2. WebSocket for real-time communication: 

    This technology is also important for the accomplishment of live communication between your user and the technical support agent that you are talking with. Its bi-directional communications capacities make it possible for updated and prompt message exchange.

    3. Authentication and authorization: 

    Ensure a secured live chat system by implementing authentication and authorization. This step is crucial to ensure that the legitimate data of the users is safe and protected beyond doubt.

    4. A database to store and retrieve messages: 

    This will only work with a significant database system. We will also ensure that user’s chats are synced with those of the support agent to facilitate easy flow of conversations.

    5. Designing the user interface (UI): 

    The UI for the live chat widget must be user-friendly and attractive to use. It is based on the component-based architecture of React, which allows for the development of a responsive and variable user interface. An improved UX results from this.

    Building a live chat widget in react

    1. Get the project started: 

    Initiate a new react project using tools like Create React App. Collect all the needed dependencies and arrange the project infrastructure.

    2. Integrate websocket: 

    Use some of the WebSocket (options) to have real-time communication. Use client-side libraries like socket.io-client, which would require a WebSocket server running in the background to be used with this particular communication protocol.

    3. Authentication and authorization: 

    Doing so will require implementing systems designed to identify and authenticate users. Ensuring that only pre-authorized users who are authenticated beforehand use the live chat functionality can be achieved through tokens, sessions, or however trusted means necessary.

    4. Database integration: 

    Integrate your React app to advanced a database where chat history can be stored. Use chat database solution such as Firebase or MongoDB for efficient storing and recalling of chat history.

    5. UX design: 

    Make the UX for the live chat. To create a rich user environment, consider features including message entry capabilities, visual messaging displays and user graphical avatars.

    6. Chat functionality: 

    This establishes the core components of the chat, enabling users to exchange texts in real-time. Engage the reader further by incorporating functionalities to include typing indicators and read receipts.

    7. Streamline integration: 

    If your site or app already has the user management mechanism, you can easily integrate the plugin into it. This helps with streamlining user administration and ensures continuity in the provision of user experience.

    8. Testing: 

    Users should test the push chat widget fully by verifying that it works across a selection of circumstances including various devices, heavy traffic loads plus network conditions. Keep an eye on what appears during testing and if any irregularities occur, fix them to ensure a robust and reliable live chat system.

    9. Deployment: 

    After the testing is done, install and deploy your React app in production with a live chat widget brought into it. While the system should measure its progress, keep track of how well it is doing and listen to what users have to say so that you can refine or restructure it as required.

    Benefits of live chat widget

    1. Improved interactions with customers: 

    By providing these customers with a chance to communicate with your company directly and quickly, the live chat widgets allow them to interact with ease. This honest time of communication boosts participation and trust.

    2. Enhanced conversion rates: 

    By allowing potential customers to talk to people in real-time via live chat widgets, it enables answering questions or solving problems instantly, which leads to higher conversion rates. It is the guaranteed responsiveness of customers’ inquiries that influences them to make purchase decisions soon enough.

    3. Live chat increases customer satisfaction:

    The immediate resolution of problems makes customers more satisfied. What people like most is they do not have to wait for someone’s call or email response anymore with the increasing ability to get real-time help.

    4. Gathering information for enhancement: 

    Inbuilt real-time chat reveals insights thanks to the user comments, which are given in real time. To solve the concerns that clients have, it is through analyzing chat transcripts to look for patterns of some common interests.

    Conclusion

    A live chat widget in React exemplifies the engagement and commitment to customer satisfaction of any active online communication world. The fact that instant message communication cannot be questioned forbeing better makes direct conversion results and ultimate user appeal an inevitable outcome. 

    However, businesses who rely on this technology even look at the importance of installing it properly in order for its benefits to fully be realized. However, for those planning to start on this pathway, the associate react developers are good candidates. As you level up your project beyond live chat expectations, take the right step to hire react developers who are knowledgeable in building a reliable and user-friendly real-time widget.

    Connect with  Experts Now!

  • React Best Practices All Developers Should Follow in 2026

    React Best Practices All Developers Should Follow in 2026

    Among front-end frameworks, ReactJS is a widely recognized and widely accepted platform. React Js has a flexible open-source JavaScript library, which is used to create fantastic applications. In this blog post, React best practices will be presented in this post to assist React JS developers and companies in building beautiful, high-performing applications.

    List of Good Practices for React Js in 2024

    1. Create a new base structure for a React applicationAn ascending

    Project structure must be created to adhere to the best standards for React applications. The React structure changes based on the requirements and complexity of the project and can be made using the NPM command-based create-react app. Determining a scalable project structure through developing a React project is necessary for the best React practices for a reliable project. You can use the NPM command “create-react-app.”

    The complexity and specifications of a project determine the React folder structure. You will get access to the several React Js best practices considered while creating the project’s architecture: Initially, the Folder Layout is necessary. Reusable components are the most crucial focus of the React folder structure architecture, which allows the design pattern to be shared across other internal projects. A single folder should include all of the components’ files (test, CSS, JavaScript, assets, etc.) as per the concept of a component-centric file organization.

    2. Children Props

    The content that exists between the opening and ending tags of a precise JSX expression is accepted as a separate prop, props.children. It functions as a component of the React documentation, and props.children is the unique prop supplied to each element automatically. When a component launches, the intention is to render the content contained within the opening and closing tags. It is also generated if one component’s content is contained within another element. React JS is one of the most valuable components that can render and receive child properties. It simplifies the creation of reusable components easily and swiftly.

    function House(props) {
    return <h3> Hi { props.children }!</h3>;
    }
    function Room() {
    return (
    <>
    <h1>What are you doing?</h1>
    <House> Duplex </House>
    </>
    );
    }
    

    3. CSS in JS

    Styling and theming are two essential React best practices for large projects. But it’s a challenging task, just like managing those large CSS files. This is the point at which the CSS-in-JS solutions become essential. Designing and theming might be as complex as managing those massive CSS files in a larger project. As a result, the concept of CSS-in-JS solutions—that is, CSS embedded within JavaScript—was developed. This concept forms the core of diverse libraries. You can utilize any of the several libraries, such as those for more complex themes, based on the functionality required.

    4. Higher Order Component

    In the ReactJs framework, the HOC will input a new component and return the latest component to a project. Its purpose is to boost the functionality of existing components by integrating the code’s logic. It is usually used for code reusability, authentication, and abstraction logic. They improve modularity and maintainability by separating the concerns between the development phase. React developers use the HOCs to inject props, modify behaviors, or integrate standard functionalities across React components. Hence, this pattern gives a more scalable code, which enables the effective development and maintenance of React applications.

    5. Rely no longer on components based on classes

    React applications should move away from class-based components. You can write your components as class-based React components. Relying less on class-based components is the ideal strategy for your React application. Writing your components as class-based components is possible with React. This is the main factor that makes Java/C# developers choose to develop classes.

    Yet, a problem with class-based components is that they begin to get more complicated, making it more difficult for you and other employees to grasp them. These components also have a low abstract content. Since developers are no longer needed to write classes, the introduction of React hooks has been a blessing. UseState, useEffect, and use context can help you achieve the goal.

    6. Placing component names in uppercase letters

    Capitalized: component names that begin with an uppercase letter are handled as React components (for instance, <Foo/>); Dot Notation: component names that contain a dot are held as React components irrespective of the case. While using JSX (a JavaScript extension), component names must start with capital letters. Here, let’s look at an example. Alternatively, you might call components SelectButton rather than selectButton.

    This is crucial because it provides JSX with an easy way to distinguish them from HTML tags that are the default. A list of all built-in names was included in earlier React versions to help separate them from custom names. In that example, the drawback was that it required ongoing updating. Use lowercase letters if you find that JSX is not your language. But the issue is still present. It has a great deal of challenges with component reusability.

    7. Rendering HTML

    React JS security rises when the appropriate concepts are applied. For instance, you can use the risky Set Inner HTML function to put HTML directly into shown DOM elements. Using the correct principles increases the security of React JS. Use the dangerouslySetInnerHTML to insert HTML straight into rendered DOM nodes. Note that sanitation is required ahead of inserting text in this manner. Using a sanitization library such as dompurify on any of the values before inserting them into the dangerouslySetInnerHTML argument is the most effective course of action to improve the situation. Additionally, dompurify can be used to put HTML into the DOM:

    import DOMPurify from "dompurify";
    <div dangerouslySetInnerHTML={{ __html: DOMPurify.sanitize(data) }} />    
    

    8. Utilize class or functional components

    The ideal way to learn React is to use functional components, which you can think about implementing. If all you need to do is display the user interface without executing any logic or altering the system’s state, use functional components rather than class ones. In this case, functional components work better. As an example:

    // class component
    class Dog extends React.Component {
      render () {
        let { badOrGood, type, color } = this.props;
        return <div className="{type}">My {color} Dog is { badOrGood } </div>;
      }
    }
    
    //function component
    let Dog = ({badOrGood, type, color}) => <div className="{type}">My {color} Dog is { badOrGood }</div>; 


    Attempt to make React lifecycle actions like componentDidUpdate(), componentDidMount(), and so on less functional. Although these techniques can be used with class components, they are inappropriate for practical elements.

    You give up control over the rendering process when you use functional components. A slight alteration to a component causes the practical element to continuously re-render.

    9. Select Fragments Rather Than Divisions

    Any React component’s code output must be contained within a single tag. React fragments (<>..</>) are preferable to <div>. However, both can be utilized in most situations.

    Every <div> tag you utilize uses up RAM. Therefore, the more division tags you have on your page, the more memory, power, and loading time it takes for your website. Eventually, this leads to a poor user experience and a slow-loading website.

    10. Leverage Hooks with Functional Components

    “React Hooks,” a new feature of React v16.08, simplifies the process of creating function components that communicate with state. Class components handle states with less complexity. When feasible, rely on functional components using React Hooks like useEffect(), useState(), and so on. This will allow you to regularly apply logic and information without significantly altering the hierarchical cycle.

    11. Boost HTTP Authentication by Security

    ReactJS framework can help you to enhance the HTTP authentication security by using strategies like JWT (JSON Web Token) authentication. However, user sensitive data are encoded into a token using the JWT, and giving the secure conversation between the client and server. Also, React apps can securely store this token in cookies or local storage and use it for future HTTP requests. Moreover, this reduces the chances of stealing user information during the application transmission. Thus, React’s component-based architecture makes robust authentication features by integrating authentication frameworks like Firebase or Auth0. Here’s a simple example:

    import React, { useState } from 'react';
    import axios from 'axios';
    
    const Login = () => {
      const [username, setUsername] = useState('');
      const [password, setPassword] = useState('');
    
      const handleSubmit = async (e) => {
        e.preventDefault();
        try {
          const response = await axios.post('/api/login', { username, password });
          localStorage.setItem('token', response.data.token);
          // Redirect or update UI upon successful login
        } catch (error) {
          console.error('Login failed', error);
        }
      };
    
      return (
        <form onSubmit={handleSubmit}>
          <input type="text" placeholder="Username" value={username} onChange={(e) => setUsername(e.target.value)} />
          <input type="password" placeholder="Password" value={password} onChange={(e) => setPassword(e.target.value)} />
          <button type="submit">Login</button>
        </form>
      );
    };
    
    export default Login;
    

    In this illustration, when the user login successfully then the server will give a response with an JWT token that is being stored in the client local storage for the authenticate request.

    12. Utilize the React Developer Tools

    The React developer tools are helpful in React application development. It understands the hierarchy of components, children, props, and the state. It facilitates code debugging. React developer tools make it simple for programmers to create interactive user interfaces.

    Regular updates are made to the React Developer tool with new functionality.

    13. Managing State in a ReactJS App

    React state management is the process of managing the data that React functional components need to render themselves. This data is often stored in the state object for the element. When the state object is modified, the component will automatically re-render.

    It contains all of the data. The other half consists of the presentation, which also comprises the HTML, CSS, and formatting. The app’s presenting section depends on the state and state management. React applications only re-render themselves in response to changes in their state.

    14. Handling mistakes and debugging in a ReactJS application

    Frontend developers often overlook error handling and reporting. However, each code segment that generates an error needs to be handled properly. Furthermore, depending on the situation, there are numerous approaches in React for handling and logging failures. Developers can adopt the following procedures to manage and troubleshoot errors:

    • Boundaries of errors for class components
    • To catch outside bounds, use Try-Catch.
    • React Error Limitations of the Library.
    • Identify the Bug and fix them appropriately

    Conclusion

    Large-scale React application development is a difficult task that needs careful consideration of the most appropriate path of action for web developers. The React best practice that is related to your team and users ends up being the most important one.

    Trying out different tools and techniques for growing React applications is the best tip. You’ll find it simpler to move forward with the react code after that.

    Hire a React JS Development Company if you want to learn more about React JS. They are skilled in working with the newest front-end technology developments. If you want to implement the React project, please contact us.

    Explore more insightful articles and stay updated with the latest trends by following our blog. Discover valuable resources for enhancing your knowledge.

    Connect with Experts Now!

  • How to hire ios app development experts for your next project?

    How to hire ios app development experts for your next project?

    In the modern day, many businesses find it quite challenging to hire skilled iOS programmers. Hiring the best iOS app developers is essential for building flawless and engaging apps.

    It is quite common that business requirements change with the trends. iOS app developers are required to upgrade their knowledge with the latest trends and technologies. Business is required to use the right strategy to hire iOS app development experts.

    What is iOS development?

    The digital revolution in the modern day leads to the massive usage of the Smartphone. These lead to greater demand for iOS programmers and iOS app developers. iOS application development involves creating apps for Apple’s OS. The process involves developing apps based on programming languages such as Swift and Objective C.

    Normally, the iPhone, iPod, Apple Watch, Mac, and many others have been using Apple’s operating system. The iOS platform is also feature-rich and suitable for creating apps with a better range of performance.

    Step-by-step process to hire an ios developer:

    Normally, the iOS developer deals with designing, development, and many other processes. iOS developers would be working with the designing and development team to bring complete functional applications.

    These apps are useful for various businesses to showcase their products, services, and many other updates. Hiring the best iOS developer involves varied processes.

    Follow the below step-by-step process for easily hiring the best iOS app development expert.

    Process to hire ios developer- bost tech labs

    1. Understanding the role of ios developers:

    iOS app development especially varies based on numerous attributes. The role of iOS developers also varies based on the requirements. Hiring an iOS developer with a limited level of experience and expertise in a single domain will be quite difficult. So it is essential to choose the right developer having the best skills and knowledge.

    Formulate the practical development approach, such as:
    • Requirements
    • Architectural decision-making
    • Development
    • Testing
    • Review
    • Deployment

    2. Analyze soft skills of ios developers:

    Look for the expertise and skills of the iOS developers so these will be the key aspects for handling the different projects. Many businesses are looking for iOS app developers based on their skills and their experience in the sectors. It is one of the important factors required for hiring a mobile app developer. Below are some of the key technical skills required from iOS developers

    Swift:

    Swift is the ultimate programming language suitable for making effective coding. These are widely used for developing the apps on varied Apple platforms. You need to ensure that the iOS developers have sufficient knowledge of Swift. You can also ensure whether they have work experience in Xcode, coding, testing, and more.

    Read About Swiftui Vs Uikit

    Objective-c:

    Objective-C is a powerful and dynamic programming language widely used for iOS app development. Objective-C follows the syntax based on Smalltalk and C. Developers have better expertise in Objective-C for building robust applications.

    3. Evaluate ios developer’s expertise:

    Before hiring iOS app developers, it is essential to evaluate the expertise of the candidates. Below are some of the levels of iOS Developers based on different categories.

    Junior ios developers:

    Beginners in iOS developments are new to the iOS domain. They might have less experience in project training, workshops, and internships. Normally, the junior iOS Developers have experience counts from 0 to 2 years.

    Mid-level ios developers:

    Mid-level iOS developers have 2 to 5 years of experience and might have worked on multiple projects. Many companies also prefer to hire Mid-level iOS developers for their expertise in different app developments.

    Senior ios developers:

    Senior iOS developers are experienced technical professionals having more than five years of experience. These developers have worked on varied projects, from complex to mid-range projects. They could add valuable contributions to your projects, such as architectural decision-making, code review, and more.

    4. Hard skills:

    Analyzing the Hard Skills is essential as these determine the grade, expertise as well as relevant experience. Acknowledging specific fields of work experience such as E-commerce, eBanking, and many others are available. Normally, these iOS app developers work at a higher hourly rate compared to the work experience in other projects.

    Below are some of the hard skills that you need to analyze:
    • Xcode IDE experience
    • Knowledge of UI / UX
    • Experience in Core Data or Realm
    • Language proficiency in Objective-C or Swift iOS
    • OpenGL and Nice Metal
    • Advanced code versioning instruments
    • Knowledge of Apple Human Interface guidelines
    • APIs & API integration experience
    • ARKit 3 or Reality Kit experience

    5. Check portfolios of ios app developers:

    Checking the portfolio of the iOS app developer is essential for evaluating the work quality. This also ensures the type of projects that they have previously worked on.

    These give better insight into the capabilities of developing the app. Go through the exposure to different sectors and problem-solving abilities. It also gives a better idea of whether they could overcome technical difficulties.

    6. Check the communication and collaboration:

    Hiring iOS developers is quite a complex process. You need to completely analyze the candidate’s communication level and collaboration aspects. It is essential to ensure the selected candidates can fluently articulate their concepts in a clear manner. You need to ensure the candidate works well with the team. It also showcases the commitment to deliver on time.

    7. Budget and cost:

    You need to look for a candidate who can fit within your iOS app development budget. It is important to accurately prioritize the overall quality as well as the value of the projects beforehand. This lets you bring a success level for the projects.

    8. Check the reviews and recommendations:

    For hiring iOS app developers, it is best to check past reviews of work from various clients. It is a convenient option for checking other freelancing portals to ensure that the iOS developer reviews can be seen. Various Social media platforms, Communities, and even job portals are available for checking the candidates’ reviews.

    Conclusion:

    Above-shared information would be helpful for you to hire the ios app development expert for your end-to-end project. It helps you to save time in finding the right candidate for your iOS app designing, development, testing, and deployment. Build Your Dream iOS App:

    Talk to Our Experts Now!

  • The Role iOS App Development: Hiring for the Future

    The Role iOS App Development: Hiring for the Future

    For businesses looking to lead in tech innovation, remaining up to date on the latest trends to hire iOS app developers is beneficial and strategically essential. New business potential and difficulties arise from the employment landscape, which is greatly influenced by emerging technology and changing market demand. However, enterprises need to succeed in this cutthroat market; they need programmers with cutting-edge techniques and an innovative vision. The talent obtained is not just skilled but also forward-thinking and able to anticipate and shape the Future of the application industry; hiring strategies must be able to react to these trends.

    Companies can ensure they hire and retain people with progressive and up-to-date skills, providing the applications they produce are presented successfully in a constantly evolving digital ecosystem by grasping these trends and incorporating them into their hiring methods. We explore the features of this dynamic landscape below to give you helpful guidance and project future developments for the sector.

    Significant Technological Developments

    At times, the rapid evolution of technology can be confusing due to the continuous release of new concepts and tools in the market. Several trends in iOS app development have a significant influence on hiring practices:

    Internet of Things (IoT)

    As bright as the devices we use daily have become in modern times. Personalized experiences can be provided by the contemporary range of inventive devices that can accept smartphone inputs. That is now possible because of the Internet of Things, or IoT, technology. As a result, it’s considered to be a crucial component for modern iOS app development.

    The Internet of Things has grown to be an important part of daily existence. It acts as your main means of communication with your smartphone. As a result, it contributes to the current technology revolution. The development of iOS apps attracts the attention of existing enterprises who wish to use the Internet of Things technologies by connecting to Internet-enabled gadgets.

    Cloud Integration

    In the present era, cloud technologies are being used more and more. This is because they not only provide greater flexibility but also provide better global collaboration. It is possible to find experts worldwide collaborating on a single platform to build an innovative solution.

    Companies or agencies developing iOS apps will profit from the provided capability. Professionals from the listed businesses can assist with the development of excellent cloud integration solutions.

    iOS apps that are cloud-based are known to run directly on the cloud. This is how various smart devices’ internal memory is improved by technology. Therefore, it allows greater collaboration and overall productivity through cutting-edge mobile apps. The benefits of cloud connection to iOS app development are projected for both users and app developers. Even if users choose not to install the apps on their devices, accessing them should be simple for users.

    Artificial Intelligence & Machine Learning

    Currently, the majority of companies—especially those in the e-commerce industry—use cutting-edge AI & ML technologies in their iOS applications. AI and ML technologies assist in analyzing end-user purchasing patterns and preferences based on their individual preferences. As a result, these technologies provide consumers access to stuff that meets their expectations, improving the overall user experience and increasing sales.

    AI and ML will assist in creating more sophisticated search suggestions, deeper learning, intelligent Siri, and better speech recognition with the help of iOS app development.

    Chatbots

    Consumers in this modern era require round-the-clock assistance. Also, they are expecting prompt responses to their inquiries from various businesses and service providers. Making consumers believe in their worth can be achieved through exceptional customer service. In a particular domain, chatbots can provide smooth experiences.

    Businesses expect to be able to respond to client inquiries when they start up in the Future by utilizing chatbots for customer connection and engagement. Both the companies and the customers would benefit from chatbot services. The availability of reliable, 24/7 support services helps give clients accurate information while enhancing the user experience.

    The dynamics of developer expectations are evolving

    The rapid development of new technology has made developers unsatisfied with only creating functional apps. They now want to drive the innovation behind these apps, pushing boundaries and giving customers unique experiences.

    Culture of Constant Learning

    Maintaining a continuous development culture in a constantly evolving industry is crucial to retaining creativity. Developers must stay current with the newest programming languages, frameworks, and industry best practices. It is a necessity rather than merely an option. Companies that provide opportunities for continuing education through conferences, workshops, courses, and other activities attract ambitious developers.

    Furthermore, protecting user privacy and data security in the digital age is critical. Developers well-versed in privacy regulations and security measures will be highly valued. In addition to the technical components of app development, their skill sets must include compliance with international privacy regulations.

    Privacy Laws and Security Knowledge

    Security has been recognized as the top priority in app development due to increased cyber threats. Developers need to stay current on the most recent security protocols to protect user information and stop breaches. Global privacy legislation, such as the CCPA and GDPR, have also established new standards. A developer’s skill set now includes security as a fundamental component. In addition to protecting users, knowledgeable developers enhance the credibility and confidence of the organizations they represent.

    Cross-Platform Development

    The discussion goes beyond technical differences while debating frameworks such as React Native versus Flutter. It has more significant implications for hiring iOS developers as well. Hiring adaptable developers who can work across various platforms is becoming a big trend. Cross-platform knowledge is now valued by companies looking to hire iOS app developers instead of pure iOS development skills. As the app development industry changes, cross-platform developers will have an advantage in job markets.

    User Experience Design

    Developing practical applications depends on the user experience (UX) design process. This entails creating aesthetically pleasing, understandable, and user-friendly user interfaces. Close collaboration between developers and designers is necessary to grasp the vision of UX designers and translate it into a practical and user-friendly program. The need for coders with experience in UX design is growing along with customer demands for seamless experiences.

    Work from Home and Its Rising Popularity

    The rise in the popularity of remote work due to shifting to digital work settings has impacted how businesses select the top mobile app developers and iOS app developers. Companies are revamping their hiring procedures to cater to this demand as they understand that skilled developers want remote work and flexibility. As a result, in an increasingly remote-focused business environment, organizations are providing competitive benefits packages that cover salary, work-life balance, and the ability to work where these individuals are most effective.

    Conclusion

    Navigating the constantly changing world of iOS app development necessitates hiring strategically. For businesses hoping to keep ahead of the curve in tech innovation, hiring iOS app developers with a background in IoT, cloud integration, AI & ML, chatbots, and cross-platform development should be a primary concern. We must move toward a culture that values continuous learning, respects privacy and security expertise, and loves user experience design. Moreover, luring excellent personnel requires understanding the growing acceptance of remote work. Companies may secure success in the ever-changing digital ecosystem by hiring iOS app developers and aligning their hiring strategies with these trends.

    Contact for  Future-Ready iOS Talent Now