• How Future Mobile App Development Will Be Affected by React Native and Flutter?

    How Future Mobile App Development Will Be Affected by React Native and Flutter?

    The handling of components is where these two frameworks most significantly differ. ReactJs transforms them into JavaScript components, whereas Flutter handles them using the basic canvas produced by Dart for Future Mobile App Development.

    Overall, both frameworks offer complete services that can support the creation of cross-platform applications. Since the introduction of Flutter and React Native, developers have had the ability to speed up the creation of simple apps, research product-market fit, and produce MVPs that can be used for validation.

    When developing ideas that are interesting to the correct audience, there is a sense of relief. These frameworks have promoted innovation and improved app idea interfaces.

    The frameworks, according to developers, are what will shape the development of mobile applications in the future. We’ll examine a few development trends that imply Flutter and React Native will have a major influence on mobile app development.

    How Will Future Mobile App Development Be Affected by React Native & Flutter?

    The cutting-edge technologies and trends that appear to be changing the world of mobile app development can be embraced with the aid of cross-platform frameworks.

    1. Adopting AI

    Since AI is the future, many companies are prepared to adopt it. Several apps need to use technology to boost intelligence and give the app more power. AI-powered apps, for instance, can offer recommendations, improve decision-making, and provide immediate support.

    Additionally, it might help the company’s marketing and sales efforts. A crucial component of AI that your company should take into account is chatbots. It can boost lead creation, conversational marketing, and generating profits for your company.

    It could be expensive for you to independently implement AI in different native apps. Before you accept artificial intelligence, it can even take some time. The cross-platform frameworks continuously strive to lessen the developer’s workload. They have built-in solutions that can make the implementation better.

    The developers can concentrate on figuring out which AI components need to be included in the app.

    2. Security Factors

    Businesses now need to ensure that their app development meets security requirements as data breaches continue to disrupt daily operations. More consumers will utilize your safe app if it assures stability.

    You would be able to debug problems more quickly while working with a single codebase, as is the case with Flutter and React Native. As a result, programmers would have more time to design programs with security in mind. You will have more time to identify the security problems and potential fixes.

    Finally, each framework has its own unique set of security implementation best practices. They already know how to put the best security formats into practise. A stunning application that is completely secure can be created, provided the documentation is followed. Cross-platform frameworks can also help with the current trend.

    3. On-demand App Solutions

    It is now crucial for people to have access to on-demand solutions as they become more aware of mobile applications. Numerous on-demand options exist. Each of these apps simultaneously has loopholes that need to be filled. Cross-platform frameworks might be considered if you’re planning to create MVPs or straightforward programs that can help with on-demand solutions.

    Your needs for an on-demand app ideas will be supported by both React Native and Flutter. Depending on your needs for functionality, feature requirements, and other factors, you can choose the framework. When a company offers an on-demand application, they frequently see an increase in conversions and usage.

    4. Mobile Payments and Wallets

    The Fintech sector has experienced rapid expansion in recent years. Numerous wallets, payment methods, and technological advancements are enabling this market to grow significantly.

    It’s time for the sector to expand a little bit more, and right now, it appears to be the most popular mobile app development trend. In this section, you have a number of gaps and open possibilities. You can guide your company towards possible conversions if you can grasp on these opportunities.

    Cross-platform development can assist in popularising the concept. It can also assist you in immediately starting your fintech concepts.

    Your application can be constructed using a variety of features and built-in components. Additionally popular and supported by a large community, cross-platform frameworks can help you provide on-demand services of the necessary standard.

    5. Mobile Business

    Using mobile has become crucial for enterprises. The eCommerce market is the same. Many companies think an app will help them reach customers and increase conversions.

    If the trend is moving upward, the programmers must hurry up the pace and begin presenting practical solutions. Using frameworks created for mobile commerce development makes this possible.

    For ideas involving mobile commerce, Flutter, and React Native can provide a wide range of front-end solutions. You’ll see that they can contribute to the delivery of aesthetically pleasing and useful interfaces that enrich experiences. These mobile app development frameworks might be useful whether you want to make a basic category or something more complicated.

    Schedule an interview with React developers

    Mobile app development in the future: Flutter and React Native

    We recently witnessed how they can assist companies in managing current trends and creating apps that are tailored to their needs. Here are a few reasons why frameworks are the way mobile app development will go in the future.

    1. Increases Productivity of Developers

    It is not a developer’s responsibility to provide solutions. They must also be innovative and provide comprehensive solutions that cater to the needs of the user. The developer might have less time for innovations if they spend all of their time coding and fixing bugs.

    Cross-platform frameworks like React Native and Flutter keep improving so they can build up a large library of components. This will make the engineer’s idea come to fruition more quickly. To create the app, they can use every component. They would eventually spend more time ideating the app and less time on actual development.

    2. Significant Popularity

    We cannot dismiss the fact that both framework communities are expanding. More programmers are contributing to the framework’s patching effort by broadening the library and improving the capabilities.

    The leading technological giants Google (Flutter) and Facebook (React Native) support the frameworks. We also cannot ignore their communities. You may observe more instances of developer-friendly technologies being added to frameworks that help in mobile app development as a result of the developing communities.

    3. Constant Improvement

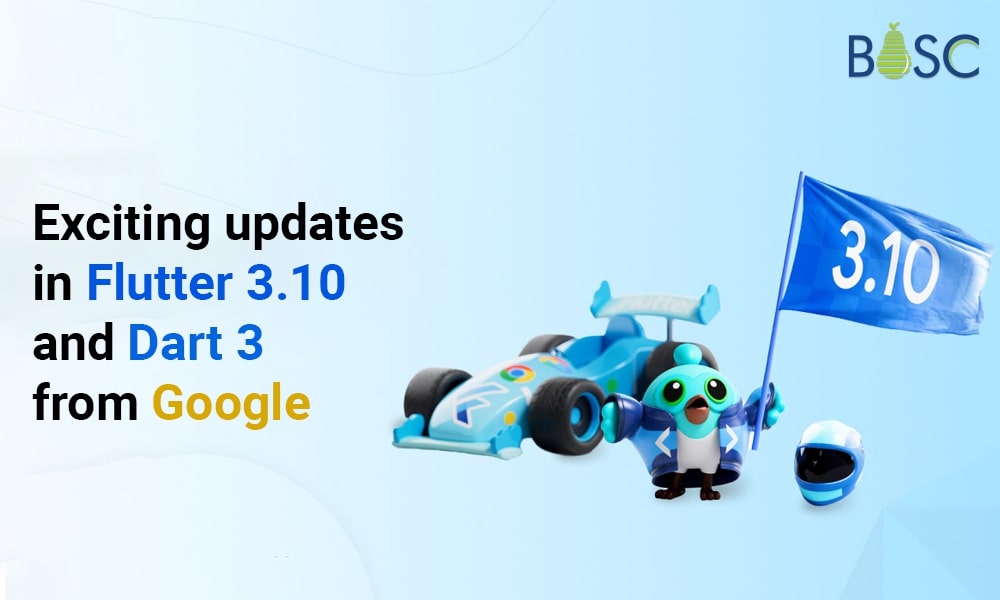
    Google recently unveiled Flutter 3.10, which provides developers with a more reliable development environment. In order to create a more futuristic product, the two frameworks are constantly adding components that can be helpful in providing the necessary solutions.

    These technologies can be incorporated and the solutions may be created with the aid of built-in ML libraries and ARKits. Each upgrade features a user interface that is easier for coders to use and that walks them through front-end development. The frameworks will provide in-depth futuristic solutions as they become more future-ready.

    4. A single codebase

    Using these frameworks expands a single codebase, which is one of their main benefits. This means that when testing the application or improving its quality, you won’t need to work with two or more codebases. This indicates that using a single codebase makes debugging quicker and simpler. You only have to deal with one UI when using Flutter.

    The developer’s task is made simple and quick by this. In terms of performance and speed, it is also futuristic. Since they can produce the code more quickly, it supports the developer in balancing quality and speed.

    Schedule an interview with WordPress developers

    Conclusion

    The answer is yes if you’re wondering if Flutter and React Native will still be useful in 2023. They prioritize development speed, quality, and delivery due to a large community, a single codebase, and continuous development.

    These frameworks are essential for coders since they enable the addition of cutting-edge technology and improve development overall.

    It makes sense to collaborate with the top cross-platform app development company. They can assist you find the best team and suggest the tech stack as well as the engagement approach to develop an outstanding application.

    Frequently Asked Questions (FAQs)

    1. Does the development of mobile apps have a future?

    Mobile app development has a bright future and a lot of possibilities. Developers now have the resources necessary to produce really new and transformational mobile apps that have the potential to alter the way we live and work owing to the rise of AI and ML, cross-platform development, progressive web apps, the Internet of Things, and 5G.

    2. Which is future React Native or Flutter?

    React Native can reach the same performance as an iOS app without requiring any changes to the iOS build parameters, making it in practice as quickly as pure native apps. Once your project has been developed, Flutter’s built-in Ahead-of-Time compiler will generate optimized code for both iOS and Android.

    3. Does Flutter have a future scope?

    A wonderful developer experience, native-like performance, an intuitive programming style, quick development times, and customisable widgets are all features of this framework. These characteristics make this framework a more popular option for Flutter app developers, and it is expected that demand for Flutter will increase in the years to come.

    4. What will be React Native future?

    Since its development framework is user-friendly, React Native has a bright future. Since React Native is powered by JavaScript, most programmers who are familiar with that language find using it to be rather simple.

    Book your appointment now

  • Google’s Flutter 3.10 and Dart 3 Bring Exciting Updates to Check

    Google’s Flutter 3.10 and Dart 3 Bring Exciting Updates to Check

    Google has recently launched a new version of Flutter 3.10 that is accompanied by significant updates to its programming language, i.e., Dart 3. However, the Flutter 3.10 UI toolkit has a better design and has Mac/ iOS enhancements for desktop, web, or mobile app development. In this, you will find impellers in PROD ready for iOS, Dart 3, and much more with Flutter 3.10. Let’s take a detailed look at the guide to Flutter 3.10.

    The most recent version of Flutter, Google’s appreciated UI toolkit, has several interesting updates and improvements that further establish it as a top option for creating visually appealing and effective cross-platform applications.

    On May 10, 2023, Google announced the most recent version of Flutter, version 3.10. It includes amazing new features and improvements for desktop, mobile, and online applications, as well as design and macOS/iOS enhancements.

    Additionally, Google revealed the revolutionary release of Impeller for iOS, a significant upgrade to the programming language. As well as enforcing null-safe code and previewing WebAssembly (WASM) compilation, Dart 3 adds many web-related improvements that will speed up your Flutter applications by up to three times.

    This time, the Google-Flutter team offers several exciting changes and new features, including improved Material 3 widgets, better DevTools for faster app profiling, and support for SLSA Level 1 to handle potential security threats.

    The most recent version of Flutter and the most comprehensive UI software development kit from Google, is Flutter 3.10.

    As a Flutter app development company, we have seen that Flutter 3.10 has numerous improvements for the web, mobile, graphics, and security, along with Dart 3.

    Stay with us as we take you on a brief tour of all these upgrades and additions, so you can get an idea of everything Flutter 3.10 has to offer.

    How has Flutter 3.10 changed?

    The Dart and Flutter product manager said, “With 100% null safety in Dart, we have a sound type system.” He said, “You can believe that if a type indicates a value isn’t null, then it never can be null. This prevents specific types of programming problems, such as null pointer exceptions. Additionally, it enables code optimization that would not be possible without null safety in our compilers and runtimes.

    That’s excellent news for Flutter developers, right?

    Learn about all the latest upgrades and features of Flutter 3.10 right now.

    • Enhances DevTools
    • Support for SLSA Level 1
    • Dart 3
    • Production-ready Impeller for iOS
    • Enhanced version in Flutter app development

    Introduction of Dart 3

    Flutter 3.10 has introduced a great addition to its very popular programming language, Dart 3. The most significant improvement in Dart 3 is the total removal of the non-null-secure code that assures you to give a secure and error-free experience in its 100% safe language and eliminates the usual bugs of nullable languages. Also, Dart 3 adds several language improvements, like introducing patterns. Hence, this capability makes it very easy to work with structured data.

    (String, int) userInfo(Map<String, dynamic> json)
    
    {
    
    return (json['name'] as String, json['height'] as int);
    
    }
    

    In the above example, there is no requirement to make the particular class for that reason or to encapsulate various values inside a collection.

    In addition, the new class modifiers like sealed class and interface class give increased capabilities and modify the switched statement, which gives a systematic breakdown of the structured patterns.

    SLSA

    Security plays a crucial role while working with open-source code, as this is being kept in mind by the Flutter development team while launching the new Flutter 3.10 version.

    Additionally, Flutter 3.10 supports Level 1 of the Supply Chain Levels for Software Artifacts (SLSA). However, this integration enables build scripts to work and execute on trusted platforms. Also, it gives many security features, which include:

    1. Scripted Build Process:

    Automated builds on trustworthy platforms are now possible thanks to Flutter build scripts. Because artifact tampering is strictly prohibited, building on protected architecture promotes supply chain security.

    2. Multi-party Approval with Audit Logging:

    Workflows for Flutter releases can only go live with multiple engineers’ approval. Auditable log files are produced for each execution. These modifications ensure that the source code and the artifacts created concurrently cannot be changed.

    3. Provenance:

    This shows that reputable sources made the framework release artifacts with expected contents. Links are provided to see and verify provenance on the SDK archive for each version.

    The team can also get closer to SLSA L2 and L3 compliance thanks to this work. These two levels are dedicated to protecting artifacts both during and after development.

    These actions have been implemented in response to recent security issues and vulnerabilities discovered in other open-source projects, such as the NPM ecosystem.In order to increase the ecosystem’s dependability and resilience for developers and end users, the Flutter team is actively enhancing its security.

    Enhanced Version of Flutter for Web

    There is excellent news if you have used Flutter to create Windows applications.
    Significant improvements have been made in Flutter for the web application loading performance.
    It is surprising that CanvasKit, the largest Flutter for the web component, has substantially decreased and is now only one-third of its prior size.

    You can also do away with unnecessary fonts to lighten the overall weight. Full support for swiftly incorporating pure HTML components into the application is now available with Flutter 3.10.Adding fragment shader capability also allows programmers to create stunning visual effects using well-known Dart code.

    This demands that languages with garbage collection, like Flutter, be accepted as part of the standard. Initial testing has already revealed a three-fold increase in performance. When WASM is eventually made public, this exciting achievement has huge promise for web applications created using Flutter.

    New Material 3 Widgets

    Flutter 3.10, the most recent version, has improved support for Material 3. You can use it to make color schemes based on an image or a base color. Several widgets, including DropdownMenu, NavigationDrawer, TabBar, SnackBar, AppBar, and many more, have undergone major enhancements thanks to Material Design components.

    Navigation Drawer

    The Flutter team has also developed improved support for iOS and macOS. By using this, users may access the spell-checking functionality of Apple within editable text widgets, and a new checkbox and radio button design that matches Cupertino aesthetics is also provided. Additionally, other animation advancements are exclusive to Apple systems.

    Refining Cupertino Animations

    This Flutter version now supports wireless debugging straight to iPhones and iPads while considering Apple devices. However, Xcode was the only application that previously had this functionality.

    You may learn more on Material 3 official website.

    Enhancements of DevTools

    In this Flutter 3.10 version, the development tools have also undergone some upgrades that make it easier for engineers to evaluate and improve the performance of their projects.

    New features and functionalities have also been included to the memory page. The addition of the Diff tool makes it possible to compare memory utilization before and after particular interactions to assess the effects of those interactions. Additionally, improvements have streamlined heap exploration through the console.

    By incorporating Material 3 widgets, boosting usability, and adhering to current design guidelines, the DevTools user interface has been improved.

    The open-source program Perfetto has also replaced the outdated trace viewer. Perfetto excels in managing large datasets and adds features like pinning threads of interest, dragging and selecting multiple timeline events, and using SQL queries to retrieve specific timeline data.

    Production-ready Impeller for iOS

    With the launch of Flutter 3.10, Impeller has replaced Skia. It has taken over as iOS’s major rendering engine. The hard shader compilation difficulties that led to janky animations and a bad visual experience are fixed with this new rendering engine, which improves animation performance.

    To avoid the necessity of shared compilation during graphics rendering, Impeller uses a tessellation algorithm.

    Impeller produces a wide range of forms and colors on the screen smoothly and at a high framerate by utilizing the state-of-the-art capabilities of next-generation GPUs. It has been painstakingly created from the ground up to meet Flutter’s demands specifically.

    With Flutter 3.10, Impeller is the default rendering engine in all iOS apps. The Flutter team, who have also highlighted their ongoing efforts in this respect, has stated that a preview version of Impeller for Android is also planned for upcoming releases.

    You can find installation instructions for the most recent version of Flutter 3.10 at docs.dev.Flutter and those resources for the Dart SDK at dart.dev.

    Dart 3’s stable release is now available, including three significant upgrades:

    • 100% guaranteed null safety increases efficiency, enables reduced compiled output, and prevents runtime issues caused by nulls. Null safety is supported by 99% of the 1,000 Dart packages the dev package management currently supports.
    • Modern programming uses new language features to allow abstract data types, pattern matching, destructuring, and structured data with records.
    • Class modifiers are a “power user” feature that lets package owners describe an API’s capabilities in greater detail.

    Schedule an interview with Flutter developers

    Conclusion

    Google’s main objective for Flutter is to offer five key features: beauty, where each pixel on the screen is controlled; speed, made possible by hardware-accelerated graphics; productivity, where workloads are supported by hot reload and dev tools; portability, where a single shared code base is used for multiple platforms; and universal availability, made possible by being free and open-source.

    The front-end development tools that Flutter has developed go beyond this, though. The Google team and the entire Flutter community have done an outstanding job of easing the development process and improving it with frequent upgrades.

    As a well-known Flutter app development business, we are thrilled with Flutter 3.10 because it offers us many advantages. This is your chance to update your application to Flutter 3.10, the most recent version, and begin your app development project. Therefore, we can assist you if you want to learn more about the new Flutter version or need assistance creating cross-platform applications. Connect with us and let us know what your project requirements are.

    Frequently Asked Questions (FAQs)

    1. What distinguishes Flutter 2 from Flutter 3?

    Flutter 3 can contribute at a frame rate of 120 Hz, another new feature that sets it apart from Flutter 2. On these machines, Flutter 2 ran at a 60 Hz pace. Users will therefore benefit from an animation experience that runs more smoothly.

    2. Why Is Flutter 3.0 a requirement?

    The framework now offers a more streamlined and consistent experience across Windows, Mac, and Linux desktop platforms with Flutter 3, which enhances the desktop experience. Flutter 3 will also integrate seamlessly with online platforms, enabling developers to create fast web apps with top-notch user interfaces.

    3. Did Google create Flutter for what purpose?

    The Google Flutter Software Development Kit (SDK) is a free and open-source tool for creating cross-platform mobile applications. Flutter enables programmers to create high-performance, scalable Android or iOS applications with aesthetically pleasing and useful user interfaces.

    Book your appointment now

  • Building a Simple Chat Application Using Flutter and ChatGPT Davinci Model

    Building a Simple Chat Application Using Flutter and ChatGPT Davinci Model

    In recent years, chat applications have become a popular way for people to communicate with one another. With the rise of natural language processing (NLP) and machine learning (ML), developers have been able to create chatbots that can respond to users in real time. This article will explore how to build a simple chat application using Flutter and the ChatGPT Davinci model.

    Google created the open-source Flutter framework for building mobile applications. It enables the experts to develop top-notch, natively compiled desktop, web, and mobile applications from a single codebase. ChatGPT is a conversational AI platform powered by GPT technology developed by OpenAI. The Davinci model is the largest and most powerful variant of the GPT series and can generate highly accurate and coherent responses to user input.

    Before we begin, ensure you have the latest version of Flutter installed on your machine. You must also create an account with OpenAI to access the ChatGPT Davinci model.

    Creating the Chat Application UI

    We will start by creating a simple UI for our chat application. We will use the Flutter Material Design framework to build our user interface. Open your Flutter project in your favourite code editor and create a new file named chat_screen.dart. In this file, add the following code:

    chat_screen.dart

    import 'package:Flutter/material.dart';
    
    void main() {
      runApp(const MyApp());
    }
    
    class MyApp extends StatelessWidget {
      const MyApp({super.key});
    
      @override
      Widget build(BuildContext context) {
        return MaterialApp(
          theme: ThemeData(
            primarySwatch: Colors.blue,
          ),
          home: const ChatScreen(),
        );
      }
    }
    
    class ChatScreen extends StatefulWidget {
      const ChatScreen({super.key});
    
      @override
      _ChatScreenState createState() => _ChatScreenState();
    }
    
    class _ChatScreenState extends State<ChatScreen> with TickerProviderStateMixin {
      final TextEditingController _textController = TextEditingController();
      final List<ChatMessage> _messages = <ChatMessage>[];
    
      void _handleSubmitted(String text) {
        _textController.clear();
        ChatMessage message = ChatMessage(
          text: text,
          animationController: AnimationController(
            duration: const Duration(milliseconds: 700),
            vsync: this,
          ),
        );
        setState(() {
          _messages.insert(0, message);
        });
        message.animationController.forward();
      }
    
      @override
      Widget build(BuildContext context) {
        return Scaffold(
          appBar: AppBar(
            title: const Text('Chat Application'),
          ),
          body: SizedBox(
            child: Column(
              children: <Widget>[
                Flexible(
                  child: ListView.builder(
                    padding: const EdgeInsets.all(8.0),
                    reverse: true,
                    itemCount: _messages.length,
                    itemBuilder: (_, int index) => _messages[index],
                  ),
                ),
                const Divider(
                  height: 1.0,
                ),
                Container(
                  decoration: BoxDecoration(
                    color: Theme.of(context).cardColor,
                  ),
                  child: _buildTextComposer(),
                ),
              ],
            ),
          ),
        );
      }
    
      Widget _buildTextComposer() {
        return IconTheme(
          data: IconThemeData(
            color: Theme.of(context).primaryColor,
          ),
          child: Container(
            margin: const EdgeInsets.symmetric(
              horizontal: 8.0,
            ),
            child: Row(
              children: <Widget>[
                Flexible(
                  child: TextField(
                    controller: _textController,
                    onSubmitted: _handleSubmitted,
                    decoration: const InputDecoration.collapsed(
                      hintText: 'Type your message...',
                    ),
                  ),
                ),
                Container(
                  margin: const EdgeInsets.symmetric(
                    horizontal: 4.0,
                  ),
                  child: IconButton(
                    icon: const Icon(Icons.send),
                    onPressed: () => _handleSubmitted(_textController.text),
                  ),
                ),
              ],
            ),
          ),
        );
      }
    }
    
    class ChatMessage extends StatelessWidget {
      const ChatMessage(
          {super.key, required this.text, required this.animationController});
      final String text;
      final AnimationController animationController;
    
      @override
      Widget build(BuildContext context) {
        return SizeTransition(
          sizeFactor: CurvedAnimation(
            parent: animationController,
            curve: Curves.easeOut,
          ),
          child: Container(
            margin: const EdgeInsets.symmetric(vertical: 10.0),
            child: Row(
              crossAxisAlignment: CrossAxisAlignment.start,
              children: <Widget>[
                const CircleAvatar(
                  backgroundColor: Colors.green,
                  child: Text('JD'),
                ),
                const SizedBox(width: 10.0),
                Expanded(
                  child: Column(
                    crossAxisAlignment: CrossAxisAlignment.start,
                    children: <Widget>[
                      const Text(
                        'John Doe',
                        style: TextStyle(
                          fontSize: 16.0,
                          fontWeight: FontWeight.bold,
                        ),
                      ),
                      const SizedBox(height: 5.0),
                      Text(
                        text,
                        style: const TextStyle(
                          fontSize: 14.0,
                        ),
                      ),
                    ],
                  ),
                ),
              ],
            ),
          ),
        );
      }
    }


    We will use Flutter and the ChatGPT Davinci model to get started with the chat application. Flutter is an open-source mobile application development framework enabling coders to create high-performance mobile applications for Android and iOS platforms. On the other hand, ChatGPT is a natural language processing tool that can generate responses to messages in a chat application.

    Before building the chat application, we need to set up the ChatGPT Davinci model. First, we need to create an account on the OpenAI platform and generate an API key. Then, we can install the OpenAI Python library using pip and authenticate using the API key.

    Once the ChatGPT Davinci model is set up, we can build the chat application. The first step is to create a user interface for the application. In this example, we will use the Flutter framework to make the user interface. We will create a simple chat screen that displays a list of messages, a text input field to send messages, and a send button.

    To handle the sending and receiving of messages, we will create a class called ChatMessage that will hold the message text, sender, and timestamp. We will also create a list of ChatMessage objects to have the chat history.

    Next, we will integrate ChatGPT into our application. Use the OpenAI Python library to send the user’s message to the ChatGPT Davinci model and get a response. After that, add the reply to the chat history and display it in the user interface.

    Here is an example of how we can implement the ChatGPT integration in our application:

    Example

    import openai
    openai.api_key = "YOUR_API_KEY"
    
    def get_chat_response(message):
        response = openai.Completion.create(
            engine="Davinci",
            prompt=message,
            max_tokens=60,
            n=1,
            stop=None,
            temperature=0.5,
        )
    
        return response.choices[0].text.strip()


    In this code, we first set up the OpenAI API key. We then define a function called get_chat_response that takes in the user’s message and sends it to the ChatGPT Davinci model using the OpenAI Python library. The response is limited to 60 tokens, and we use a temperature of 0.5 to control the randomness of the answer..

    Finally, we can add the chat functionality to our application by calling the get_chat_response function when the user sends a message. Here is an example of how we can integrate this into the app.:

    void sendMessage(String text) {
        setState(() {
          _chatHistory.add(ChatMessage(
              messageText: text,
              messageSender: "user",
              messageTime: DateTime.now().toIso8601String()));
        });
    
        String response = get_chat_response(text);
    
        setState(() {
          _chatHistory.add(ChatMessage(
              messageText: response,
              messageSender: "bot",
              messageTime: DateTime.now().toIso8601String()));
        });
    }
    

    In this code, we first add the user’s message to the chat history as a ChatMessage object. We then call the get_chat_response function to get a response from ChatGPT and add it to the chat history as another ChatMessage object.

    With these steps completed, we have successfully built a simple chat application using Flutter and the ChatGPT Davinci model. With further customization and improvements, this application can be developed into a more advanced chatbot that can provide helpful information and assistance to users.

    Schedule an interview with WordPress developers

    Conclusion

    In conclusion, building a simple chat application using Flutter and the ChatGPT Davinci model can provide an engaging and interactive user experience. By integrating the power of natural language processing and artificial intelligence, developers can create a chat interface that mimics human-like conversations. Hence, a chat application built with Flutter and ChatGPT Davinci can offer users a seamless and engaging conversational experience.

    I hope you all understand how the chat app is developed in Flutter programming with the Davinci model. You can hire Flutter app experts to help integrate this functionality into your application with the newest features. Let’s get started by sharing the details of your project with us.

    Frequently Asked Questions (FAQs)

    1. Differentiate between ChatGPT and Chatbot?

    ChatGPT can generate responses based on the context and the number of conversations, Whereas Chatbot is pre-programmed with a limited set of resources. Hence, it makes ChatGPT more personalized and sophisticated than chatbots.

    2. Does ChatGPT generate the Flutter code?

    ChatGPT can generate natural language descriptions and explanations of Flutter code. It makes it easy for programmers to understand and explain complicated coming structures and concepts.

    3. What is the primary algorithm for a chatbot?

    A necessary component of an AI chatbot is the NLP layer, which permits computer programs to translate and mimic human communication via predictive analytics, sentiment analysis, and text classifications.

    Book your appointment now

  • Integrating CustomPaint in Flutter Widgets

    Integrating CustomPaint in Flutter Widgets

    Flutter has established itself as the standard choice among developers since it allows for the creation of stunning user interface designs at the necessary framerate. We will give you a brief overview of CustomPaint in this blog and provide instructions on creating a Flutter app development with a CustomPaint design, improving the application’s user interface.

    What is CustomPaint in Flutter?

    The Flutter SDK’s CustomPaint widget allows you to draw various shapes on a canvas. It has the following characteristics:

    1. Painter:

    The painter paints before the child is painted. In this case, Custom Painter must be extended.

    2. Size:

    The size of this Custom Painter is initially equal to size.zero, which says that it will not display if no child or size is defined.

    3. Foreground Painter:

    The painter who follows the children in the foreground. A class that extends the CustomPainter class is also necessary.

    4. Child:

    The widget beneath is widget tree.

    You can either specify a size property without a child when using CustomPaint, or you can use the child property to give it a Flutter widget.

    The CustomPainter Class

    From CustomPainter extends the class ExampleCustomPainter, which is an abstract class, two methods must be included within it:

    1. paint: It is called whenever the object is essential to be repainted.
    2. shouldRepaint: Called when a new class instance is given.

    	
    class ExampleCustomPainter extends CustomPainter {
    @override
    void paint(Canvas canvas, Size size) {
    
    }
    @override
    bool shouldRepaint(covariant CustomPainter oldDelegate) {
    
    }
         }
    

    The paint method has two parameters:
    1. canvas
    2. Size

    The canvas will be the same size as any children given inside the CustomPaint widget. In this instance, the canvas area will occupy the entire Container.

    The Canvas Area

    To draw anything on the canvas, you must be aware of the coordinate system it uses. The Canvas class exposes drawing commands for several operations, including:

    • points, lines, arcs/ellipses, and polygonal shapes
    • paths
    • text
    • shadows
    • clipping

    Most operations have the form to draw the object and may require an Offset, individual doubles, and Paint. One thing to be aware of when using graphics software in a different language is that the meaning of Offset varies depending on the context. Depending on the situation, it can represent a position or a delta from another coordinate.

    From the Flutter docs,
    Offsets can often be understood in one of two ways:

    1. As indicating a location in Cartesian space at a predetermined separation from an independently maintained origin. For instance, the top-left position of a child is frequently specified as an Offset from the top-left of the parent box in the RenderBox protocol.

    2. In the form of a vector that can be used with coordinates. As an example, while painting a RenderObject, the parent is given an Offset from the origin of the screen, which it can add to the Offsets of its children to determine the Offset from the origin of the screen to each of the children.

    Colouring the canvas

    We can utilize the canvas to cover every layer with a specific colour.function drawColor()which colours the entire canvas with colour.

    	
    void paint(Canvas canvas, Size size)
    {
    canvas.drawColor(Colors.black, BlendMode.color);
    }


    The BlendMode specifies how colour is painted over already-existing canvas elements.

    Common classes used in painting

    1. Rect

    A Rect class creates a virtual rectangle with a width and height, which will draw an actual rectangle or set bounds for a shape internally. A Rect can be made in several ways, such as:

    	
    Rect.fromCenter( center: Offset(100, 100), width: 50, height: 80, );
    

    2. Path

    There are functions in the Custom Painter that supports drawing common shapes, such as circles and rectangles. However, paths enable us to trace out a specific shape when we need to draw custom shapes.

    	
    Path() ..moveTo(0, 0) ..lineTo(100, 100) ..lineTo(0, 100) ..lineTo(0, 0);
    

    Drawing a Circle

    You can draw a circle by calling the method known as drawCircle() on the canvas object:

    	
    class DrawCircle extends CustomPainter {
    var paint1 = Paint()..color = Colors.redAccent;
    var paint2 = Paint()..color = Colors.amber[100];
    // ..strokeWidth = 16
    // ..style = PaintingStyle.stroke;
    @override
    void paint(Canvas canvas, Size size) {
    canvas.drawCircle(Offset(0.0, 0.0), 50, paint1);
    canvas.drawCircle(Offset(0.0, 0.0), 40, paint2);
    }
    @override
    bool shouldRepaint(covariant CustomPainter oldDelegate) {
    return false;
    }
    }
    

    Output

    Output of circle
    Output of circle

    Drawing an Arc

    The enclosing Rect must first be defined before an arc may be defined. The beginning angle from which the arc originates must then be determined. All angles are in radians, not degrees, and the sweep angle determines the angle the arc subtends. If the arc returns to the centre determined by the theme Center argument. If accurate, the sector is traced out as a circle rather than an arc. The arc can then be painted using the drawArc() method by adding up all of these factors:

    	
    @override
    void paint(Canvas canvas, Size size) {
    var center = const Offset(200.0, 200.0);
    var rectangle = Rect.fromCenter(center: center, width: 100.0, height: 50.0);
    var paint = Paint()
    ..color = Colors.blue;
    canvas.drawArc(rectangle, 0.0, pi / 2, true, paint);
    }


    Output

    Output of arc
    Output of arc

    This depicts an arc that extends to the right by 90 degrees (pi / 2 radians) and then returns to the centre.

    Schedule an interview with WordPress developers

    Drawing Ovals

    Since they can be drawn in various sizes and shapes, ovals are more difficult to draw than circles. The oval’s bounds can be set using the same Rectclass as before, and it can be painted on the screen using the drawOval() method:

    	
    @override
    void paint(Canvas canvas, Size size) {
    var center = Offset(size.width/2, size.height/2);
    var rectangle = Rect.fromCenter(center: center, width: 300.0, height: 150.0);
    var paint = Paint()..color = Colors.blue..style = PaintingStyle.fill;
    canvas.drawOval(rectangle, paint);
    }


    Output

    Output of oval
    Output of oval

    Drawing Image

    There are numerous techniques to draw pictures on a canvas. One option is to utilize the image’s default size and specify an Offset for the top left corner using the drawImage() method:

    	
    class DemoPainter extends CustomPainter {
     final ui.Image image;
     DemoPainter(this.image);
     @override
     void paint(Canvas canvas, Size size) {
       var srcCenter = const Offset(150.0, 150.0);
       var dstCenter = const Offset(150.0, 200.0);
       var paint = Paint();
       var source = Rect.fromCenter(center: srcCenter, width: 100.0, height: 50.0);
       var destination =
           Rect.fromCenter(center: dstCenter, width: 150.0, height: 150.0);
       canvas.drawImageRect(image, source, destination, paint);
     }
    
     @override
     bool shouldRepaint(covariant CustomPainter oldDelegate) {
       return false;
     }
    }
    

    Output

    Output of image
    Output of image

    Conclusion

    In conclusion, CustomPaint is a powerful and flexible widget in Flutter that allows developers to create custom app graphics and visualizations. It enables experts to easily draw their shapes, paths, and patterns and control their appearance and behaviour. With CustomPaint, you can implement complex animations and transitions and even create interactive and responsive user interfaces. So that, Developers can paint their designs using low-level graphics primitives, giving them complete control over the look and feel of their app. Hence, the flexibility and creativity that CustomPaint offers make it an excellent tool for building unique and engaging user interfaces in the Flutter app.

    Suppose, you want to develop a Flutter app and include these new features and functionalities. We’re eager to use these new functionalities to provide our clients with high-quality apps. As a result, our team of skilled Flutter developers can assist companies and organizations in utilizing these advanced features to produce top-notch, latest mobile apps that satisfy their particular objectives and demands.

    Frequently Asked Questions (FAQs)

    1. Which tool is utilized to make custom shape?

    For constructing custom shapes that are accessed from custom shapes’ same properties as Shape tools are the Pen Tool.

    2. What is the use of the paint () method?

    When the AWT method is invoked, the Graphics object parameter is pre-configured with a perfect state for drawing on this specific component. However, the colour of graphics objects is set to a component’s foreground property. As a result, a component’s property is used to set the graphics object’s font.

    3. How to use CustomPaint in Flutter?

    A widget that gives a canvas on which you can draw the images during the painting phase. But in Flutter, you can use the CustomPaint widget, which uses the parent component’s size rather than the child component’s. Paint() and shouldRepaint() are two methods that the CustomPainter subclass overrides.

    Book your appointment now

  • What are the Enums in Flutter and How it is Used?

    What are the Enums in Flutter and How it is Used?

    Flutter 3.0 is one of the long-awaited macOS and Linux platforms that gained stable features. These extensively allow for easily developing the app for running on any platform. Flutter 3.0 also comes with the majority of updates, especially enums. You can easily hire Flutter developer who is well versed in the enums for the Flutter projects.

    Enums are enabled with ultimate power in the Flutter 3 or Dart 2.17. Built-in Flutter enums feature gives more options for implementing the added features. These are also an excellent way to handle a wide range of cases along with refactors Flutter 3.0.

    What Are Enums in Flutter?

    Enumerated types or Enums are the data type with the set of named values. These can be called members, elements, enumerators, or numerals. Enum also provides the Flutter engineers with the custom type restricted set of values.

    It will be quite a convenient option for adding an integer to represent the set of values. Enum involves the type of data with predefined values. The Enum is the special class that is used for representing the fixed number of values in Dart. One of the simple examples of the Enum class is the enum Operating System { macOS, Windows, Linux}.

    Also Read: A Guide to Create Popup Forms in Flutter

    Features Of Enums in Flutter

    Normally, all the Enums extend with the Enum class, so these can be easily sealed. These do not involve the subclasses or are even implemented explicitly instantiated.

    Abstract classes are also enabled with the mixins, which gives the absolute way of implementing or even extending the Enum. No objects will be implemented with the type of class or mixin.

    • Allows the programmer to use a custom type
    • Data type having a set of named values
    • Variables are equal to one of the values

    Flutter 3 provides complete support for the Universal Binaries. These Flutter application development would also extensively work along with adding more features such as the enums.

    Before Flutter 3.0 was introduced, the Enums were used in the specific platform type that is built for the app. These can be extensively used for iOS devices to assure maximum stability.

    Adding A Property To The Enums in Flutter

    Normally, it is quite an efficient way to add a unique property for the Enums. Below are some of the popular options for creating extension methods.

    	
    extension OperatingSystemExtension on OperatingSystem {       
    bool switch (this) {           
    case OperatingSystem.macOS:       
    return true;
          case OperatingSystem.windows:
          case OperatingSystem.linux:       
    return false;
        }
      }
    }
    

    Moving the enum into the class is also added with the internal constructor. These would be delivering the constant gaining better stability for the “enum” values.

    Most Flutter experts have been using this method to increase stability in the results. These play an important role in representing the fixed numbers for any constant value.

    Also Read: Use Regex In Dart

    Creating A Flutter Enum

    The enumerated type will be displayed with the keyword called the “enum.” Usually, the Enum is not a unique feature across the Dart language, so they are used for various applications.

    These also exist along with many other languages. You can also extensively develop the programmable interface with various techniques such as Flutter Enums. Below are examples of the Flutter Enums with rainbow colors. The enum could represent the data in the Dart.

    	
    enum MyColors {
       red,
       orange,
       yellow,
       green,
       blue,
       indigo,
       violet
    }
    

    In Flutter, these are not defined with integer values. Inputting values is unnecessary with the Dart, so these can be extensively denoted as symbols along with an enumeration list. It is enabled with the integer value to assure the stability of the results. Enums in Flutter streamline code by defining a set of constants, enhancing readability and reducing errors. Dive into our custom AI development company’s insights to harness enums effectively in your projects.

    Normally, the value of the first enumeration symbol used will be 0. These would especially denote an index on items that are used in Enum. It is quite a convenient option for running the code with an enum.

    	
    enum MyColors {
       red,
       orange,
       yellow,
       green,
       blue,
       indigo,
       violet
    }
    void main() { 
    print(MyColors.values);
    }
    

    Upon displaying the Enums in Flutter, it will be enabled with better stability in achieving the results. The function can also take a value of the enum, so these are added with the value suitable for it.

    The method also restricts various parameters on values added with an enum. These could be extensively passed values without the error. These errors could be added with the editor plugins.

    	
    // RESULT
    // [MyColors.red, MyColors.orange, MyColors.yellow, MyColors.green, MyColors.blue]
    

    Also Read: Implement Folding Scroll in Flutter App

    Setting Values On Flutter Enum

    You cannot set the value of the enum after the compilations. These are not listed for the mutable. The main reason is that they allow the developers to enable the Dart feature. The Dart enums will not be mutable structures, and these are suitable for attaining results with the value.

    To get the values from the Enum in Flutter, you are required to set the appropriate value for the Enum in the Flutter. You can simply access the value for the enum in the Dart, so they are added with the specific property. These can also be added with an index on the value that you require.

    	
    enum MyColors {
       red,
       orange,
       yellow,
       green,
       blue,
       indigo,
       violet
    }
    

    Enum with Values (Dart 2.17+)

    Enums have a special class suitable for representing the fixed numbers in the Dart. These extensively have constant values especially added with declarations in a straightforward manner.

    Enum classes are enabled with the Dart languages with the zero-based index. These can also be defined with an enum type, so they give better stability with the index value. You can also update the changes in the dart, as these would provide your enum with the custom values. For example, you have value for the Sedan = 0, SUV = 1, Truck = 2, then // enhanced enum will be constant class

    	
    enum CarType { 
    none("), 
    suv("ABC-1"), 
    sedan("CDE-2");
      // can add more properties or getters/methods if needed
      final String value;
      // can use named parameters if you want
      const CarType(this.value);
    }
    

    Adding the enums in Dart language becomes quite an efficient manner. These state the stability in accessing the storage type with the enum of CarType. These methods will represent the type of car that is available in the data. Normally, the Enums involve various properties, such as

    	
    enum OperatingSystem { 
    macOS(true, true),
      windows(false, true), 
    Linux(false, true);
      const OperatingSystem(this.canBuildForIos, this.canBuildForAndroid);
      final bool canBuildForIos;
      final bool canBuildForAndroid;
    }
    

    Enhanced Enum is quite similar to that of the normal class. These play a significant role in implementing the interface with the mixins in dart. Classes are also implemented based on the types and values with the enum declaration.

    Also Read: How to Use Hexadecimal Color Strings in Flutter?

    Conclusion

    Usually, there are various methods the enums can be implemented in Flutter. These can also be a suitable option for overcoming fundamental enum limitations. With the recent changes in Flutter 3.0, it is convenient to use Enums for various applications. The enumeration in Dart will set the symbolic names so they can be set with constant values.

    Therefore, Enums make your code more readable and can be used to restrict the range of values assigned to a variable. They can also provide a convenient way to map numbers to meaningful values. So, you can integrate the enum in Flutter depending on the requirements, and it is maintained by concentrating on the high-end documents.

    Connect with a leading and trustworthy mobile app development company like www.seo.bosctechlabs.net, which will have an experienced and skilled development team and assist you in every manner.

    Schedule an interview with WordPress developers

    Frequently Asked Questions (FAQs)

    1. What is the purpose of an enum?

    An enum is a specific data type that enables a variable to be set to predefined constants. A variable must be equal to one of the values predefined for it. A typical example is compass direction and days of the week.

    2. Why use an enum class in Flutter?

    Enums are an essential part of programming languages. It helps the developers define the small set of a predefined set of values utilized across a logic they have built. Dart language, which is used to create Flutter, has limited functionality.

    3. What are mixins in Flutter?

    Mixins are a way of reusing the class code in multiple class hierarchies. Hence, to use a mixin, use the keyword followed by one or more mixin names.

    4. Why use an enum rather than an array?

    The array collects the various values, whereas the enum value is the simple one value. An array is used to iterate among several values using an index. An enum is assigned to some atomic value and iterated so that we can iterate the type.

    Book your appointment now

  • Flutter Best Practices to Follow in 2026

    Flutter Best Practices to Follow in 2026

    Nowadays, the mobile app development market is growing continuously, and many developers rely on the best platform to make cross-platform apps. Flutter is a highly demanding cross-platform mobile framework. Know here all details on flutter best practices you should check in 2023.

    When it comes to using Flutter, you need to understand best practices. Experts help you realize essential practices for app development. It is the best way to simplify the app development process. Best practices are helpful for Flutter programmers to create and design with Flutter to enhance productivity, code usability, maintainability, and readability.

    Use Refractory Code in the Widget for Flutter Best Practices

    You can get immense benefits from the Flutter widget when using refractory code in the widget lifecycle. Whenever the widget undergoes a change, it will restructure. That is the best strategy to improve performance and prevent needless rebuild. It provides all the optimizations that Flutter brings to the widget class.

    class HelloWidget extends StatelessWidget {
    const HelloWidget({
    Key? key,
    }) : super(key: key);
    @override
    Widget build(BuildContext context) {
    return Text('Hello');
    }
    }
    

    State management

    The Flutter framework never requires any state management by default. It may also wind up a messy combination based on the specific parameter. Using a simple solution is always recommended for state management. When using them for the Flutter project, you can ensure the maintainability and scalability of the application.

    • On the other hand, a stateful widget is also the best option for state management library.
    • It never scales when you need to keep the state across the different screens, like the authentication state of the user.
    • State management lets you have to store anything and also change anything.
    • All the widgets will also modify automatically.

    In Flutter app development, you can come across different options for state management. App developers use the choice based on the level of comfort and experience. The BloC pattern is an essential option for state management.

    Keep well-defined architecture for Flutter Best Practices

    Flutter is a wonderful app development framework. It is easier to learn and understand than other frameworks for iOS and android. It is a good platform for code and design. Whether you fail to keep well-defined architecture, things will mix up quickly. Proper architecture manages different layers like presentation, business logic, and data. Bloc library comes with a great set of options for good architecture.

    Also Read: Flutter Vs. React Native: Which is Best For your Project in 2023?

    Use perfect dart style

    Dart style is the most crucial part of Flutter application development. A well-defined style guide accepts convention and enhances code quality. Using a consistent style in a project makes it easier for the team to understand and work together. It is also suitable for new programmers. In that way, managing regular and constant style aids the project in the long run.

    • The development team can be comfortable with a dart and define a custom style guide.
    • Dart brings an official style guide to developers.
    • Linter is also a good idea in a Flutter project and is valuable for a large team.

    Choose the ideal package

    The Flutter ecosystem provides adequate support to the Flutter app developer. You can use a reusable piece of code that acts as libraries. It may also be known as a package in the Flutter ecosystem. Whether you want to utilize the package for functionality, it is vital to look at essential factors.

    • You should check when the package is updated and prevent utilizing a stale package.
    • If the package maintains good popularity, it is possible to identify community support.
    • Check open issues in the package code repository is necessary to know issues that influence the functionality of the project.
    • Team also focuses on how often packages get updated and take complete advantage of advanced dart attributes.
    • If you use some functionality from the package, it is ideal for writing code and copying them.

    Also Read: How To Export Fonts From Package In Flutter?

    Perform test for critical functionality

    Flutter developers focus on the best solution to save time and effort. Using an automated set of tests helps a team to save effort and time. The cross-platform mobile framework targets different platforms and testing single functionality after changes require effort. 100% code coverage for testing is a good choice for expertise.

    When it comes to testing, you should consider the budget and available time. You can use at least a test for the critical functionality of the app. Integration test let’s run a test on the emulator and physical devices. A developer also uses the firebase test lab to run tests on different devices.

    Integrate streams if necessary

    Streams are very effective and utilize them for stunning responsibility to use resources ideally. Keeping streams with poor implementation takes more CPU usage and memory. Apart from that, it may close the stream which causes memory leaks.

    A stream can be used when engineers deal with different asynchronous events. Some developers utilize changenotifier for reactive UI. If you create a project for advanced functionality, you can adapt the Bloc library that requires resources. It allows the team to access a simple interface to create a reactive UI.

    Also Read: How to Validate Form With Flutter BLoC?

    Concept of constraints

    Every Flutter app expert must know the Flutter layout rule. The team must understand rules like sizes go up, constraints go down, and parents set positions. The widget comes with its own constraint from a parent. Constraint covers different components like minimum and maximum height and minimum and maximum width.

    The widget moves via its own list of children one after another. It is responsible for commenting on children about constraints and inquires every child about the size. Widget places children horizontally and vertically. It also alerts parents about size within original constraints. All the widgets bring themselves of box constraint and parent.

    Developers must consider the best practice in Flutter app development to make code readable. It is an effective means of app performance and functionality in Flutter.

    Schedule an interview with WordPress developers

    Conclusion

    Best practices for Flutter app development help developers ease down the work of the developing process. You can hire Flutter developers and consult with them to overcome the challenges of developing the app. Experts will assist you in completing the project on time without hassle.

    Frequently Asked Questions (FAQs)

    1. What is cross-platform app development?

    Cross-platform application development is to create a single application that will run on different operating systems instead of designing numerous versions of the application for each platform.

    2. What is a refactor into the Flutter Widget?

    Refactor is the most crucial part of Flutter application development. It is useful in programming to break up the code into sub-parts to reuse the code, or else you have designed a button, and you want to utilize that same button overall in the app so that you might refactor it into another file.

    3. What is BLoC in Flutter development?

    This variation of the classical pattern has been developed from the community of Flutter. BLoC stands for Business Logic Components. In the app, everything should be represented as the flow of events like Widgets submits events, and the other widgets will respond with the help of BLoC.

    Book your appointment now

  • How To Pick An Image From Gallery Or Camera And Display It?

    How To Pick An Image From Gallery Or Camera And Display It?

    Many people find the image picker a useful feature in the app. Many apps like Facebook, WhatsApp, Twitter, Instagram, and others have been using the image picker for selecting files to pick an image from gallery or camera and display.

    Image picker assures in selecting the files from devices for using the profile picture. It is also quite an efficient option for sharing with friends. You can also hire Flutter developers to add the amazing feature of picking the picture from the camera or gallery for displaying them.

    What is an easy way to Flutter Image_Picker?

    The most commonly used image picker in the mobile app is an efficient way to set an avatar for user profiles. These are quite an amazing option for easily creating the image picker in the Flutter. These also give you absolute results with gaining faster efficiency.

    The Flutter app development also enables the user to easily select a photo or even take an image from the device camera. Coding the image widget using Flutter is an efficient option from scratch.

    Flutter also comes with an astounding image picker plugin. It gives you the ability to pick an image from the device gallery or even take new images from your camera. An image_picker plugin is a suitable option for exposing the helpful methods in the ImagePicker class.

    	
    import 'package:image_picker/image_picker.dart';
    ImagePicker picker = ImagePicker();
    

    Picker instance involves unique methods suitable for easily opening the image selection dialog.

    What is pickImage method?

    Normally, the pickImage method is perfect for an opening dialog along with displaying the gallery from the phone. These are significant options for selecting the image more efficiently. Source arg states also involve the easier method for finding the location of the image. Below is the source that is set ImageSource.gallery. These assure the image can be selected from the user’s gallery.

    	
    XFile? image = await picker.pickImage(source: ImageSource.camera);
    

    Above is an example of an image taken from a device camera. Normally, these methods are perfect for opening the camera as well as suitable for picking pictures snapped in a more significant manner.

    Also Read: A Guide to Create Popup Forms in Flutter

    What is pickVideo method?

    	
    XFile? Image = await picker.pickVideo(source: ImageSource.gallery);
    

    pickVideo method opens the dialog to pick a video from the phone’s gallery. It is quite a convenient option for using the pickVideo method in which the video can be efficiently picked either from the phone’s video camera or gallery. Flutter best practices allow the method for easily enabling arg source: ImageSource.gallery. This causes a better way of picking the video quickly.

    	
    XFile? Photo = await picker.pickVideo(source: ImageSource.camera);
    

    pickVideo also allows the user to easily pick the video from the camera. Under this process, the arg source: ImageSource.camera would be enabled to access the phone’s video camera. Users can easily record videos to the highest excellence. Recorded video could be easily used as the picked video more efficiently.

    Also Read: How to create Music Streaming App Development?

    How to install on the iOS platform?

    Normally, the plugin requires iOS 9.0 or higher versions. Starting with version 0.8.1, it will be suitable for getting better iOS implementation. These also use the PHPicker to pick images even multiple times. Implementing PHPicker is an efficient option to choose HEIC images even in iOS version 14 or higher.

    • First, you need to add image_picker to easily enable dependency across pubspec.yaml file.
    • Add the below keys to the Info.plist file
    • Located in /ios/Runner/Info.plist

    1. NSPhotoLibraryUsageDescription:

    It gives better stability for the app permission to access the photo library. It is called Privacy, which involves Photo Library Usage Description across the visual editor. Permission is not required for the image picking in iOS 11+ when you pass requestFullMetadata

    2. NSCameraUsageDescription:

    These describe locates the app needs to access the camera. It involves Privacy with Camera Usage Description across the visual editor.

    3. NSMicrophoneUsageDescription:

    This describes the app needed for accessing the microphone when you like to record videos. Microphone Usage Description is also involved in the visual editor.

    	
    <dict>
      .
      .
    <key>NSPhotoLibraryUsageDescription</key>
    <string>Upload images for screen background</string>
    <key>NSCameraUsageDescription</key>
    <string>Upload image from camera for screen background</string>
    <key>NSMicrophoneUsageDescription</key>
    <string>Post videos to profile</string>
      .
      .
    </dict>
    

    Also Read: Parallax Animation — Flutter

    How to Install in Android?

    Android version 0.8.1 also supports the image_picker on Android 4.3 or higher. There is also no configuration required. Plugin needs to work out of the box, so these are highly recommended for preparing the Android with killing application. You can also easily prepare Handling MainActivity destruction on the Android section.

    It does not require adding the android:requestLegacyExternalStorage=”true” feature as they attribute with tag in AndroidManifest.xml. Normally, image_picker is specially updated to make use of better-scoped storage to a high extent.

    	
    Install image_picker package
    

    dependencies:

    	
    Flutter:
      sdk: flutter
    image_picker: ^0.6.7+6
    

    you can also add the image_picker package to pubspec.yaml

    Run flutter pub

    Install the package

    You can also follow the below steps to easily add plugins to the Android OS. This gives better access for Flutter to easily improve the stability of accessing the packages.

    Open the application

    	
    android:requestLegacyExternalStorage="true."
    Android:name="io.flutter.app.FlutterApplication"      
    android:label="xxxxxx"
    android:icon="@mipmap/launcher_icon">
    <activity>
    ...          
    ...
    </activity>
    </application>
    

    Also Read: Adding SVG Images In Flutter App

    Package Installation

    Picking an image from Gallery or Camera is quite an efficient option. These can also be added along the feature with Flutter packages. Follow the below Package installation and configuration setup.

    • Open pubspec.yaml file
    • Add package image_picker: ^0.8.3
    • Make changes to our iOS and Android config files
    • Add the following keys to your Info.plist file
    • Locate in /ios/Runner/Info.plist
    • The package provides methods to access our gallery and camera.

    Image picker is also useful for picking the image Gallery and Camera. The _getFromGallery() involves the function of picking an image from the gallery. The function gives you better access to run on it. Gallery access permission will easily pop up on the NSPhotoLibraryUsageDescription. You can also get the complete Info.plist. The user also gives better permission to access images in the gallery from the app.

    Source: Source involves ImageSource.camera or ImageSource.gallery
    maxWidth: Resized image value also involves determining the width of the image
    maxHeight: Resized image also involves whether the height of the image is larger compared to the value

    This _ getFromCamera () is the function of picking an image from the camera. Camera access permission pops up if this function runs for the first time. These involve NSCameraUsageDescription also gives the Info. plist as the user is required to give permission to access the camera.

    	
    import 'dart:io';
    import 'package:flutter/material.dart';
    import 'package:image_picker/image_picker.dart';
    class MyPage extends StatefulWidget {
    @override
    _MyPageState createState() => _MyPageState();
    }
    class _MyPageState extends State<MyPage> {
      /// Variables
      File imageFile;
    /// Widget
    @override
      Widget build(BuildContext context) {
        return Scaffold(
    appBar: AppBar(
    title: Text("Image Picker"),
            ),
    

    How to Build Flutter Image Picker App?

    Adding the image_picker plugin is quite an amazing option to pick an image from Gallery or Camera and Display them. Below is one example of the Flutter image picker app. You need to make sure to use the following Flutter app development tools and binaries in the machine.

    • Flutter SDK
    • VS Code
    • Android Studio

    Methods:

    List? photos = await picker.pickMultiImage(source: ImageSource.camera);

    Adding the image_picker plugin

    add the image_picker plugin to our Flutter project

    Open the pubspec.yaml file

    add the image_picker to the dependencies section

    dependencies:

    flutter:

    sdk: flutter

    image_picker: ^0.8.2

    Schedule an interview with WordPress developers

    Conclusion

    Using an image picker library is the best way to choose the image from a gallery or camera and display it in an ImageView. It is a helpful way to allow users to customize their pictures. But before being said, it needs permission handling, launching an intent to launch a camera or gallery app, retrieving the Image’s URL, and displaying the image in the image view. You have also learned about the Flutter image picker component and the plugin for Flutter. Thus, the exact integration of these steps may vary depending on the platform and programming language used.

    If you want more knowledge of Flutter and know how to pick images from a gallery or camera and display them, then take the help of trust-worthy mobile app development company BOSC Tech Labs. However, it guides you throughout the process, and you will know the perfect method of pickling the pictures from a gallery or camera. Their development team will have the expertise and will assist you in every manner with their skills and knowledge! Be ready to connect with them!

    Frequently Asked Questions (FAQs)

    1. What is an image picker?

    Image picker delivers access to the system’s UI for choosing images and videos from the phone’s library or capturing the photo with the camera. Know here all tips on picking an image from gallery or camera and display.

    2. What is the difference between an image picker and a file picker Flutter?

    A primary difference between the iOS gadgets is that the file picker will redirect to the files app, whereas the image picker will redirect you to the gallery.

    3. How can I display the picture randomly?

    It generates a random number using the floor() method, which uses an array of images to display on the webpage randomly. It will give a random number between 0 and the length of an array assigned to the pictures to view randomly.

    Book your appointment now

  • How To Add The Universal Link In Flutter?

    How To Add The Universal Link In Flutter?

    The Universal Links in Flutter is an amazing way for the user to access the app by clicking the link on the website. It is quite a convenient option for the marketing campaign or even accessing the deep linking in specific content in the app.

    It will be convenient for setting and using the Universal Links in Flutter. You can also easily hire Flutter developers to add the Universal link in Flutter. This gives better options for accessing the app using the website.

    Quick Accessibility Option

    Universal Links in the Flutter is also supported on iOS 9.0 and above. These give you ultimate support in accessing the universal links instantly through a simple process.

    You can also easily use varied methods like the URL Scheme linking for accessing the older version of Android and iOS. The Flutter Plugin project helps gain accessibility with Deep Links or Android and Universal Links.

    Normally, these links are quite an efficient option for web-browser-like links. So these could be extensively activating the complete web app development which contains the information.

    These can be extensively used for loading the specific section in the app. It also assures continuing the user activity from the app or website. App Links and Universal Link involve the regular HTTP links and assure of giving you the ultimate results.

    You can also easily load the browser even with setting it up exactly. These also extensively allow present web pages with quick accessibility, such as installing the app.

    Also Read: Multi-Themes Using Riverpod in Flutter

    Installation Procedure

    For making the plugin, you could add the uni_links as a dependency with pubspec.yaml file. Migration for null safety is enabled with the APIs. These changes especially involve massive functions for the getters.

    These are also becoming explicitly nullable when clicking the Universal link in the Flutter app development. These changes involve massive functions for changing more features in them.

    Permission Required

    Normally, Android must declare the links’ permission based on the configuration files. You can also examine the example directory for the Custom URL schemes (iOS) and Deep Links (Android).

    The following step is only specified for Flutter but is also a suitable option for the specified platforms. Below is the in-depth guide for adding the Universal link with Custom URL schemas on iOS. These also can be added with the App Links or Deep Links for Android app development.

    IOS (Universal Links)

    Normally, there are 2 different kinks available in it, such as the “Universal Links” and “Custom URL schemes.”

    1. Universal Link in Flutter:

    Universal Links would work using the HTTP schemes, requiring the specified hosts. These also enable the proper entitlements and hosted files, such as the apple-app-site association.

    2. Custom URL schemes:

    The Custom URL schemes especially have the custom scheme, so these could be easily hosted specifically. They are not the hosted file or even entitlements. The downside is the app could claim any scheme. These are the perfect option to make sure the app is unique. For example, this involves myIncrediblyAwesomeScheme or even hst0000001.

    Also Read: White Label App vs. Custom App Development: Which is Best for You?

    Using The Advanced Xcode

    You can also easily enable runner domains to be extensively done with XCode or even through Runner. entitlements file.

    Creating entitlements file based on the Xcode are listed below:

    • Open up Xcode on ios/Runner.xcworkspace file
    • Go to Project navigator
    • Click Runner root item
    • Click Runner Target
    • Open the Signing and Capabilities Tab
    • Click + Capability (plus) button
    • Add new capability
    • Enter ‘associated domains`
    • Select item
    • Double-click the first item in Domains
    • Change from web credentials
    • Enter file called Runner.entitlements
    • Click ‘Done’

    Code

    	
    <key>com.apple.developer.associated-domains</key>
               <array>
                           <string>applinks:[НАШ_ХОСТ]</string> // applinks:myapp.com
               </array>
    

    You can also easily upload the apple-app-site association file and create them accordingly. Normally, the file uses the JSON structure, so these can be added without any extension. The output will be listed below

    	
    {   
    "applinks": {       
    "apps": [],
           
    "details": [{           
    "appID": "[TEAM_ID].[APP_BUNDLE_ID]",           
    "paths": ["[PATH_FOR_REDIRECTION]"]
            		}]
     }
    }
    

    Now you can easily get the TEAM_ID for accessing the developer account. These can be easily accessed in the Account section mode and clicked in the Membership. The team ID field involves various aspects to be filled, such as UP******H, and the numbers 0–9 or even the letters A-Z.

    Users can access the Universal link by entering the APP_BUNDLE_ID in the project. It is quite important for getting the standard attribute with important aspects. PATH_FOR_REDIRECTION indicates the page on the site for easily accessing the application without any hassle.

    	
    "paths": [
               "/your_path", // бwill be redirected if we go to <https://myapp.com/your_path>
               "/your_path/*", // will be redirected if we go to <https://myapp.com/your_path/[что_угодно_дальше]>
               "*", // will be redirected to any link <https://myapp.com/[anything_further]>
               "NOT /your_path", // will be redirected to any link other than <https://myapp.com/your_path>
               "NOT /your_path/*", // will be redirected to any link other than <https://myapp.com/your_path/[anything_further]>
    ]
    

    iOS supports the apple-apple-site-association file, which gives you direct connectivity in the root folders. Users can also host the link or click the well-known/apple-apple-site association directory.

    Also Read: Flutter Rendering Widgets Using JSON Data

    Testing for iOS

    If using the Simulator, test using the Xcode CLI :

    	
    xcrun simctl openurl booted https://<web domain>/details
    

    Otherwise, type the URL in the Note app and click it.

    If everything is set up correctly, the Flutter application launches and displays the screen.

    For Android

    The universal link also supports the 2 types of Android links. This includes the “Deep Links” and “App Links.”

    • App Links can be easily enabled with the https scheme, so this requires the specified host. It gives you direct access to the hosted file like the assetlinks.json.
    • Deep Links is another process for the custom scheme, so there is no need to host. The method is also quite an amazing option for saving time without using the hosted file.

    The app also enabled the scheme + host combo. It makes sure the unique attribute to high excellence, such as HST0000001://host.com. The process involves at least or even 2 intent filters by enabling the android/app/src/main/AndroidManifest.xml:

    	
    <manifest ...>
     	 <!-- ... other tags --> 
    <application ...>   
    <activity ...>     
    <!-- ... other tags →
    
    
       			<!-- AppLinks -->     
    <intent-filter>       
    <action android:name="android.intent.action.VIEW" />       
    <category android:name="android.intent.category.DEFAULT" />
           				<category android:name="android.intent.category.BROWSABLE" />       
    <!-- Accepts URIs that begin with YOUR_SCHEME://YOUR_HOST -->       
    <data         
    android:scheme="[YOUR_SCHEME]"         
    android:host="[YOUR_HOST]" />     
    </intent-filter>
    </activity>
    </application>
    </manifest>
    

    The Android:host attribute provides the complete optional for the Deep Links. It will give you complete accessibility to the maximum. You can add the Android:pathPrefix attribute for the specificity to the extent.

    	
    <!—Accepts URIs for enabling YOUR_SCHEME://YOUR_HOST/NAME/NAME... -->
    <!-- Accepts URIs enabling https://YOUR_HOST/NAME/NAME... -->
    <data 
    android:scheme="[YOUR_SCHEME_OR_HTTPS]" 
    android:host="[YOUR_HOST]" 
    android:pathPrefix="/[NAME][/NAME...]" />
    

    Test your deep links for android

    You can use ADB (Android Debug Bridge) with AM (Activity Manager) tools to test your deep links. These tools will help you test the Intent filter URIs specified for deep linking in your correct app activity. To run this, you must use the command adb on a physical device or an emulator. To test an intent filter with adb the following syntax is used :

    	
    $ adb shell am start
            -W -a android.intent.action.VIEW
            -d <URI> <PACKAGE>
    

    Schedule an interview with WordPress developers

    Conclusion

    Enabling the Universal Links setup involves an app and website. It is convenient for handling the link within the Flutter App. You would also require enabling the uni_links package to high excellence. Getinitial Link gives you a better link-starting app with Stream that does not produce the link.

    However, in this guide, you will also discover the installation process for an Android and iOS platform both with an example and also about the universal link. Hence, Flutter is an amazing choice for creating the apps for your business. By partnering with a leading mobile app development company that aids you in every manner. You can also read our blogs of Flutter that aids you to boost your knowledge of Flutter development.

    Frequently Asked Questions (FAQs)

    1. What is universal link in Flutter?

    Universal Links is a deep linking protocol developed by Apple and was introduced in iOS versions 9+ to hugely replace a normal deep linking process. Universal links permit an app developer to make a two-way association between the website and the mobile app.

    2. What is the difference between the universal link in flutter and the deep link?

    A deep link is a link that leads users to a particular section of the app besides its home page or web page. A universal link is a deep link exclusive to Apple devices only. Hence, it is used in email campaigns to direct users to a certain section internally in the app.

    3. What is a universal APK?

    A universal APK consists of the code and resources for all ABIs in a single APK. It has a default value of false. This option is only available in splits.abi block. While creating the various APKs dependent on screen density, Gradle will always generate the universal APK that has the code and resources for all the multiple screen densities and sizes.

    Book your appointment now

  • A Guide to Create Popup Forms in Flutter

    A Guide to Create Popup Forms in Flutter

    Flutter is one of the best front-end frameworks that allow developers to create innovative and dynamic elements for the website  for popup forms in flutter. Since it is a cross-platform development framework, the website can executed across multiple operating systems. That’s why Flutter is prefer in c to several other cross-platform development frameworks. Besides, it is based on Dart programming language- the brainchild of Google- so creating the UI components using this framework won’t be much of a hassle.

    Creating popup forms in Flutter is straightforward and efficient. This guide by our computer vision development company will walk you through the essential steps, ensuring a smooth and responsive user experience for your app.

    Most websites are configure in a manner that forms a sudden popup on the window, with or without any action from the user’s end. These forms can be for submitting feedback, subscribing to newsletters, etc. To develop such a pop-up form for your website, Flutter app development is the best option. The following article describes the entire process that will help you easily understand everything.

    showDialog being used to retrieve different widgets

    First, you must focus on building a stateful widget and returning a component named showDialog. It will accept a WidgetBuilder as the parameter to ensure it can return any widget once the code is executed. This field can u across the entire code to ensure you can display the popup forms as dialog boxes on different web pages.

    While writing the codes, you can use the showDialog() function for different pages and define various Flutter widgets, like Form, Column, Buttons, Text widget, etc.

    Streaming popup forms in flutter periodically

    Another important thing you must remember while coding for the popup forms is defining a streaming channel. It will help the popup form appear on the skin regularly. For example, let’s say you want the dialog box to appear after every 10 seconds.

    So, you need to write a command like:

    	
    Stream<int> every10seconds = Stream<int>.periodic(Duration(seconds:10), (t) => t)
    

    This statement defines that the variable t has stored the value of ten seconds, and once you pass the parameter through the showDialog function, the popup box will appear on the screen every 10 seconds.

    Also Read: How to Create Popup Menu in Flutter

    Use of AlertDialog widget

    Often developers include the AlertDialog widget in the code to ensure the dialog box can automatically display multiple clickable buttons or a list of options. Users should be able to select an option on the dialog box.

    The AlertDialog class will extend the StatefulWidget class, where you can use this keyword to extend the values passed through the variables defined earlier.

    Code Example

    	
    ElevatedButton(
              child: const Text("Open Popup"),
              onPressed: () {
                showDialog(
                  context: context,
                  builder: (BuildContext context) {
                    return AlertDialog(
                      scrollable: true,
                      title: const Text("Login"),
                      content: Padding(
                        padding: const EdgeInsets.all(8.0),
                        child: Form(
                          child: Column(
                            children: [
                              TextFormField(
                                decoration: const InputDecoration(
                                  labelText: "Name",
                                  icon: Icon(Icons.account_box),
                                ),
                              ),
                              TextFormField(
                                decoration: const InputDecoration(
                                  labelText: "Email",
                                  icon: Icon(Icons.email),
                                ),
                              ),
                              TextFormField(
                                decoration: const InputDecoration(
                                  labelText: "Message",
                                  icon: Icon(Icons.message),
                                ),
                              ),
                            ],
                          ),
                        ),
                      ),
                      actions: [
                        ElevatedButton(
                          child: const Text("submit"),
                          onPressed: () {
                            // your code
                          },
                        ),
                      ],
                    );
                  },
                );
              },
            ),        
    

    Output

    Also Read: Flutter Rendering Widgets Using JSON Data

    Conclusion

    As we have briefly discussed the components to include in the popup forms in Flutter, you won’t have any problem writing the entire codebase based on the webpage and several other aspects of the dialog box itself.

    To summarize, developing the forms in popups in Flutter is possible by wrapping elements inside a dialog widget. However, it will give customizable actions that allow you to make a custom popup with your form. Hence, it will display additional information within the popup, such as a configuration message.

    If you want to develop the Flutter application with the popup forms, then connect with the best mobile app development company in USA, which will have the expertise and skills that will be helpful in your project and makes your app stand out in the competitive market.

    Schedule an interview with WordPress developers 

    Frequently Asked Questions (FAQs)

    1. What is the popup form in Flutter?

    Popup forms are one type of form that is creat to pop up and over your website. However, popup forms gather visitor information, like emails for email marketing campaigns.

    2. How to add a popup window in Flutter?

    Flutter has a dialog widget that needs a BuildContext to know which screen or widget it will be viewed on. You can also put the dialog on to the screen as other widgets or pop it up through the showDialog function(), and showDialog is the standalone function.

    3. How do you make the form in the Flutter app?

    Step 1: Utilize the Form widget with a global key.
    Step 2: Use TextFormField to deliver an input field with a validator property.
    Step 3: Make the button to validate form fields, and it will display the validation errors.

    Book your appointment now

  • Why the Future of Flutter is Bright in 2026 and Beyond

    Why the Future of Flutter is Bright in 2026 and Beyond

    To maintain a strong digital presence, mobile app development has become an important aspect for large, medium, and small enterprises. When we think about developing apps, the first thing that comes to mind is the Android and iOS platforms.

    However, various kinds of code are needed for each platform to make the apps for them. Clients and mobile app development industries face the challenge when they realize they must construct two separate apps for Android and iOS.

    Cross-platform application software like Flutter aids in creating mobile apps which run on a wide variety of systems and are written in simple language. Flutter has gained popularity because of its features, like quick and fast app development and upgrades on both Android and iOS platforms.

    Hence, many app developers believe that Flutter app development is the next huge thing, and let’s see why selecting Flutter to develop your business’s mobile application.

    Also Read: Flutter Vs. React Native: Which is Best For your Project in 2023?

    Future of Mobile App Development

    Below are some points to describe why app development prefers Flutter.

    1. Rapid App Development

    Flutter is cross-platform; it is possible to use similar code for Android and iOS. However, this will eventually shorten the time needed to develop an application. It doesn’t mean you will need half of the time to develop an app, but having one codebase for both platforms will help you focus on something else.

    2. An update has been done at the same time on both platforms

    While using the cross-platform development tools such as Flutter, you can create apps for both platforms as there s no requirement to choose or concentrate on one platform at a time. Hence, remember that Apps for iOS and Android must be reviewed before making them available to the public.

    3. Simple UI Design

    Only a single UI design is needed to share the same code between the platforms. Cross-platform apps have two approaches: either they will reinvent the user experience by merging the innovative features of iOS and Android or adhere to material design principles with small tweaks for each platform using Flutter.

    Also Read: Why Choose Flutter for MVP Development in 2023?

    4. Tried and Test Technology

    The first stable version of Flutter was released on December 4, 2018, and it makes a young technology in the world of mobile app development. However, it has already been tried and tested worldwide by brands like Toyota, BMW, etc. Hence, you can trust Flutter while designing the mobile app.

    5. Instant Fuschia Support

    With the help of Google’s new OS, Fuchsia, it is possible to develop a production-ready operating system that can handle speed, security, or stability. Fuchsia is the framework that helps designers and Flutter app developers to create robust and user-experience apps.

    The Flutter framework is a useful and valuable tool for creating on Fuchsia. Hence, if you are developing mobile apps in Flutter, you can deploy them on Fuchsia on the first day. You may see a rise in the number of people who download and use the app immediately.

    6. Stable Performance

    A Flutter source code is compiled before the mobile app is available to the public for use. Due to this, the native components can be interacted with without restoring the web view or JavaScript engine. Flutter code is extracted on the system canvas. It also adds more efficiency to the application. The framework team is pleased that they have maintained a stable frame rate of 60 or 120 FPS on various systems.

    Schedule an interview with WordPress developers

    Conclusion

    Flutter is rapidly becoming one of the world’s most popular mobile application development frameworks. It is easy to see why businesses and developers are migrating to Flutter, with the quick development cycle, high performance, beautiful user interface, and cross-platform compatibility. With Google’s support, a growing Flutter community continuously invests in new app development tools. With this, there is no doubt that Flutter will continue to grow and evolve.

    Flutter’s importance in the mobile app development industry is growing daily. It is worth considering Flutter as the future of mobile app development, whether you are a business looking to develop a new app or a programmer looking for a new framework. You can connect with the leading mobile app development company for your next project. Feel free to consult us!

    Frequently Asked Questions (FAQs)

    1. Why is Flutter the succeeding of mobile app development?

    Flutter is easier to use than other mobile app development platforms like native. You do not need to learn any new language; it also takes less time to develop an app with Flutter. It uses the same codebase for Android and iOS apps.

    2. Why is Flutter the best choice for developing an app?

    Flutter code can run and execute on mobile, desktop, and web platforms. You do not need to hire different developers for each platform. You have to write the code only once in Flutter, and rest assured that an app will work across the other platforms.

    3. What are the benefits of Flutter app development?

    Flutter has gained popularity among developers over some years, and it has benefits like faster code writing, reduced testing time, rich documentation, ebay learning, and usage. Hence, Flutter’s huge community continuously evolves and gives a great user experience.

    Book your appointment now